
MacBook Air 13” Retina Display Late 2018 Display Replacement

Giriş
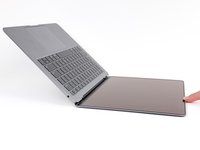
1. adıma gitUse this guide to replace the display on a 2018 MacBook Air.
Neye ihtiyacın var
Tamir Seti
Bu kit, bu kılavuzu tamamlamak için gereken tüm parçaları ve araçları içerir.

Parçalar

Aletler


Daha fazlasını göster…
-
-
If your MacBook is running Big Sur v11.1 or later, disabling Auto Boot may not work. You can proceed normally, but make sure to disconnect the battery as soon as you're inside.
-
Use a P5 driver to remove the following screws:
-
Two 7.9 mm screws
-
Two 7.1 mm screws
-
Six 2.6 mm screws
-
-
-
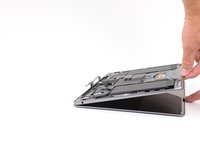
Wedge your fingers between the display and the lower case and pull upward to pop the lower case off the Air.
-
Remove the lower case.
-
-
-
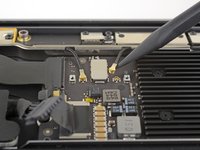
Peel back the tape covering the battery connector enough to reveal the connector underneath.
-
-
-
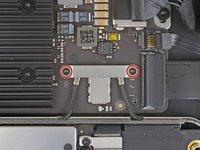
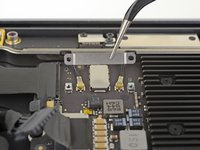
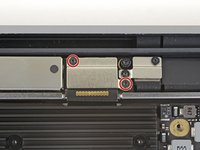
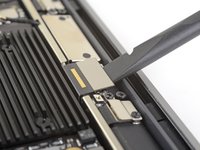
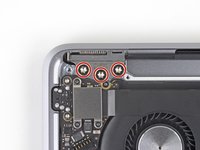
Use a T3 Torx driver to remove the two 1.4 mm screws securing the antenna cable bracket.
-
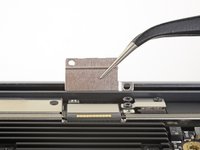
Remove the antenna cable bracket.
-
-
-
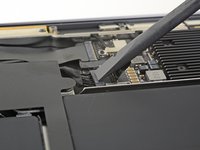
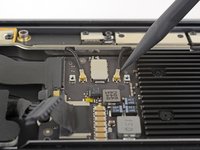
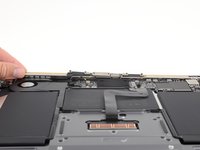
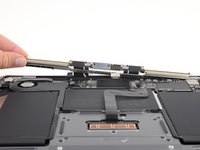
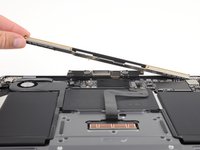
Lift the antenna bar straight up and out of the case. Take care not to snag the antenna bar on any cables or connectors.
-
Remove the antenna bar.
-
-
-
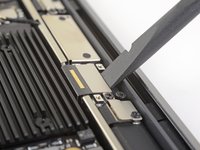
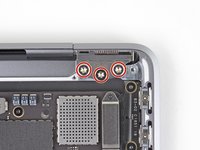
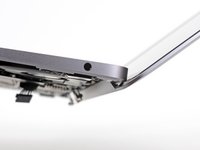
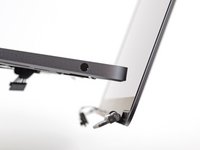
Use a T9 Torx driver to remove the six 4.9 mm screws securing the display hinges to the upper case.
-


Compare your new replacement part to the original part—you may need to transfer remaining components or remove adhesive backings from the new part before installing.
To reassemble your device, follow the above steps in reverse order.
Take your e-waste to an R2 or e-Stewards certified recycler.
Repair didn’t go as planned? Check out our Answers community for troubleshooting help.
İptal et: Bu kılavuzu tamamlamadım.
26 farklı kişi bu kılavuzu tamamladı.

11 Yorum
So…….. Which one of those flexes is the camera flex? It seems you skipped over a lot of the connectors in your guide.
I would like to know this as well same issue with Camera not detected as other comments.
I’m also interested in this. After a LCD swap, de iSight camera / webcam isn’t working.
Jochem -
Y’all need to give bonus points for putting it all back together again. Those T3 screws in steps 5 and 7 are awful hard to get back into place while holding the brackets in place. Not to mention the replacement display I purchased (from a third party) didn’t have the other two brackets in place, so I had to move those over from the original display as well.
The high res images in this guide are very helpful, and the guide is very well written and straightforward. Thanks.