Ana içeriğe geç
Onarım Topluluğuna Katılın - Hesap Oluşturun
Roku 3 Ethernet Port Replacement

Roku 3 Ethernet Port Replacement

Andy Hak

Andy Hak ve 2 diğer katkıda bulunanlar

En son 30 Kas 2016 tarihinde güncellendi

20 dakika
Zor

The ethernet port serves as a temporary or permanent solution to connecting to the internet on a network that does have have WiFi. Follow this guide to replace your broken or faulty ethernet port.

  1. Roku 3 Ethernet Port Replacement, Motherboard: adım 1, 1 resimden 1.
    • Place the Roku 3 on the table face down and orient it so you can correctly read the writing.

  2. Roku 3 Ethernet Port Replacement: adım 2, 3 resimden 1. Roku 3 Ethernet Port Replacement: adım 2, 3 resimden 2. Roku 3 Ethernet Port Replacement: adım 2, 3 resimden 3.
    • Pull back the rubber protection in the top right corner to locate the screw.

    • Repeat with the bottom right corner and bottom left corner.

  3. Roku 3 Ethernet Port Replacement: adım 3, 1 resimden 1.
    • Remove the 9 mm screws from the three corners with a Hex 1.3 Screwdriver.

  4. Roku 3 Ethernet Port Replacement: adım 4, 2 resimden 1. Roku 3 Ethernet Port Replacement: adım 4, 2 resimden 2.
    • Open the device by gently lifting the bottom half away from the top half of the device.

  5. Roku 3 Ethernet Port Replacement: adım 5, 1 resimden 1.
    • Use your fingers to carefully lift the motherboard from the top half of the device.

  6. Roku 3 Ethernet Port Replacement: adım 6, 2 resimden 1. Roku 3 Ethernet Port Replacement: adım 6, 2 resimden 2.
    • Pull away the IO shield from the motherboard using your hands.

  7. Roku 3 Ethernet Port Replacement, Ethernet Port: adım 7, 2 resimden 1. Roku 3 Ethernet Port Replacement, Ethernet Port: adım 7, 2 resimden 2.
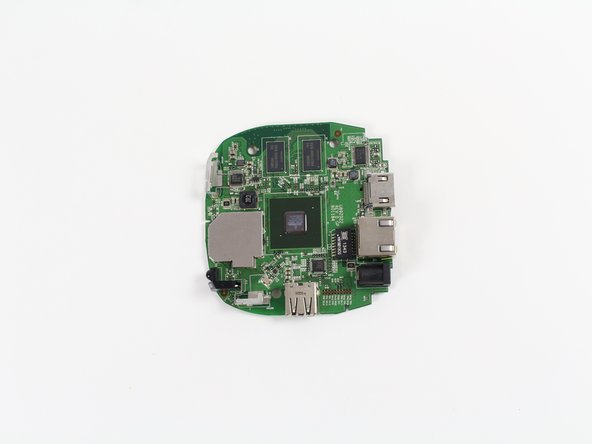
    • Turn over the motherboard so the back is face up and almost all large silver components are resting facedown on the table.

    • Orient it such that the backside of the HDMI port is in your upper right corner.

  8. Roku 3 Ethernet Port Replacement: adım 8, 1 resimden 1.
    • Desolder all of the port's connections with a soldering iron.

    • For more information on soldering, check out iFixit's Soldering Guide.

  9. Roku 3 Ethernet Port Replacement: adım 9, 2 resimden 1. Roku 3 Ethernet Port Replacement: adım 9, 2 resimden 2.
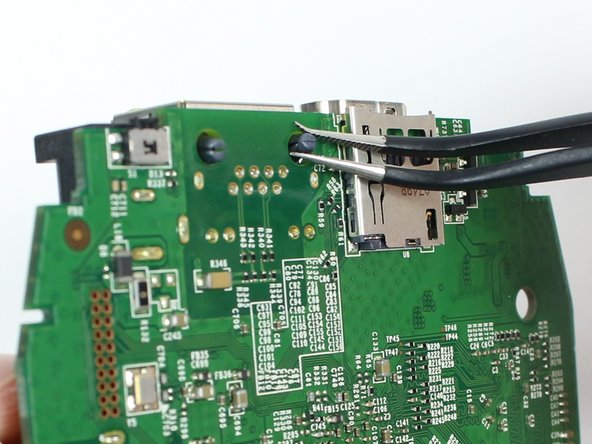
    • Locate the plastic push-throughs just to the left of the backside of the USB port.

    • Pinch the plastic push-throughs. The port should now be able to be removed.

Sonuç

To reassemble your device, follow these instructions in reverse order.

Gelecekteki Onarımlar İçin Hazırlanın

Hepsini satın al

Andy Hak

Üyelik tarihi: 10/07/16

268 İtibar

2 adet Kılavuz yazıldı

Ekip

Cal Poly, Team 15-2, Livingston Fall 2016 Cal Poly, Team 15-2, Livingston Fall 2016 üyesi

CPSU-LIVINGSTON-F16S15G2

3 Üyeler

6 adet Kılavuz yazıldı

0Kılavuz Yorumları

Yorum Ekle

İstatistikleri Görüntüle:

Son 24 Saat: 0

Son 7 gün: 2

Son 30 gün: 13

Her zaman: 1,722