Giriş
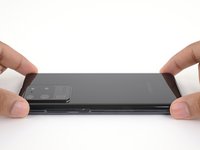
Follow this guide to replace the screen assembly for the Samsung Galaxy S20 Ultra. The display glass, OLED panel, and digitizer comprise the screen assembly and will need to be replaced together.
Note: Some replacement screens for this phone come pre-installed in a new frame (a.k.a. chassis), which requires you to transplant all of your phone's internals and install a new battery. Make sure you have the correct part before starting this guide.
There is a significant chance that you may break the unreinforced and fragile display panel during this procedure. If you plan on reusing the screen assembly, be sure to apply plenty of heat and be extremely careful during the prying stage.
You'll need replacement adhesive in order to complete this repair.
Neye ihtiyacın var
-
-
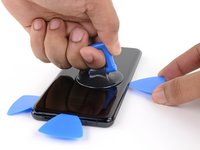
Heat an iOpener and apply it to the back cover's bottom edge for two minutes.
-
-
-
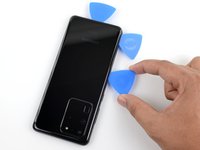
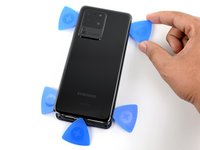
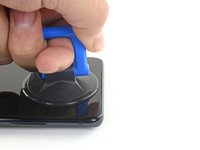
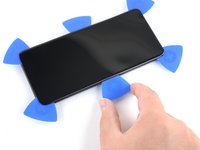
Apply a suction cup to the back of the phone, as close to the center of the bottom edge as possible.
-
Pull on the suction cup with strong, steady force to create a gap between the back cover and the frame.
-
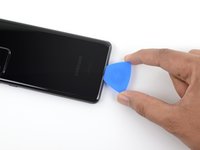
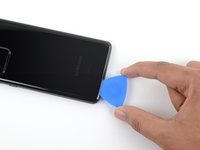
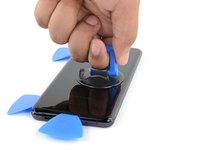
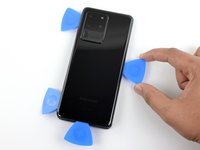
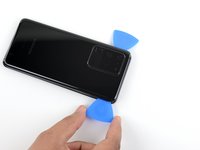
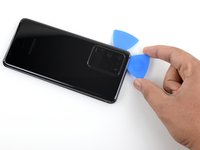
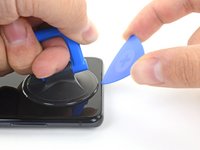
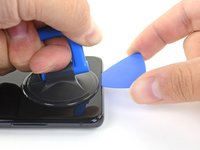
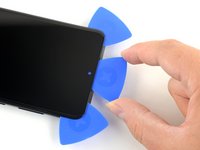
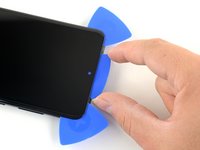
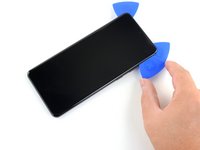
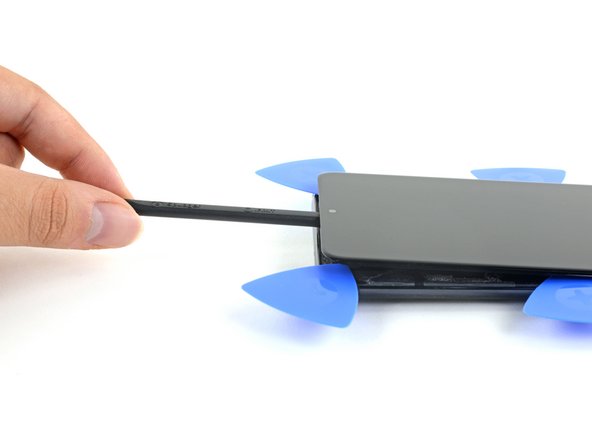
Insert the point of an opening pick into the gap.
-
-
-
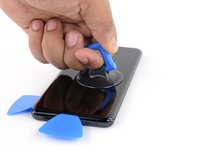
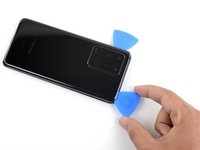
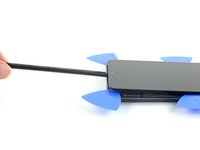
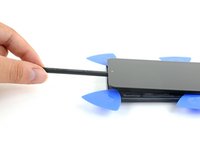
Slide the pick back and forth along the bottom edge to slice through the adhesive.
-
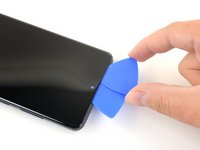
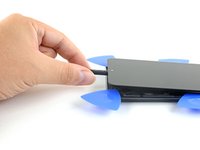
Leave your opening pick in the seam to prevent the adhesive from resealing.
-
-
-
Apply a heated iOpener to the left edge of the back cover for two minutes.
-
-
-
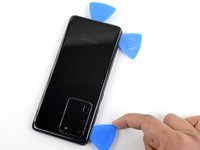
Apply a suction cup to the back of the phone, as close to the center of the left edge as possible.
-
Pull on the suction cup with strong, steady force to create a gap between the back cover and the frame.
-
Insert the point of an opening pick into the gap.
-
You can try also applying a few drops of high concentration (over 90%) isopropyl alcohol into the seam to help loosen the adhesive.
-
-
-
Apply a heated iOpener to the right edge of the back cover for two minutes.
-
-
-
Apply a suction cup to the back of the phone, as close to the center of the right edge as possible.
-
Pull on the suction cup with strong, steady force to create a gap between the back cover and the frame.
-
Insert the point of an opening pick into the gap.
-
-
-
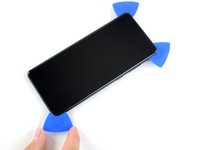
Apply a heated iOpener to the top edge of the back cover for two minutes.
-
-
-
-
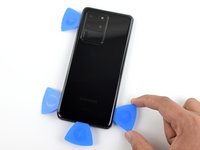
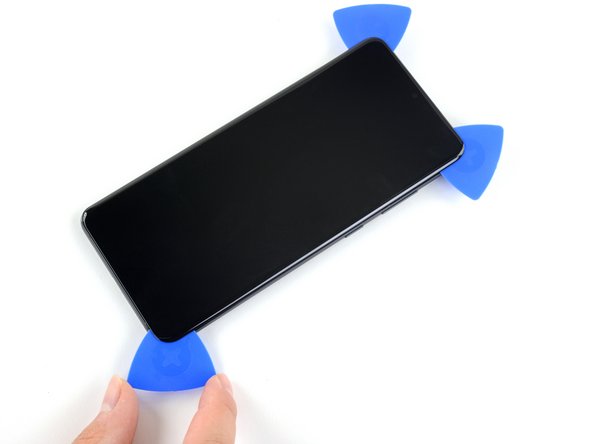
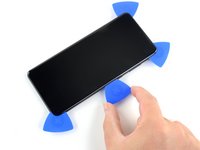
Gradually slide the pick from the right edge of the device around the top right corner.
-
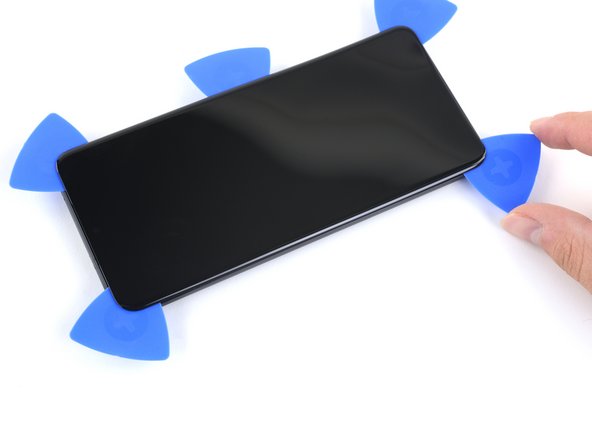
Continue slicing along the top edge to fully separate the back cover adhesive.
-
-
Bu adımda kullanılan alet:Tweezers$4.99
-
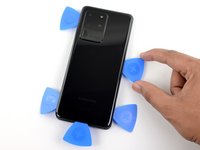
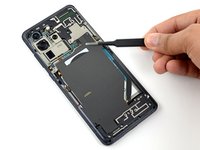
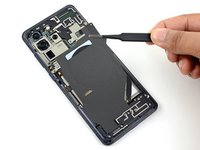
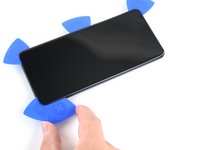
Lift the back cover slowly. Use opening picks to slice any remaining adhesive.
-
Remove the back cover.
-
This is a good point to power on your phone and test all functions before sealing it up.
-
Remove any adhesive chunks with a pair of tweezers or your fingers. Apply heat if you're having trouble separating the adhesive.
-
If you're using Samsung custom-cut adhesives, follow this guide.
-
If you're using double-sided tape, follow this guide.
-
-
-
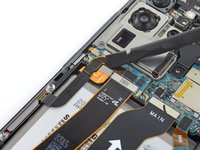
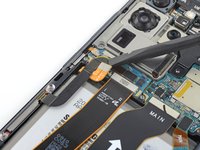
Use a spudger to pry up and disconnect the wireless charging coil connector.
-
-
Bu adımda kullanılan alet:Tweezers$4.99
-
Use a pair of tweezers to gently peel the wireless charging coil away from the device.
-
Remove the wireless charging coil.
-
-
Bu adımda kullanılan alet:Magnetic Project Mat$19.95
-
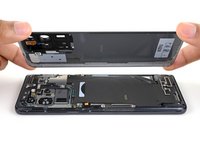
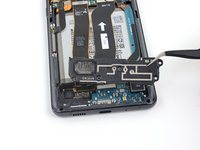
Use a Phillips #00 screwdriver to remove the five 3.9 mm-long screws securing the motherboard bracket.
-
-
Bu adımda kullanılan alet:Tweezers$4.99
-
Use a pair of tweezers to unclip and remove the motherboard bracket.
-
-
-
Use a spudger to pry up and disconnect the battery connector.
-
-
-
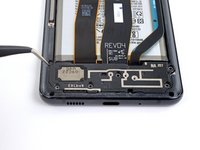
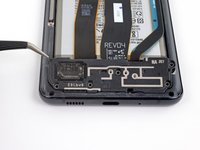
Use a Phillips #00 screwdriver to remove the five 3.9 mm-long screws securing the loudspeaker and lower midframe.
-
-
Bu adımda kullanılan alet:Tweezers$4.99
-
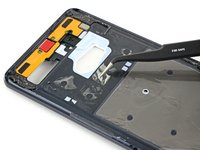
Insert the point of a spudger or a pair of tweezers into the notch in the top left corner of the midframe and pry up to release the clips holding it in place.
-
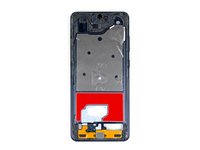
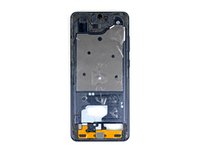
Remove the loudspeaker and lower midframe.
-
-
-
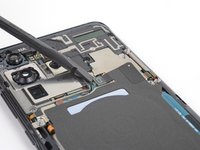
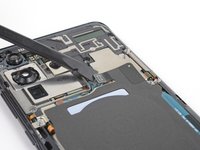
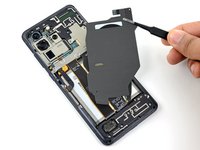
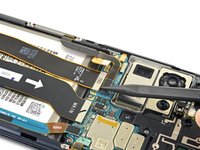
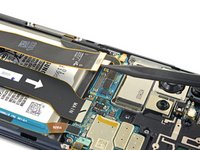
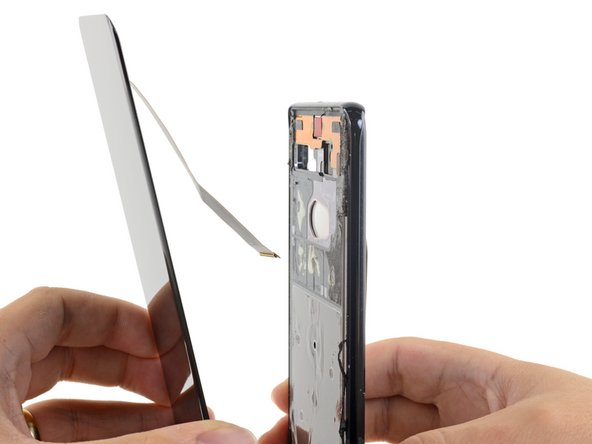
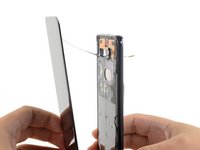
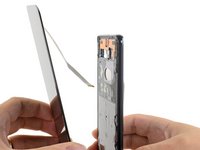
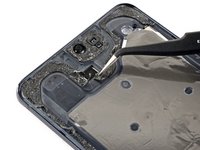
Use a spudger to pry up and disconnect the display cable.
-
-
-
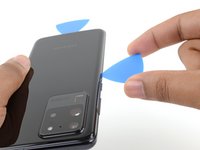
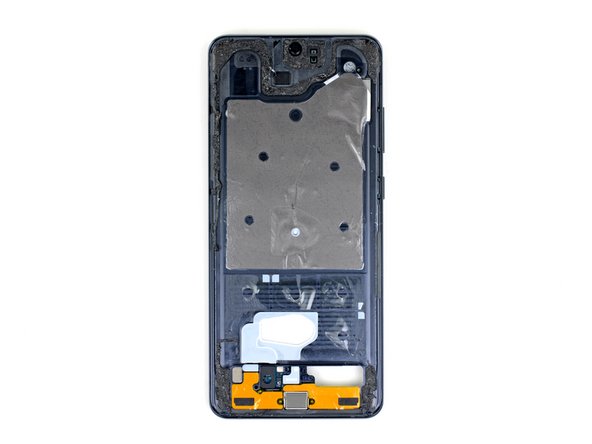
The adhesive surrounding the long edges of the device is thin and will only require you to insert the pick 5 mm to separate.
-
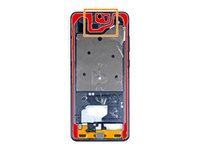
Note that along the top edge of the phone, the adhesive runs significantly farther from the device's edge. You will need to insert your pick deeper here to fully seperate the adhesive.
-
-
-
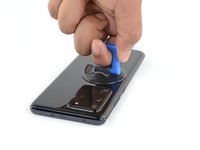
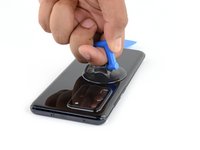
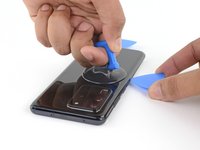
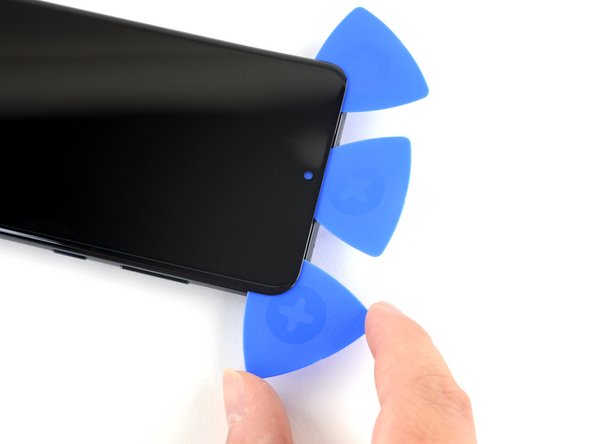
Heat an iOpener and apply it to the top edge of the display for two minutes.
-
-
-
Apply a suction cup to the display glass, as close to the center of the top edge as possible.
-
Pull on the suction cup with strong, steady force to create a gap between the display glass and the frame.
-
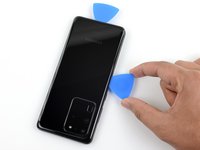
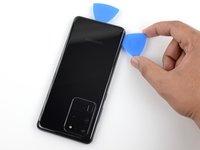
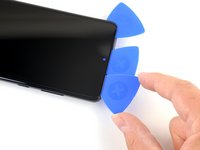
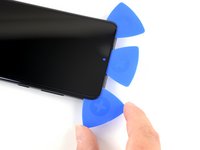
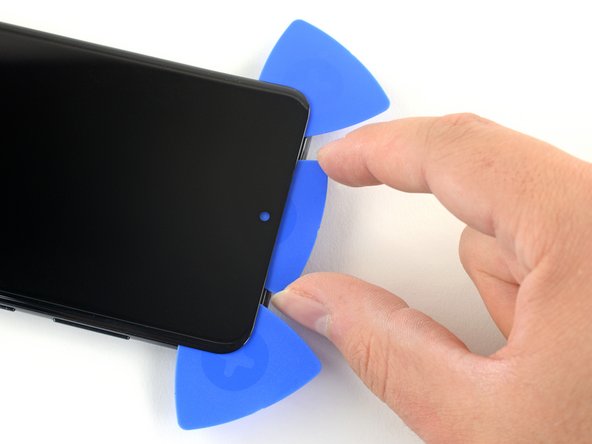
Insert the point of an opening pick into the gap in the center of the earpiece speaker notch, working it downwards underneath the display.
-
Leave your pick in the seam to prevent the adhesive from reasealing.
-
-
-
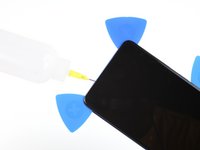
Apply high concentration (over 90%) isopropyl alcohol behind the display as close to the clear adhesive (marked red) as possible.
-
Tilt the device as you apply the alcohol to help it penetrate the adhesive underneath the lower portion of the display.
-
After you apply the alcohol, continue tilting the bottom of the phone down for two to three minutes to help the alcohol penetrate further.
-
-
Bu adımda kullanılan alet:Tweezers$4.99
-
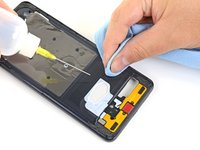
Use tweezers to remove any remaining adhesive from the frame.
-
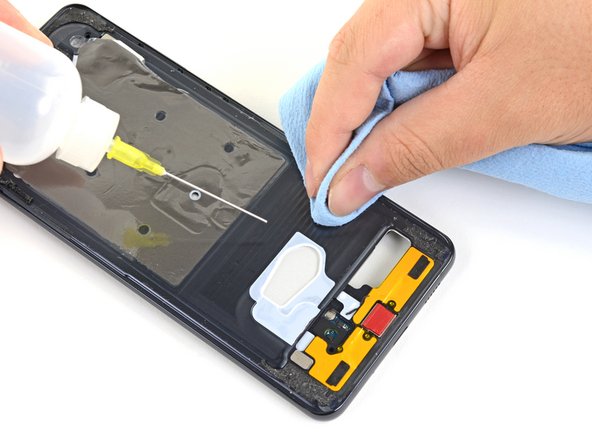
Use isopropyl alcohol and a lint-free cloth to thoroughly clean the frame's surface and prepare it for new adhesive. Wipe in one direction to avoid smearing.
-


Compare your new replacement part to the original part—you may need to transfer remaining components or remove adhesive backings from the new part before installing.
To reassemble your device, follow the above steps in reverse order.
After you've completed the repair, follow this guide to test your repair.
Take your e-waste to an R2 or e-Stewards certified recycler.
Repair didn’t go as planned? Check out our Answers community for troubleshooting help.
İptal et: Bu kılavuzu tamamlamadım.
11 farklı kişi bu kılavuzu tamamladı.


1Rehber Yorum
"Hinweis: Einige Ersatzdisplays sind schon in einem neuen Rahmen vorinstalliert. Du musst deshalb alle inneren Bauteile des Smartphones übertragen und einen neue Akku einsetzen." - genau das ist ja das Problem auf dem aktuellen Display-Markt (ebay usw.) - Welche Anleitung benötige ich also zum Übertragen der inneren Bauteile? (Habe ein gebrauchtes Display mit Glasbruch im Rahmen erstanden und denke nicht dass es sinnvoll ist, dieses herauszulösen, es könnte endgültig kaputt gehen)