
Sony a7 Motherboard Replacement

Giriş
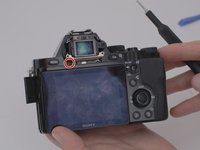
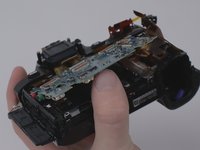
1. adıma gitThis replacement guide will address how to remove a faulty motherboard from a Sony a7 model number ILCE-7 camera. The motherboard fulfills the role of the brain of the camera. It serves as the centralized hub to connecting all other processes inside the camera together. The LCD screen and memory card are examples of other parts that rely on the motherboard. Provided in this replacement guide are the steps needed to properly remove the motherboard.
If the camera fails to boot up in the proper sequence, it is possible that the motherboard has failed. Before beginning the replacement guide, please refer to the troubleshooting page, for helpful information and simple remedies before having to go through the motherboard removal process.
Neye ihtiyacın var


-
-
Flip the camera upside down, and observe where the battery door and switch are located on the camera.
-
-
-
Remove the eyepiece cover by removing the four M1.5x4mm screws with a PH00 Phillips screwdriver.
-
Remove the M1.5x4mm screw that retains the adjustment wheel with a PH00 Phillips screwdriver.
-
-
-
Bu adımda kullanılan alet:Tweezers$4.99
-
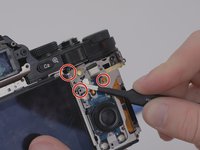
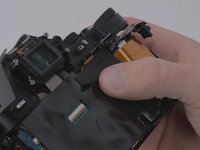
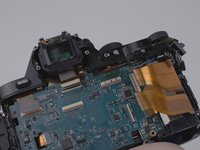
Using the blunt tweezers, remove the blue ribbon cable.
-
-
-
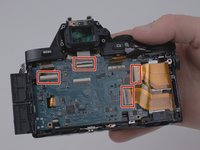
Remove four M1.5x4mm screws using a PH00 Phillips screwdriver.
On my A7 the screw shown first top right was a different thread to the other three, take care to put back in the correct place
-
-
-
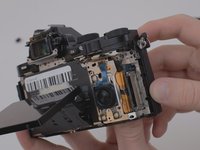
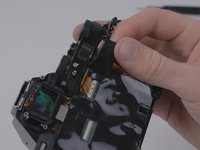
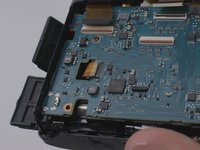
Detach the amber ribbon cable from the motherboard.
13단계에서 14단계로 오는사이에 마더보드의 왼쪽 아래부분 나사 푸는 부분이 누락된것 같습니다. 아래 20단계에서 억늡한 나사 2개 이외에 아래쪽 2개를 더 푸는것을 추가해야 합니다.
그리고 8단계 2번째 사진의 나사는 풀 필요가 없는 나사인데.. 왜 풀어야 하는지요??
-
-
-
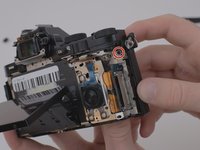
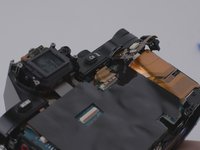
Peel off the small adhesive tape located on the top right side of the motherboard.
-
-
-
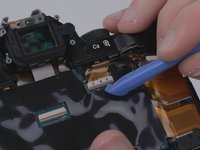
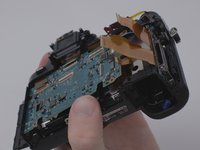
Remove the four visible ribbon cables by using the spudger.
For SD card slot replacement: Remove the bottom right flex cable. There will be a hole under the cable to access a screw in the battery compartment, which holds on the grip. Remove the screw. Remove the one remaining screw in the corner of the battery compartment. The grip should now come loose. Remove the grip. Remove the two screws holding the SD card board on. Disconnect the small two wire cable from the top of the board. The board should now slide out. Disconnect the flex cable from the old board and connect to the new board for reinstall.
I did this for a Sony A7S and all is working well.
-
-
-
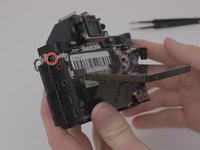
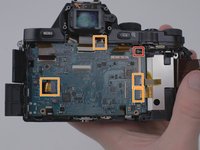
Remove one M1.5x2mm screw with a PH00 Phillips screwdriver.
-
Remove one coarse threaded 5mm screw with a PH00 Phillips screwdriver.
on my A7 there was three 5mm course thread screws marked orange, two were in the holes at the bottom of the main board
-
-
-
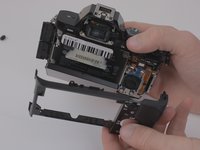
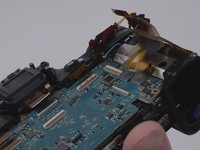
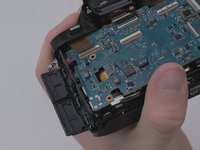
Remove the two visible ribbon cables by using the forceps.
The manual identifies the motherboard as sy-1022. It has several surface mount fuses. Did you repair your board by replacing these fuses or swap out the board. A repair tech in the US said that when a board is swapped out and data cannot be recovered from the original board, special software is needed to get the camera operational. Did you run into that issue? Also- did you replace the board's lithium battery?
-


To reassemble your device, follow these instructions in reverse order.
To reassemble your device, follow these instructions in reverse order.
İptal et: Bu kılavuzu tamamlamadım.
5 farklı kişi bu kılavuzu tamamladı.

Ekip

Embry-Riddle Aeronautical University, Team S16-G2, Branham Spring 2020 Embry-Riddle Aeronautical University, Team S16-G2, Branham Spring 2020 üyesi
ERAU-BRANHAM-S20S16G2
3 Üyeler
15 adet Kılavuz yazıldı
1Rehber Yorum
For SD card replacement:
Follow above guide to step 18. Remove the bottom right flex cable. There will be a hole under the cable to access a screw in the battery compartment, which holds on the grip. Remove the screw. Remove the one remaining screw in the corner of the battery compartment. The grip should now come loose. Remove the grip. Remove the two screws holding the SD card board on. Disconnect the small two wire cable from the top of the board. The board should now slide out. Disconnect the flex cable from the old board and connect to the new board for reinstall.
I did this for a Sony A7S and all is working well.