Giriş
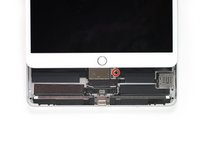
Use this guide to remove and replace the battery for the iPad Pro 10.5”.
Because there are steps in this guide where the battery may remain connected to the logic board, leave the iPad on until the battery is completely discharged (the iPad turns itself off) before attempting this guide. A charged lithium-ion battery can catch fire and/or explode if accidentally punctured.
Have plenty of high concentration (>90%) isopropyl alcohol to help make the removal and residue cleanup easier.
If your battery is swollen, take appropriate precautions.
Neye ihtiyacın var
-
-
You may need to reapply heat repeatedly throughout this process to prevent the adhesive from cooling and hardening.
-
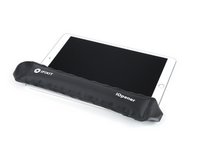
Prepare an iOpener and place it on the bottom edge of the iPad's screen for about two minutes.
 FixBot'a Sor
-
-
Bu adımda kullanılan alet:Clampy - Anti-Clamp$24.95
-
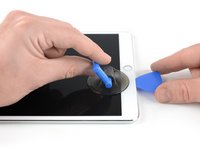
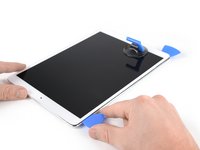
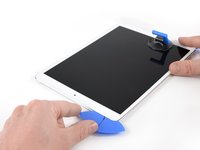
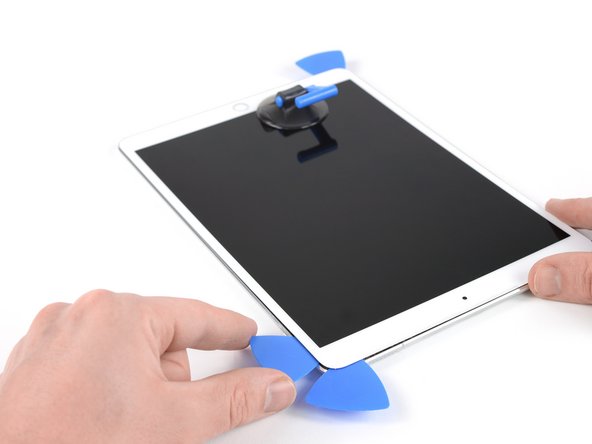
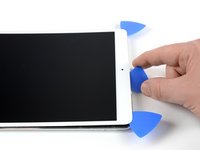
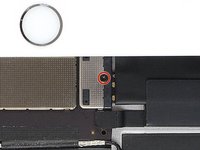
Place a suction cup next to the iPad's home button and press down to create a seal.
-
Firmly pull up on the suction cup to create a small gap between the front panel and the rear case.
-
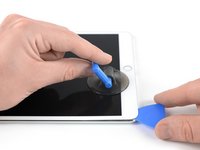
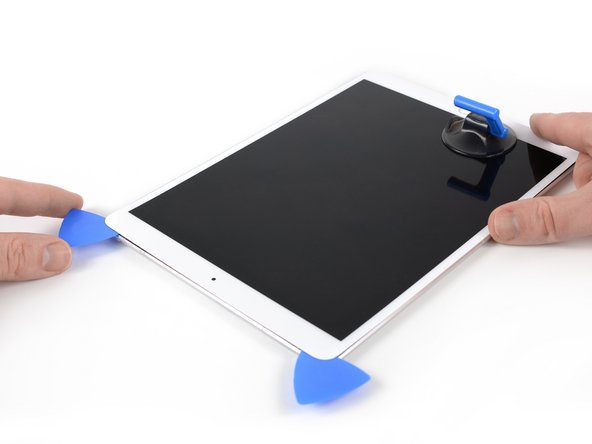
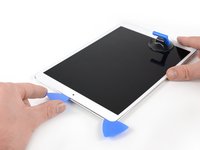
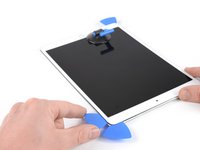
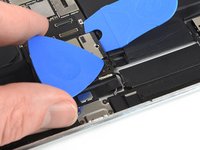
Once you've opened a sufficient gap, insert an opening pick into the gap.
-
-
-
Slice through the adhesive under the screen by sliding the pick along the edge of the display, towards the bottom left corner.
-
Leave the pick in place temporarily to prevent the adhesive from re-sealing.
-
-
-
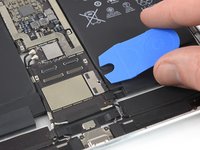
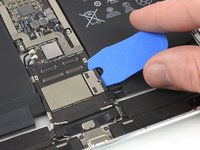
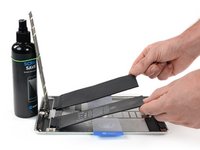
Apply heat to the left edge of the iPad for about two minutes, or until it's slightly too hot to touch comfortably.
-
If necessary, re-heat your iOpener for a few seconds or until it's a bit too hot to touch. Be careful not to overheat the iOpener, or it may burst.
-
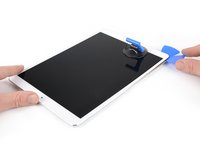
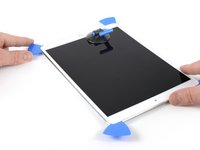
Insert a second opening pick at the bottom left corner of the iPad.
-
Slide the second opening pick along the left side of the display to separate the adhesive underneath.
-
Leave the opening pick inserted near the top left corner of the iPad to prevent the adhesive from re-sealing.
-
-
-
Apply heat to the top edge of the iPad for about two minutes, or until it's slightly too hot to touch comfortably.
-
-
-
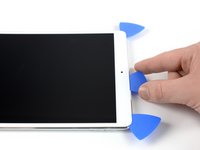
Insert a third opening pick at the top left corner of the iPad.
-
Use the opening pick to cut the adhesive under the top edge of the iPad by sliding it to the top right corner.
-
-
-
Apply heat to the final, right edge of the iPad for about two minutes, or until it's slightly too hot to touch comfortably.
-
Insert a fourth opening pick at the top right corner of the iPad.
-
Slide the opening pick down to the bottom right corner to cut the adhesive.
-
Slide the opening pick around the bottom right corner—pausing to apply more heat if needed—and cut the remaining adhesive on the bottom edge, but stop before you reach the home button.
-
-
-
Insert a fifth opening pick at the top of the iPad near (but not directly on) the front-facing camera.
-
Gently twist the pick to separate the display assembly from the iPad.
-
If needed, apply more heat and/or cut any remaining adhesive that prevents the display from separating.
-
-
-
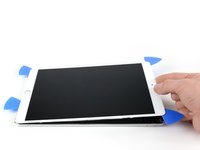
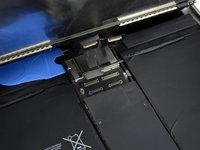
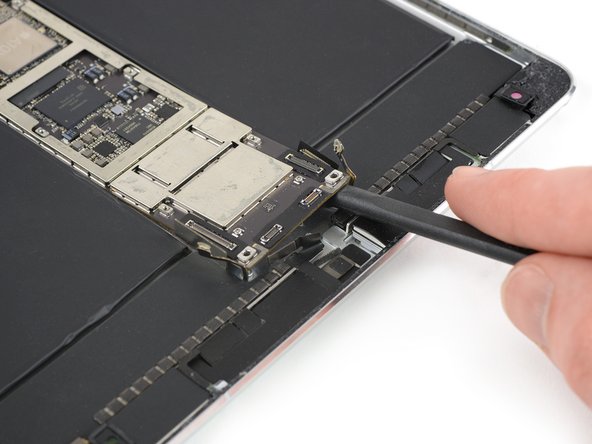
Lift the display assembly from its top edge and carefully slide it up (towards the front-facing camera and headphone jack), until the screw that secures the battery power connector is revealed at the bottom.
-
-
Bu adımda kullanılan alet:Magnetic Project Mat$19.95
-
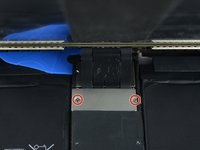
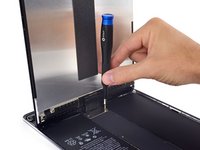
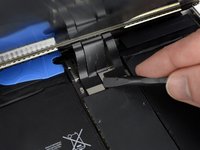
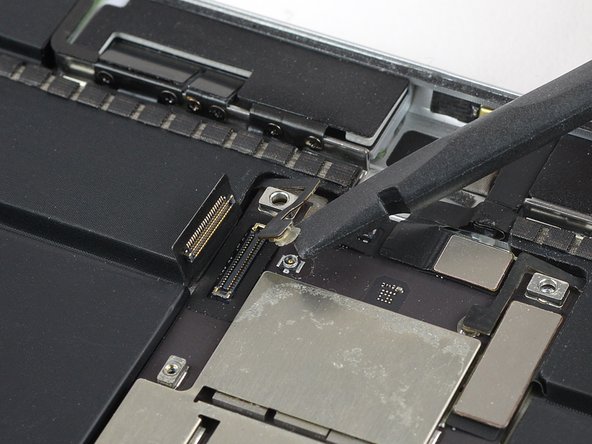
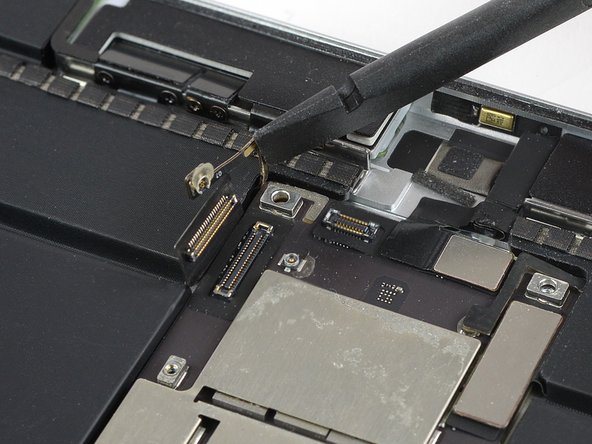
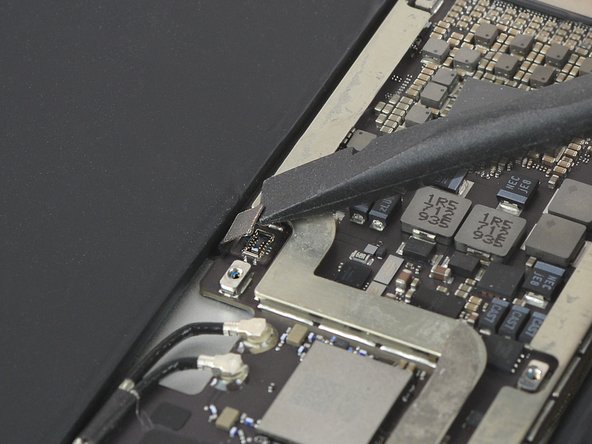
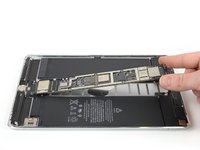
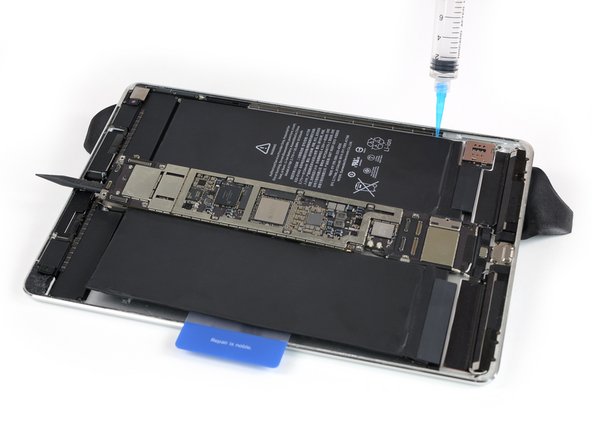
Remove the 1.9 mm Phillips screw that secures the battery power connector.
-
-
-
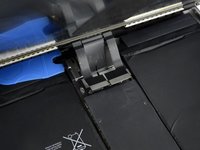
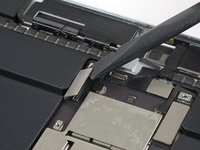
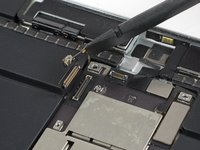
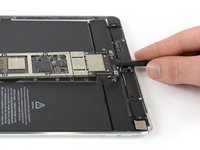
To disconnect the battery, slide one prong of a battery blocker or the tip of an opening pick under the battery power connector to ensure the power circuit is interrupted.
-
Leave the battery blocker in place as you work.
-
-
-
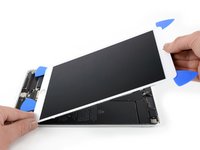
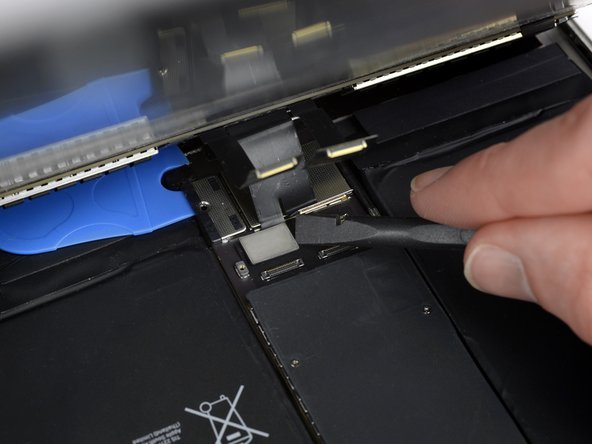
Slowly lift the display from its top edge, being careful not to strain the attached ribbon cables.
-
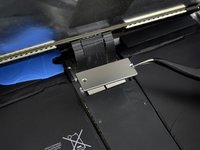
Remove the two 1.3 mm Phillips screws securing the display connector cover bracket.
-
Remove the display connector cover bracket.
-
-
-
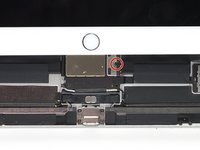
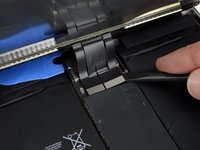
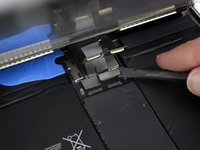
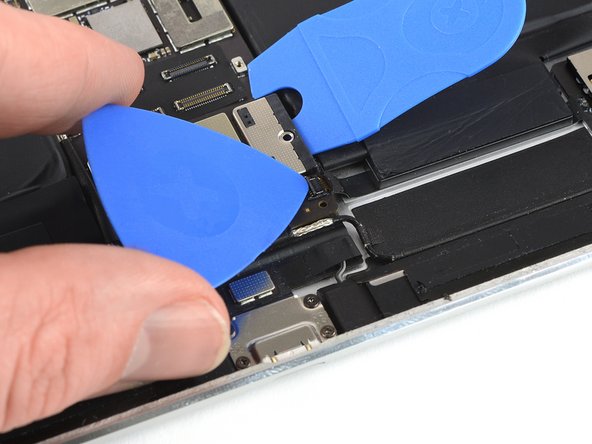
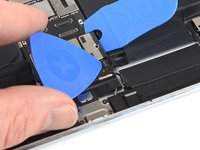
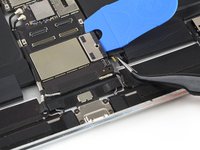
Use a spudger to disconnect the two visible display flex connectors by gently prying them straight up from their sockets.
-
-
-
-
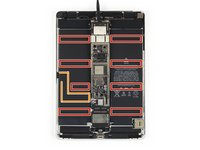
Use a Phillips screwdriver to remove the ten screws securing the EMI shield:
-
Eight 1.3 mm screws
-
Two 2.3 mm screws
-
-
-
Apply a heated iOpener to the EMI shield to loosen the adhesive beneath. Apply the iOpener for at least two minutes.
-
-
-
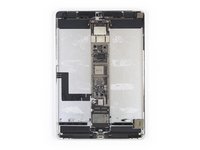
Use flat end of a spudger to pry up the EMI shield, starting from the top edge near the front-facing camera.
-
Continue carefully prying up the EMI shield until you can remove it.
-
-
-
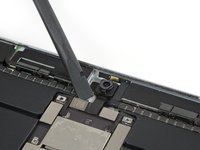
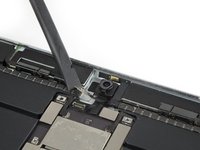
Use the edge of a spudger to pry up and disconnect the flex cable for the front-facing camera.
-
Remove the front-facing camera.
-
-
-
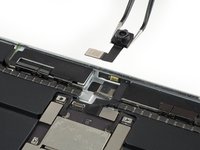
Use the edge of a spudger to pry up and disconnect both the left interconnect cable and antenna cable. Fold them gently out of the way.
-
-
-
Use the edge of a spudger to pry up and disconnect the microphone array cable.
-
-
-
Use the edge of a spudger to pry up and disconnect both the right interconnect cable and antenna cable, and gently fold them out of the way.
-
-
-
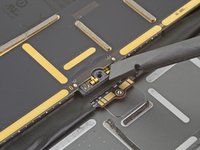
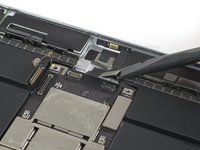
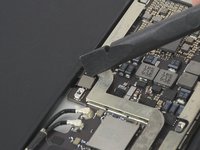
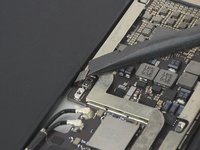
Use the edge of a spudger to pry up and disconnect the cable for the Smart Connector, and fold it out of the way.
-
-
-
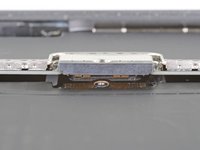
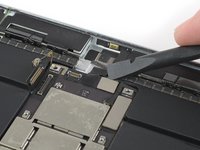
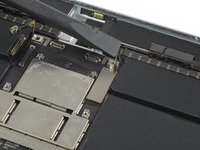
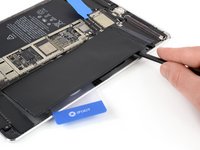
Remove the Battery Blocker from the battery power connector.
-
Slide one side of the Battery Blocker under the battery power connector, and ensure that it doesn't cover the ZIF connector for the SIM card tray flex cable.
-
-
Bu adımda kullanılan alet:Tweezers$4.99
-
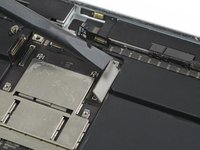
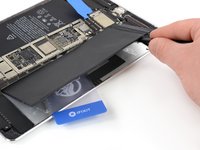
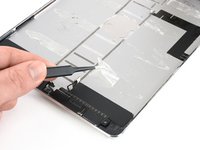
Use a pair of tweezers to peel off the tape that covers the ZIF connector for the SIM card tray flex cable.
-
-
-
Use an opening pick to flip up the locking flap on the ZIF connector.
-
Use a pair of tweezers to pull out and disconnect the SIM card tray flex cable.
-
-
-
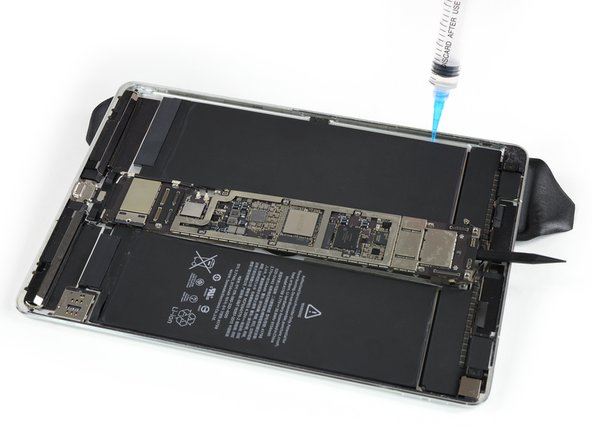
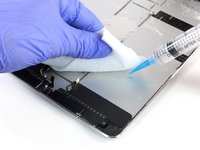
Apply some solvent in a seamless movement along both edges of the logic board. Allow it to penetrate the adhesive for several minutes.
-
-
-
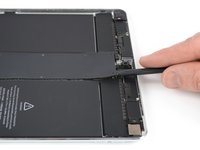
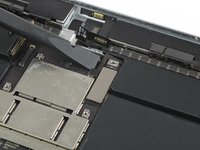
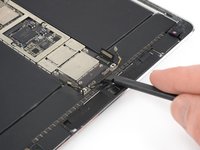
Insert the flat end of a spudger between the logic board and the rear case of the iPad.
-
Use the spudger to slowly pry up the right side of the logic board.
-
Pry up the left side of the logic board until you can get a good grip.
-
-
-
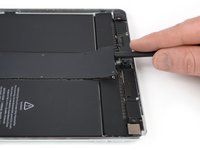
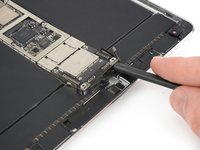
Lifting from the top edge, swing the logic board upwards to a 45° angle to ensure all adhesive beneath is separated.
-
Use a spudger or opening pick to separate any remaining adhesive as needed.
-
-
-
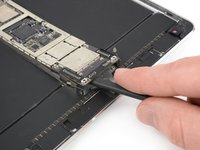
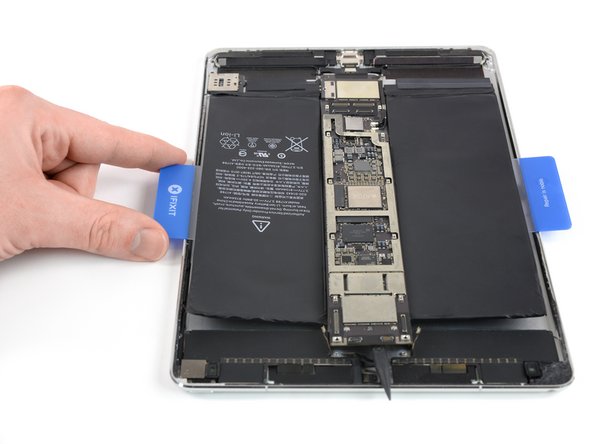
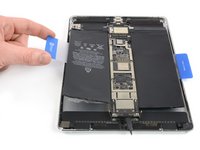
Set the logic board back down, leaving the spudger underneath to prevent the adhesive from re-sealing.
-
Adhesive
-
Smart Connector cable
-
-
-
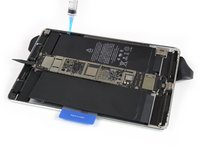
Elevate the left side of the iPad (long edge nearest the headphone jack) by placing an iOpener underneath, so that the iPad lays down at an angle.
-
-
-
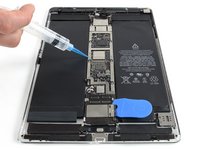
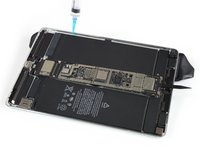
Apply some solvent underneath the battery at the three separate points where the longer adhesive strips are located. Only apply the solvent point by point and not in a seamless movement.
-
Allow the solvent to penetrate for several minutes to help weaken the adhesive.
-
-
Bu adımda kullanılan alet:Plastic Cards$2.99
-
Remove the iOpener so the iPad lays flat, and rotate it so the headphone jack faces towards you.
-
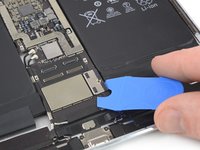
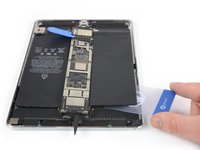
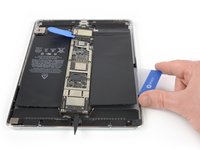
Insert a plastic card underneath the battery cell, starting near the outer corner.
-
Wiggle the card from side to side and push it under the battery to separate the adhesive underneath.
-
-
-
Carefully insert a spudger underneath the battery at the same hight as the display connectors. You might need to reapply an iOpener or adhesive remover.
-
Pry up the battery using the spudger and cut the remaining adhesive with it.
-
Lift the battery with the spudger to ensure all the adhesive is loosened.
-
Place the plastic card under the center of the battery cell, and leave it there to prevent the adhesive from re-sealing.
-
-
-
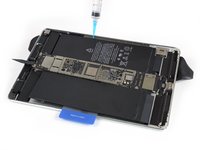
Elevate the right side of the iPad (long edge, nearest the rear camera) by placing an iOpener underneath, so that the iPad lays down at an angle.
-
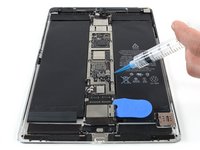
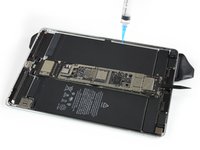
Apply some solvent underneath the battery at the two leftmost adhesive strip locations.
-
-
-
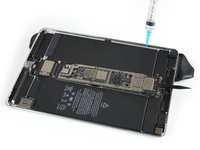
Continue separately applying solvent at the remaining two adhesive strip locations. Allow it to penetrate for several minutes to help weaken the adhesive.
-
-
-
Remove the iOpener so the iPad lays flat, and rotate it so the headphone jack faces towards you.
-
Insert a plastic card underneath the battery cell, starting near the outer corner.
-
Wiggle the card from side to side and push it underneath the battery to separate the adhesive underneath.
-
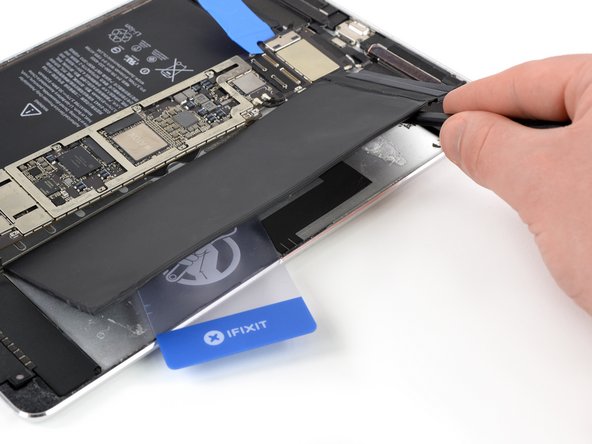
Slide the plastic card down toward the bottom edge of the iPad and cut all the adhesive beneath the battery cell.
-
-
-
Lift the battery cell slightly to ensure all the adhesive is separated.
-
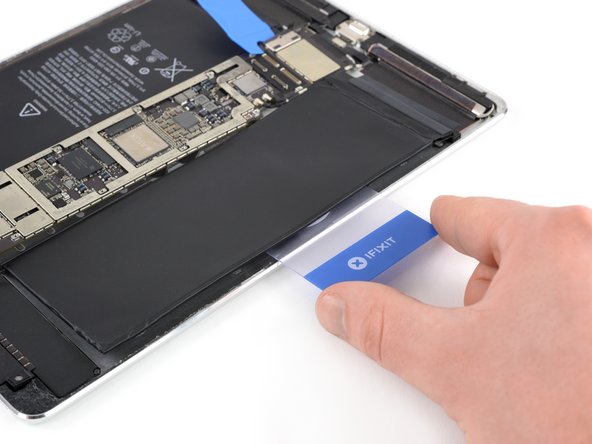
Leave the plastic card under the battery to prevent it from re-adhering.
-
-
-
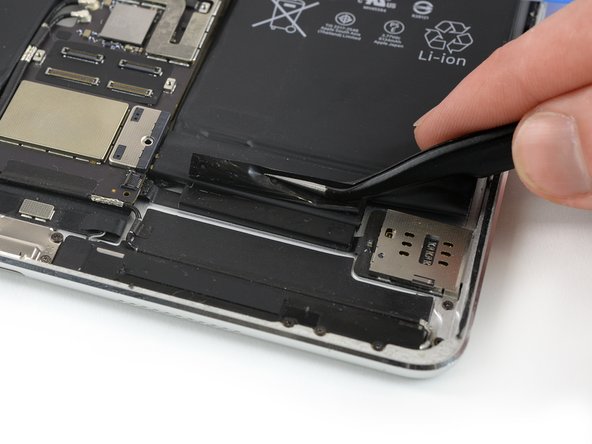
Peel up the black adhesive strip at the bottom edge of each battery cell, if they didn't already come off during the prying procedure.
-
-
-
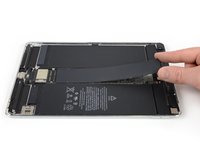
Lifting from the top edge, swing the logic board up until it's roughly perpendicular to the iPad.
-
Prop the board up securely so it doesn't move while you work. (Don't use anything metallic or conductive.)
-
-
-
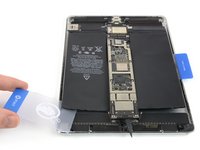
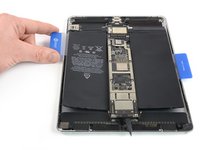
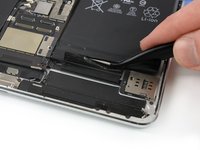
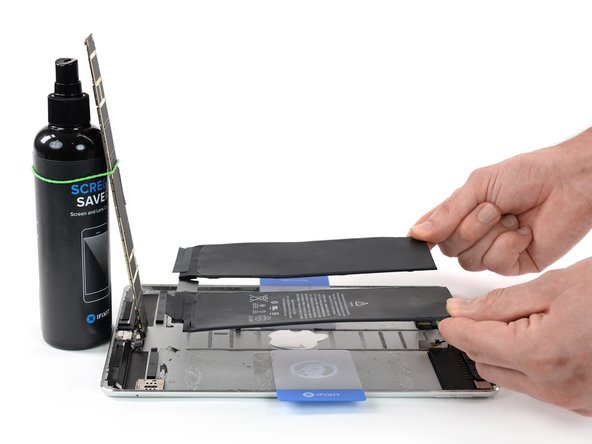
Get a good grip on both sides of the battery and remove it from the iPad.
-
-
Bu adımda kullanılan alet:Tesa 61395 Tape$8.95
-
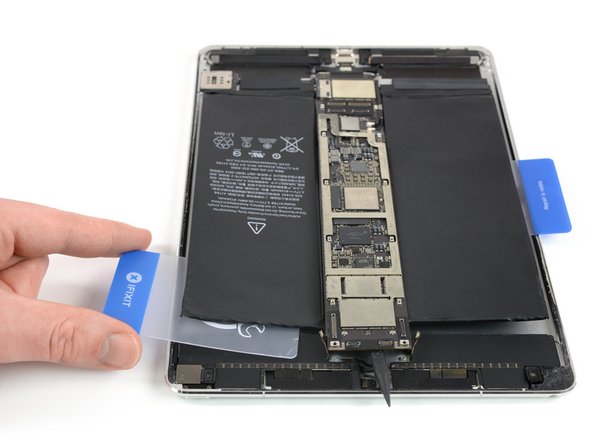
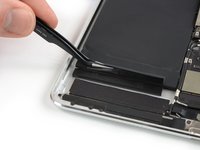
Use a pair of tweezers to peel off the remaining adhesive strip parts.
-
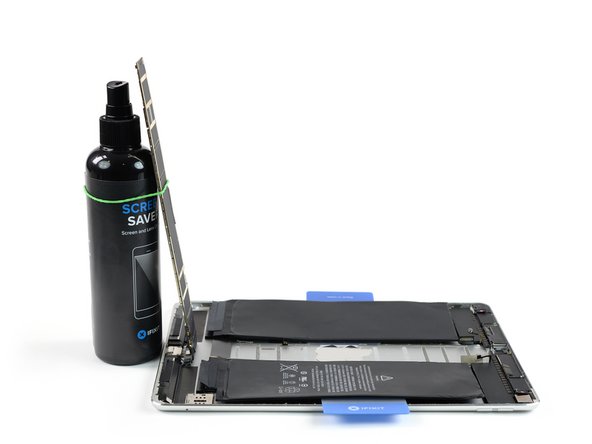
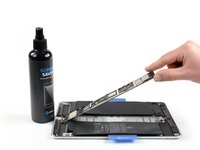
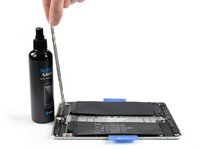
Clean the glued areas with isopropyl alcohol and a lint-free cloth before installing a new battery to ensure the new battery fits and the adhesive bonds correctly.
-


Compare your new replacement part to the original part. You may need to transfer remaining components or remove adhesive backings from the new part before installing.
To reassemble your device, follow these instructions in reverse order.
If possible, turn on your iPad and test your repair before resealing the tablet.
For optimal performance, calibrate your newly installed battery after completing this guide: Charge it to 100% and keep charging it for at least 2 more hours. Then use your device until it shuts off due to low battery. Finally, charge it uninterrupted to 100%.
Take your e-waste to an R2 or e-Stewards certified recycler.
Repair didn’t go as planned? Check out our Answers community for troubleshooting help.
İptal et: Bu kılavuzu tamamlamadım.
71 farklı kişi bu kılavuzu tamamladı.


18Kılavuz Yorumları
If you say the “the battery isolation method in this guide is outdated” then what is the correct way to isolate the battery?!?! The rest of the guide makes no mention of the correct/prefered method of isolating the battery.
How is it that the author took the time to update the guide with that message but failed to mention what should be done instead
We will never know why since only the author will know this. ¯\_(ツ)_/¯
Hi can you advise please? In step 25 the SIM card tray flex cable is disconnected, no problem apart from i don’t have a SIM card tray flex cable in the A1701 that i’m repairing!! Urgent assistance required please. Regards R
You have the Wi-Fi model, which will look slightly different and have different procedures compared to the cellular model. You can skip the SIM flex cable step.