Giriş
The Lightning connector, headphone jack, and cellular antenna are on a single assembly and must be removed and replaced together. If you've tried cleaning the lightning port to no avail, replacing the Lightning connector can solve charging and connectivity issues.
You can also use this guide to replace the microphone gasket.
Neye ihtiyacın var
Videoya Genel Bakış
-
-
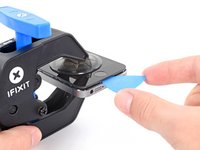
Lay overlapping strips of clear packing tape over the iPhone's display until the whole face is covered.
-
-
-
Power off your iPhone before beginning disassembly.
-
Remove the two 3.6 mm Pentalobe screws next to the Lightning connector.
-
-
-
Regardless of the tool you use, you need to be sure you pull up the entire display.
-
If the glass begins to separate from the plastic, as shown in the first image, slide a plastic opening tool between the plastic frame and the metal phone body to pry the metal clips out of the case.
-
-
Bu adımda kullanılan alet:Clampy - Anti-Clamp$24.95
-
Pull the blue handle backwards to unlock the Anti-Clamp's arms.
-
Slide the arms over either the left or right edge of your iPhone.
-
Position the suction cups near the bottom edge of the iPhone just above the home button—one on the front, and one on the back.
-
Squeeze the cups together to apply suction to the desired area.
-
-
-
Press a suction cup onto the screen, just above the home button.
-
-
-
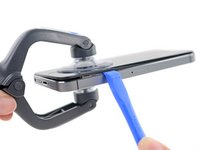
While holding the iPhone down with one hand, pull up on the suction cup to slightly separate the front panel assembly from the rear case.
-
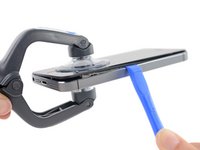
With a plastic opening tool, begin to gently pry the rear case down, away from the screen, while you pull up with the suction cup.
-
-
-
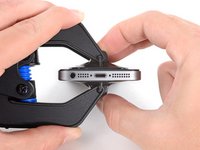
Continue to pry up around the sides of the front panel assembly, detaching the clips along the left and right side.
-
-
-
Once the clips have been released on the bottom and sides of the front panel assembly, pull the bottom of the assembly away from the rear case.
-
Open the display to about a 90º angle, and lean it against something to keep it propped up while you're working on the phone.
-
Add a rubber band to keep the display securely in place while you work. This prevents undue strain on the display cables.
-
-
-
Remove the following two screws securing the metal battery connector bracket to the logic board:
-
One 1.8 mm Phillips screw
-
One 1.6 mm Phillips screw
-
-
-
-
Remove the metal battery connector bracket from the iPhone.
-
-
-
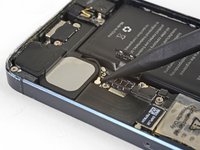
Use a plastic opening tool to gently pry the battery connector up from its socket on the logic board.
-
-
-
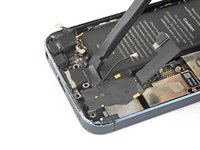
Remove the following screws securing the front panel assembly cable bracket to the logic board:
-
Two 1.2 mm Phillips screws
-
One 1.6 mm Phillips screw
-
-
-
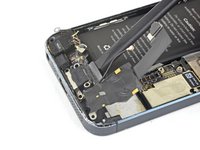
Lift the display cable bracket toward the battery to unhook it, and remove it from the iPhone.
-
-
-
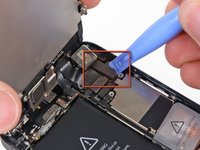
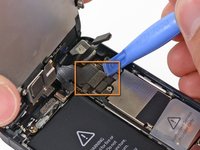
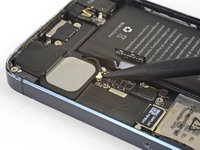
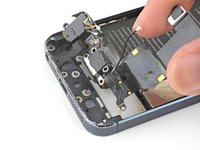
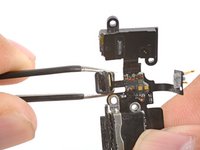
Use a plastic opening tool or a fingernail to disconnect the three front panel assembly cables:
-
Front-facing camera and sensor cable
-
LCD cable
-
Digitizer cable
-
-
-
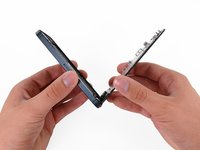
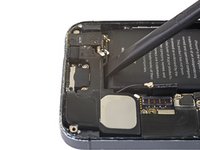
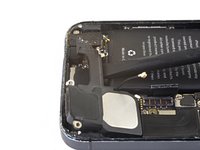
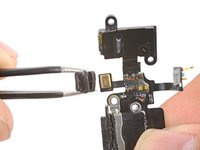
Remove the front panel assembly from the rear case.
-
-
-
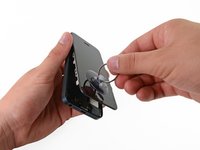
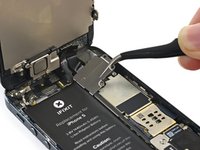
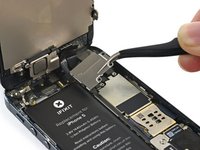
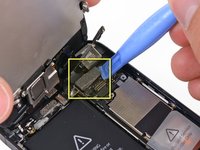
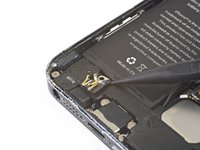
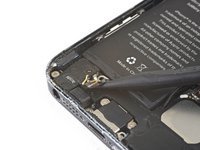
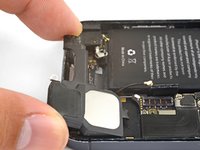
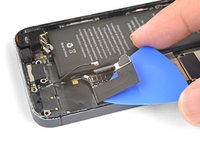
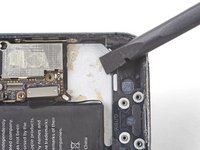
Use the point of a spudger to pry up and disconnect the antenna cable from the logic board.
-
-
-
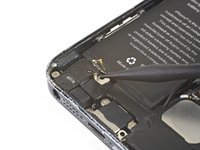
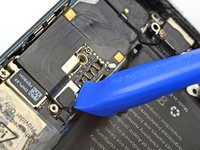
Remove the following screws securing the Lightning connector assembly to the rear case:
-
One 2.9 mm Phillips screw
-
One 1.5 mm Phillips screw
-
Two 3.3 mm Phillips screws
-
-
-
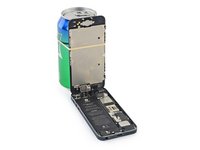
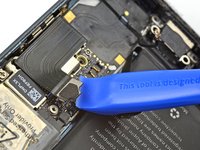
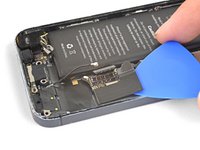
Flip the phone face up, heat an iOpener, and apply it to the right edge of the phone for a minute.
-


Compare your new replacement part to the original part. You may need to transfer remaining components or remove adhesive backings from the new part before installing.
To reassemble your device, follow these instructions in reverse order.
Take your e-waste to an R2 or e-Stewards certified recycler.
Repair didn’t go as planned? Check out our iPhone 5 Answers community for troubleshooting help.
İptal et: Bu kılavuzu tamamlamadım.
512 farklı kişi bu kılavuzu tamamladı.


67Kılavuz Yorumları
Just a quick note that if you're doing this teardown because your iPhone 5 isn't charging unless you apply some force to the Lightning cable, the problem may simply be some lint or other crud in the Lightning port. Blow some compressed air in there before you disassemble your iPhone and see if it solves the problem - it did for me.
ifixed my i5 by cleaning the port too (was just about to buy the kit!). I found a paper clip done the job perfectly.
Cheers, Adam Engst.
Also found dirt was the only fault with a number of 5's.
Gary -
Well I bought the replacement first and then realized about the dirt. I removed the dirt and it is now working again. I guess after 2 years the thing accumulates quite a bit of dust.
esleep -
THANK YOU for your comment, Adam, and the others that took the time to confirm it worked for them. Thankfully I read it before attempting this repair on my iPhone 5S. It took only 10 seconds with a very skinny (<1 mm) screwdriver, scraping the deep edge of the port, and I pulled out a wad of pocket lint that was about the size of a pea when uncompressed. A paperclip would have done the job. Charger works perfectly now.
Erin S -