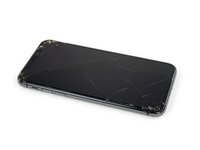
Giriş
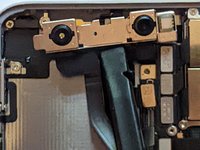
Apple has paired a couple of assemblies to the logic board, presumably for security purposes to ensure that Face ID can't be hacked. Therefore it is impossible for the do-it-yourself repairer to replace any of those three parts and still have Face ID work.
The only thing an average person can do outside of taking the phone to Apple for repair is to replace all three parts together with ones salvaged from an original phone. Here's what's needed:
- Logic Board
- Front Facing Camera Assembly (Paired to that logic board)
- Proximity Sensor / Earphone Assembly (Paired to that logic board)
That being said, there are other repairs that can be made if Face ID stops working, but they generally require skill in microsoldering; not something just anyone can do. For example, the flex cable that connects the front camera to the logic board can get damaged and it is possible to replace it; it's just that it's very difficult without precise equipment and a particular set of skills.
This guide will step you through replacing the three paired components from a damaged phone into a new phone.
Neye ihtiyacın var
-
-
Insert a SIM card eject tool or a paperclip into the small hole in the SIM card tray, located near the side button on the edge of the iPhone.
-
Press firmly to eject the tray.
-
-
-
Remove the SIM card tray from the iPhone.
-
-
-
Power off your iPhone before beginning disassembly.
-
Remove the two 6.9 mm-long pentalobe screws at the bottom edge of the iPhone.
same situation here
Same issue with the stripping. The tip of the iFixit P2 head in my $70 kit just ground off on the first screw and that was that. Not much you can do.
yes correct the same happened to me, the screws were perfect shaped never been open and as soon as i used the P2 it stripped the screws, seems like the P2 is slightly smaller but Dremel kit with a very small drill bits and precise knife tool is the way to go.
This step in automatically followed through, without any thought. Why remove these screws? Can anybody explain? The Screen is detachable all the same, with them well screwed in…
These screws attach to a plate that’s part of the screen half of the phone. If you succeed in detaching the screen without removing those, it would seem reasonable that you will have damaged that plate or its ability to keep the two halves together.
Dan Long -
@Dan Long is right
Uri -
Clean out the pentalobe screw heads first so the tool goes all the way in. A small sewing needle works well to loosen any build up and then press some putty/chewing gum into the screw head and pull away quickly for a final clean out.
Never opened my phone ever, when I went to look at the first step.. I noticed one of my screws was stripped. I thought it was impossible, but I removed the non stripped one, then once I got to the stripped one.. I learned my assumptions were correct. I bought this one straight from the apple site years ago ahaha Any tips to remove the stripped screw?
William Olstad's tip about cleaning the screws with a needle and a bit of poster putty worked well for me. There was a lot of crud in there! The opening is shallow, so it's easy to see how the screwdriver wouldn't catch with even a bit of grit in the way, No problem getting the pentalobe screws out with the ifixit screwdriver.
If all else fails, very carefully cut a slot across the head of the screw with a Dremel tool using a diamond bit that dentist will gladly give you - I ask my dentist for used bits; and chuck them in a drill bit chuck designed for Dremel. The slot allows you to use a tiny, straight blade screwdriver. You can reuse the screw or replace it with a new pentalobe screw.
-
-
-
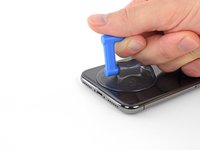
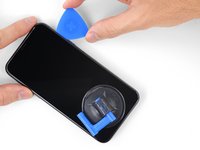
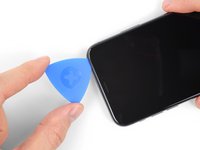
Measure 3 mm from the tip and mark the opening pick with a permanent marker.
Got to step 2 and realized the fix kit doesn't include an opening pick! Looks like a guitar pick, and I have those lying around. Is that expected? Looks like the pick is used in many steps below. There's a little blue crowbar that isn't mentioned in the instructions. Perhaps that replaces the opening pick?
Hi! I can't see which guide you were using when writing this comment. Can you reply here with which guide and fix kit you used?
I see you posted this in Meta. I hope it's resolved soon! In the meantime, a guitar pick may work well enough for your repair.
what fix kit?
My fix kit didn't include an opening pick either
My AliExpress refurbished screen came with a pick that has a coin-like circle that pops out, so no modification was necessary
It's not an Ifixit KIT if it doesn't include everything. You'll need to order the opening pic separately. Or head to Walmart like myself and look for guitar pics. Hopefully, this will work just as well.
No pick in mine as well. It’s really not clear that you have to order this separately when ordering an IPhone SE 202/2022 screen repair kit. Is this the case?
Frustrated, I ordered a compact package where everything was encapsulated. Useless suction tools could not separate the screen. If it is unable to decouple the screen, then why sucking suction tools you have provided.
For my kit the triangle pick was stuck inside the box with the screen not with the other tools maybe it's also there for you
Y’all are getting far, FAR too detailed with some of this stuff…. Measuring and marking the pick that you won’t actually use to open the device?!? lol that’s kinda funny. Just heat it up, grab a spudger, and the back just pops right off! The iFixit tech need to stick to the KISS method more often, you know KEEP IT SIMPLE STUPID!!! Like l, for reals, I’ve been doing this stuff for YEARS and using iFixit guides regularly and this is just ridiculous at this point!
Will the phone still work if the sensor assembly on the back of the screen is damaged?
-
-
-
Lay overlapping strips of clear packing tape over the iPhone's screen until the whole face is covered.
-
If you can't get the suction cup to stick in the next few steps, fold a strong piece of tape (such as duct tape) into a handle and lift the screen with that instead.
-
-
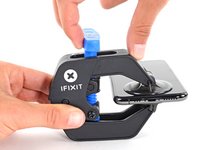
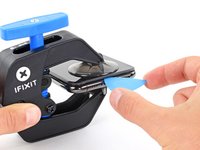
Bu adımda kullanılan alet:Clampy - Anti-Clamp$24.95
-
Pull the blue handle backwards to unlock the Anti-Clamp's arms.
-
Slide the arms over either the left or right edge of your iPhone.
-
Position the suction cups near the bottom edge of the iPhone—one on the front, and one on the back.
-
Squeeze the cups together to apply suction to the desired area.
-
-
-
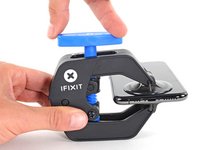
Heat an iOpener and thread it through the arms of the Anti-Clamp.
-
Fold the iOpener so it lays on the bottom edge of the iPhone.
-
Wait one minute to give the adhesive a chance to release and present an opening gap.
-
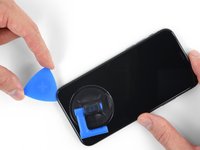
Insert an opening pick under the screen and the plastic bezel, not the screen itself.
-
Skip the next three steps.
DO NOT separate the glass from the plastic bumper or rim around it. These instructions don't clarify that the pick has to be inserted between the plastic rim and the metal body. It is likely that the glass will lift slightly off the plastic surround before the plastic will lift out of the metal body. I had success sliding a card or pick back and forth along the bottom edge of the plastic rim while pulling on the suction cup. Eventually there was a space large enough for the pick to go under the plastic rim.
Thanks for pointing this out! I'll revise this step to clarify this point.
-
-
-
Use a hairdryer or heat gun or prepare an iOpener and apply it to the lower edge of the iPhone for about a minute in order to soften up the adhesive underneath.
General tip regarding heating necessary to remove adhesive:
consider using a heated tip of a small screwdriver or metal spudger (not the one made of plastic, provided in kit), rather than to heat the device itself.
You then need to be careful about the temp of the tool which if hot enough can melt plastic components or harm them. Keeping the heat source (heat gun) far enough away from the object that you’ll eventually melt the glue but would be much harder to melt components. I try to keep 4” or 5” gap between the source & object
Thanks for the info. Could a air convector do the job
If you have a 3d printer, heat the bed to 80c and put the phone screen side down on it for 30 secs
thaks for this advise, I was looking for this as I dont have a heat gun haha, nice hack
-
-
-
If using a single suction handle, apply it to the bottom edge of the phone, while avoiding the curved portion of the glass.
If you were using some form of screen protector, it may come off first as soon as you pull on the suction cup. Do not be alarmed. That is normal behavior.
3m VSB double stick tape will stick to the screen when the suction cups fail (see my comment on step 1)
-
-
-
Pull up on the suction cup with firm, constant pressure to create a slight gap between the screen and the frame.
-
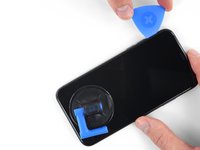
Insert an opening pick into the gap under the screen's plastic bezel, not the screen itself.
In addition to safety goggles, I would recommend you also wear good gloves to avoid getting cut with the glass as you try to pry it open.
The top about applying more heat and gently rocking the screen up and down to weaken the adhesive did the trick for me. Thank you!
There needs to be more clarity on where to shove the opening pick into. There is actually two openings that the pry tool can be forced into: one below the black plastic bezel, and one above the black plastic bezel. When I heated my screen with a warming pad and pulled up the suction cup, it actually pried apart above the black plastic bezel which removed the touch screen from the display panel. With this being the first newer iPhone I'd opened since the 3GS, I didn't realize that I was opening the wrong opening as the directions only mentioned one opening and did not warn of this. I was pretty disappointed in the lack of mentioning this, as I was taking my time and following it to the tee. As a result, it destroyed my original iPhone screen.
DO NOT separate the glass from the plastic bumper or rim around it. As someone else noted, these instructions don't clarify that the pick has to be inserted between the plastic rim and the metal body of the phone. When pulling upwards with the suction cup, it is likely that the glass will lift slightly off the plastic surround before the plastic will lift out of the metal body. I had success sliding a card or pick back and forth along the bottom edge of the plastic rim while pulling on the suction cup. Eventually there was a space large enough for the pick to go under the plastic rim.
Thank you for pointing this out! I've updated the step to reflect this.
The suction cup doesn't work at all... The minimum force I apply to lift it up, it comes off completely. This is very frustrating!!!
-
-
Wouldn’t it be better to put this part BEFORE the step where you have to pry open the phone?
-
-
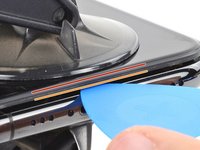
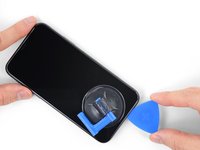
Re-insert your pick at the bottom edge of the iPhone, and slide it up the right side to continue separating the adhesive.
If you have flat feeler gauges (for adjusting engine valve tappet clearance, ignition points … old school) the .003” thick gauge goes right in. Work your way up in thickness until you can get the pic or supplied pry tool in. Don’t insert metal feeler gauge in too far, just enough to hold crack open. I didn’t need to use the suction cup. I used a hot/cold gel pack heated in microwave to heat edges to soften glue a bit. Made sure it wasn’t so hot I couldn’t stand it on my skin.
-
-
-
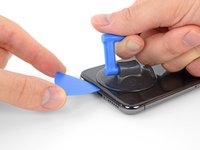
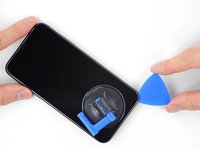
Slide the opening pick around the top corner of the display, while gently pulling or wiggling the display down in the direction of the Lightning port.
-
Slide the pick to the opposite corner and cut any remaining adhesive securing the display.
-
-
-
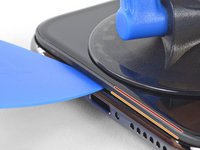
Open the iPhone by swinging the display up from the left side, like the back cover of a book.
-
Lean the display against something to keep it propped up while you're working on the phone.
My phone came apart in a different way and looks not right the little box at the top of the display as actually bolted to the top of the frame body I think something went really wrong when I opened it.
It opens like a book but be careful not to open it all the way — only as far as shown in the photo. Otherwise it will strain the thin cable that connects the sensor module and then no more FaceID for you (or, as it turns out me). This could have been made more explicit in the instructions.
It opens like a book but be careful not to open it all the way … the small stainless steel tabs that hold the screen around the metal frame, that are on the bend place (right side of the phone)… are tend to bend, you can straighten them back to 90 deg. but the plastic base that they are on? very fragile- watch out not to break the plastic bezel … it may come apart of the glass.
Advice for re-assembly: Before closing up the phone with the seal, check if phone is powering up again and speaker, mic and sensors are still working. If done this check even before installing the board connector bracket in Step 13.
-
-
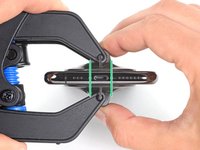
Bu adımda kullanılan alet:Magnetic Project Mat$19.95
-
Remove five Y000 screws securing the logic board connector bracket, of the following lengths:
-
Three 1.1 mm screws
-
One 3.1 mm screw
-
One 3.7 mm screw
One thing I found helpful for replacing the screws was to use only the 000screwdriver tip, without the handle. This way, the tip isn’t magnetized and the screw doesn’t tend to ‘roll’ off the screwdriver tip (the screw has almost no mass, so the head (largest surface) is pulled around to the side of the screwdriver tip when magnetized).
Rich May 23, 2020
My 3.1mm screw had a stripped head, could not remove it. (Factory defect, this iPhone was never opened)
So I had to give up removing the display assembly, and jumped directly to battery replacement, Step 20.
That was tricky as I had to keep the display at 90º with a risk of breaking display connectors, but hopefully the replacement went well.
I would not recommend to do this but to follow the guide, but, in case someone encounters a similar issue, that could help!
Be careful on reassembly. Keep the screen supported and not moving. I had difficulty getting the screws in and ended up ruining the screen connectivity at the back of the screen where the ribbon cables go in near the center. I was trying to hand hold the screen and it ended up moving around too much.
To keep track of the screws, I copy the photos showing their places, then arrange these photos on document in Pages, print it. Next I apply two sided sticky tape (the roll-on type). So all screws have their corresponding places …
-
-
-
Remove the bracket.
I tested it, then proceeded to close up the device without the bracket. Do I need to reopen and install? All connections are good?
The bracket helps those many connectors underneath maintain good contact. Probably in the short term nothing bad will happen, but I’d hang onto the bracket and reinstall it when convenient.
Agree with Jeff
cgtyoder -
for me, the replacement battery was completely dead, small panic when the power-on button was pressed, but quickly realised that this was the situation, and now watching the phone take a power cycle.
Before clicking the screen assembly back, I tried to test the iPhone by pushing the start button, but nothing happened. After taking off the bracket, reseating the plugs I tried again - nothing happened! Then I plugged in the charging cable connected with the iMac, and it started immediately. So if the phone does not start using the startup button, it might just be a glitch when reconnecting the battery.
-
-
-
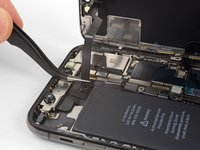
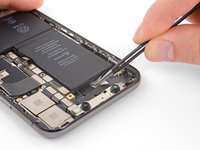
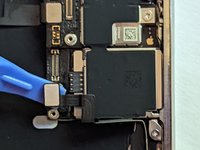
Use the point of a spudger or a clean fingernail to pry the battery connector up from its socket on the logic board.
-
Bend the connector slightly away from the logic board to prevent it from accidentally making contact with the socket and providing power to the phone during your repair.
cosa può succedere se non si disconnette la scheda logica'?
note: be careful not to crush or puncture your battery at this step!! I gave mine a minor dent, which I hope wont be a problem.. but something to keep in mind for fxlks in the future!
Thanks, already did it)
-
-
-
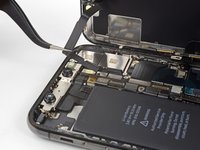
Use the point of a spudger to pry the digitizer cable connector up from its socket.
This was probably the hardest part other than trying to get the screen off with the crappy suction cups. I re-installed the bracket only the find out that the touch screen would not respond to touch. Had to remove the five screws, remove the bracket and reseat the recessed screen connector. Reseating the bracket took another 10+ minutes. I carefully used the angled forceps to grab the cable and align the connector being careful not to damage the cable.
Once you have the connector seated, I would reconnect the battery, power on the phone, and check the touch screen response before re-installing the bracket (step 13).
Yeah, this was probably the trickiest part of the reassembly. The power connector cable kept getting in the way so I moved it carefully but fully out of the way. Then it was a matter of fiddling around with it a bit and being careful not to force it on.
I was positive that I had messed something up, I had powered up the phone to test three different times and everything seemed find except there was no touch at all. On my fourth attempt, I carefully examined everything for dust and debris (blowing gently), and I did notice that a corner of the connector (more like part of the ribbon) was bent slightly, and I straightened it. I don't know if it was the ribbon or some tiny debris, but after reseating a fourth time, it worked.
Very important part of the tutorial. Be careful and patience! In my case the screen and camera didn't respond after assemble, so I tried again to reconnect the connector like tutorial said and it worked well. Now my iPhone feel like a new one 💪🏼
-
-
-
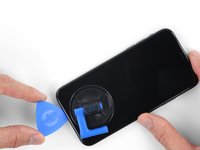
Carefully lift the cable until the adhesive separates.
It is part of the face id part so yes. This is the ear piece too so if the ribbon tears there is a chance the ear piece will stop working as well.
Be super careful handling this ribbon particularly. I did a battery install and, when I was done, I had a phone with a new battery and no Face ID. That’s a $300 Apple repair, and no 3rd party shop will touch it. I believe the ribbon lays vertically (i.e., perpendicular to the “floor” of the phone, against the side edge of the battery. During the re-install, I must have forced the ribbon into position after seating the connector, causing fatal flexing of the ribbon. (Don’t know this for sure, but I see another comment saying that this cable is part of Face ID.) Anyway, bottom line: BE CAREFUL REMOVING AND REINSTALLING THIS RIBBON!
My flex cable was more than lightly adhered in place. I needed to use a guitar pic or similar to help encourage adhesive to separate. I wouldn’t pull too hard like shown in pictures unless you had just the right grip on the ribbon cable so as to avoid damaging flex cable. See note above (5/31/20)
Bizarre — it turns out my whole front panel sensor assembly came entire off of the front screen and is stuck to the logic board.
I also found the glue quite recluctant to release so I applied a second or two of heat using the wife's hair dryer which softened it and the cable lifted much easier then. Be careful not to apply too much heat though which could then impact other internal components.
Cho ít cồn 90° vào để mềm keo dễ tháo
my iphone x doesn't have a front panel sensor? in fact, it looks completely different than the picture???
@kennethmcleod, most likely you've separated the screen frame from the screen itself. We see this most commonly when people neglect to remove the pentalobe screws next to the charging port. Usually the cure is to take out those screws, then repeat the screen removal process on the frame that's still attached to the phone.
You don't need to disconnect the front sensor to change the screen. Just leave it connected and remove from the screen side.
I have damaged the front panel sensor assembly flex cable. Does it carry multiple channels of info or is it just one solid piece that can be soldered back together? If not, will the phone still work except Face ID?
-
-
-
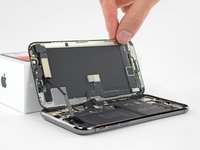
Remove the display assembly.
I tried this and broke the cable can it still repair
CAUTION:
Removing the Taptic Engine or Speaker in next step is optional and the guide continues as this was per se needed.
Unnecessary work and also If you remove the speaker you lose the adhesive gasket and this is not included in the scope of delivery of the "Battery replacement" offering.
So do not remove and avoid losing waterproofing.
Just to confirm the face id is not affected when replacing the earpiece assembly? Am I correct
Sorry for the late response, but you are NOT correct. Replacing the earpiece speaker assembly will result in the loss of Face ID functionality. That's the whole assembly, including the speaker, dot projector and flood illuminator. If you unsolder the speaker from the assembly, that can be replaced by itself without losing Face ID, but any other part will cause it to quit working.
-
-
-
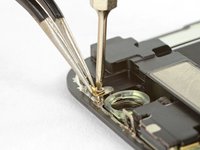
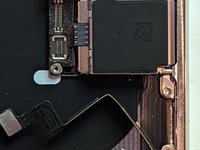
Remove the 1.2 mm Y000 screw on the back of the display assembly, near the infrared camera port.
when I opened my iPhone the screw was already stripped, I had the phone once at an Apple store for repair about 2 years ago. Had not opened it in between so it seems they stripped the screw there or it came like that from the factory. Any ideas? I don’t want to try and force it out.
Be careful: the metal clip beneath this screw it’s really small, make sure not losing it.
Steps 19 and on are all on the screen you just removed. Not the phone side. I didn’t look closely at the image and just went for the screw in roughly the same place on the phone body side. First warning sign it’s a phillips - but more importantly I was working on the entirely wrong piece. I guess you’ll probably figure it out faster than I did.
FYI: My iphone XS has a slightly different screw position for the one shown to have a “clip”. There is no clip for this screw on mine. Maybe a rev update because of the clip getting lost and being hard to reinstall?
FYI - The sensor assembly of the replacement looks a bit different from my original one. The screw is located further to the right on the original. As a result, I am unable to attach the sensor assembly on the replacement part, because the fixture is at a different position.
Unfortunately, there’s nothing I can do about it apart asking for a refund.
Screws at my Iphone X are normal,but even w heat,i cant take them off,and even the strongest member of my family cant do this
-
-
-
-
Beneath the screw you just removed lies a small metal grounding clip. If it didn't already come out along with the screw, remove it now.
sin ese clip la señal wifi se recibe a duras penas
Is there any way we buy the ground metal clip separately please if there’s a way to get it emailed me
Reinstalling this clip + screw is super hard =P
It is pretty difficult without using a zoom in. A 2nd iphone camera zoomed in at 8x while using magnetic screwdrivers makes the job a little easier
Yes eBay has it
Screw Gasket Ear Speaker for Apple iPhone X Replacement Repair Phone Part Speak
This looks different on my iPhone X. There’s no clip. It turns out that the replacement screen is NOT compatible with my iPhone. See my comment on Step 23. Must be a different HW revision. The whole front sensor assembly casting is a bit different. After replacing 2 screens of older iPhone generations this is my first failure due to HW incompatibility. From here on forward I probably won’t attempt another major smart phone repair. Technology is getting to complex for DIY. Will buy an iPhone 13 Pro with insurance (even though it’s utterly overpriced and I always like the DIY challenge)…
it’s not technology that’s getting more advanced, it’s apple creating more barriers between a DIY repair vs funneling your hard earned dollar into apple care and the Genius Bar
I did the same thing here - its the x vs xs and my partner ordered the part
I ripped off the side clips and ones in wrong place (put the old screen next to it - and rip them off with needle nose plyers (in a rolling motion so you get each solder one at a time)). the smaller clips that had enough room i left.. then i could force the screen on.
And its working ...... lets see for how long - the sealant and small clips seem to be holding it together okQue pasa si no pones ese clip?
-
-
-
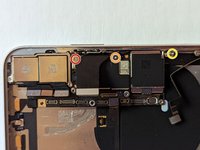
Remove two more Y000 screws securing the speaker/sensor assembly:
-
One 1.6 mm screw
-
One 1.3 mm screw
What do you do if the 1.6mm tripoint screw won’t come out…? I think it may be stripped :(
You could try using an old screwdriver & carefully adding a dab of superglue to the screw to attach it to the screwdriver, Then the screw may come out, Superglue’s strength is holding 2 pieces together when the stress point is pulling the 2 pieces away from each other. Superglue becomes surprisingly easy to break when twisting the 2 pieces. So be careful since the rotation of the screw will put the stress point at the weakest of the glue’s strength.
I would suggest:
1. Try a small precision flat head, a good quality one, I bought some that were supposed to be to remove stripped screws, about 20-30 bucks for 4 or 5 of them, and they have saved my butt many times.
2. I have been able to remove stripped screws with wire cutters. Or you can try some vamp pliers but they are probably too large for this situation.
3. If the last two fail, the course of action is to basically destroy the head of that screw (assuming you are removing the stuff you need for your new lcd, which is very likely) they have drill bits called easy outs or screw removing drill bit, which is a drill bit with the spiral going the opposite direction (for a screw that tiny you can take a small drill bit, cut and sharpen the end that normally has no spiral, I have made that work in the past) the point is that as you drill in, the drill bit is digging and moving counterclockwise, so at some point as it digs in it will get “stuck” and keep spinning go the screw, thus removing it.
-
-
-
Use a hairdryer or heat gun or prepare an iOpener and apply it to the top front of the display for about a minute, in order to soften the adhesive securing the sensors.
I could not have done this without the iOpener, it was worth the investment!
-
-
-
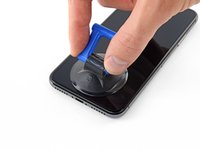
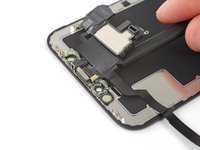
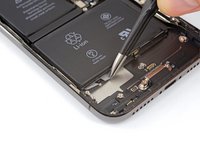
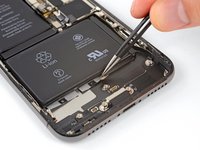
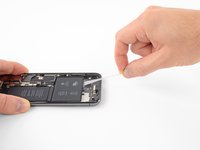
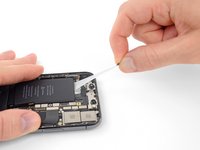
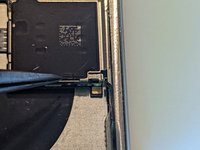
Carefully slide the flat edge of your spudger underneath the flex cable below the microphone.
-
Twist gently to separate the microphone, while being careful not to strain or damage the flex cable.
-
If needed, use the point of the spudger to finish separating the microphone from its notch in the front panel.
-
-
-
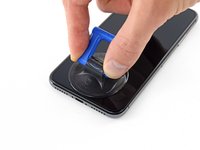
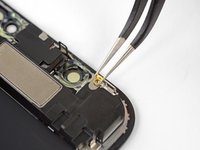
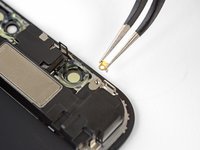
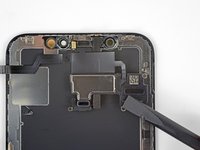
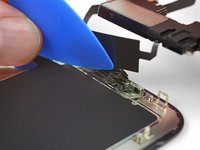
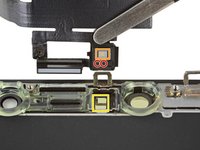
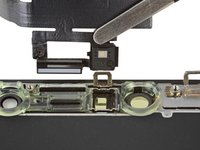
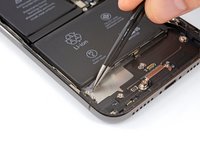
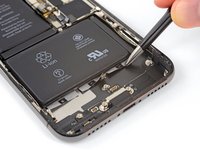
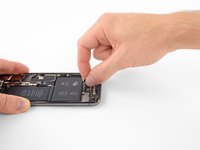
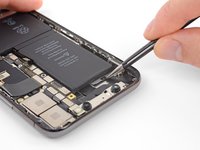
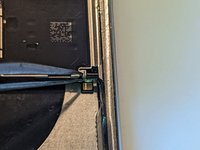
Working left to right, slide an opening pick beneath the flex cable and underneath the proximity sensor + flood illuminator module.
-
Gently wiggle and lift to separate the module from its notch in the front panel.
-
-
-
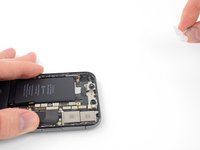
If you successfully removed the entire ambient light sensor, as shown in the first photo, continue to the next step below.
-
If the white diffuser strip detached and remains embedded in the display, as shown in the second photo, you will need to carefully lever it out along the top edge using a thin blade or pry tool. Re-applying heat first may make this task a bit easier.
In my case the diffuser came out with the light sensor, but not completely. A layer of the diffuser was left behind in the recess. We will see how it goes. ;) I will report back.
As did mine. I managed to get the thin strip out with tweezers, it is like a sliver of tape, but not sure whether to install in new screen Did yours work OK without?
P Bond -
what colour is the diffuser
also can you show the position of sensors going back into the new screen
-
-
-
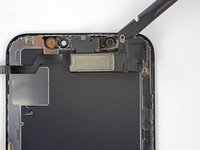
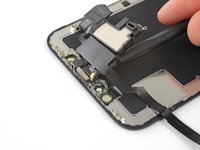
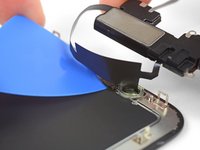
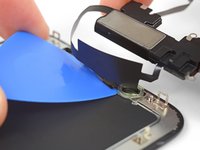
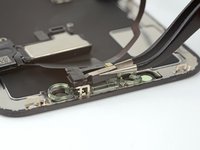
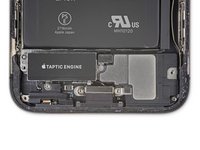
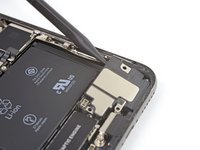
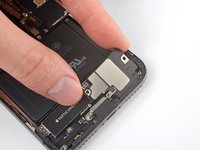
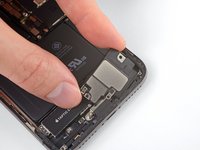
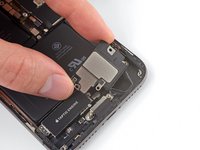
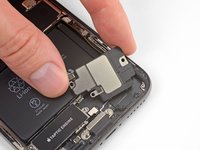
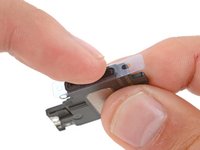
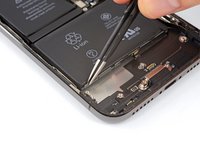
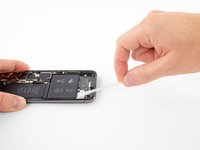
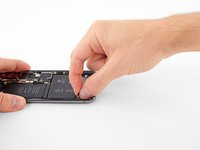
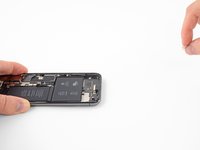
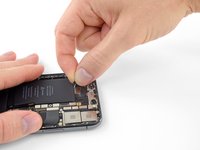
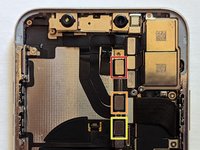
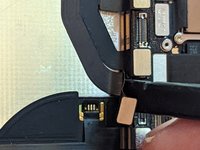
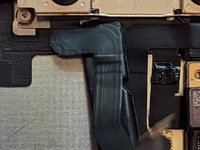
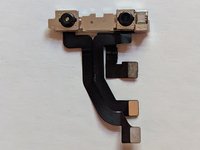
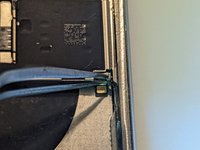
Remove the earpiece speaker and front sensor assembly.
-
Proximity sensor
-
Flood illuminator
-
The module must be positioned so that these components are not obstructed by any adhesive.
there was no bracket on my new screen I purchased from here.. am I supposed to heat up and remove the old one, or was their supposed to be one on the new screen ??
@br0k3nilluzion If your new display didn’t come with a front camera frame, you can (and should) remove the old one from your broken display and transfer it over. Use heat and careful wiggling/prying to remove it—and if it’s stubborn, add a few drops of isopropyl alcohol. Hope this helps!
Does face-id stop working if the black plastic separates from the flex(The orange and red dot)?
If the black plastic piece with the flood illuminator and the proximity sensor is separated from the flex cable, then Face ID will definitely not work. Be very careful not to damage any of the parts in the front sensor assembly.
There is some sort of a tape in front of the flood illuminator which is not present on the replacement screen! Is that gonna cause a problem too?
BTW, it’s so difficult to position the front camera frame without glue. I guess it takes a few attempts of trial and error!
It might not cause any major problems, but there’s a chance that it could effect FaceID functionality. If possible, transfer the tape from the old screen to the new one.
I find it better, regardless of if your new screen comes with the transparent front camera frame, to remove the front sensor assembly from the old screen with the frame, and lifting up the whole assembly using the frame. That way you do not need to apply heat directly to the fragile assembly, but apply it to the other side, the front of the screen at the top, instead, to soften the frame adhesive. The frame is then usually easy to pry loose using a narrow spudger, and comes off cleanly. After that it is much easier to remove the sensors and microphone from the frame, no heat needed usually. And if your new screen doesn’t come with the frame, just plonk the whole frame/sensor assembly down in the right place, and boom, Bob’s your uncle.
Hello I have an iPhone X i Bought it in 2019 with Face ID not working ( not available try later ) I think the screen was changed with another original , tru tone Off , Als off no auto brightness (and the PROXIMITY SENSOR too ! ) no black screen in calls, i would like to ask u if the earpiece speaker flex was changed with another one (all components ) not the original , did proximity sensor still work ?? Because I don’t know is the original flex of my iphone or not ? I found some scratches in the flex it appears to have small cut so I don’t know the PROXIMITY SENSOR not working because there are a small cut in the flex or because the flex is not the same ?? And if the flex is not the original it can disable (proximity sensor)too not only flood and als ?? Thank you
Yes it should still work. If you change the assembly to one that isn’t original to that iPhone X everything except the FaceID should still work - I have done so several times for clients. So the reason for yours not working is probably the same small scratches and cuts you have seen. The cable is a bit fragile and some of the copper leads running through it are extremely thin.
Lars -
To keep True Tone function on the replacement screen you’ll need a chip data programmer EEPROM to copay data from the old screen onto the new one. There a device called JC-V1 which should do the trick.
Screen glitching slightly after changing the screen. Any suggestion to what it can be?
Tim. I had a glitchy screen as well. It would force touch out of nowhere, and “ghost touch” every now and then. Eventually, the top half of the screen stopped responding. Reach out to customer service ASAP. You may have a defective screen.
My front ear speaker not working . The mic it’s working . Apple said you have to replace all the screen to fix the ear speaker because it’s connected with one cable all together. If I buy the speaker and change it myself it will work after or I’m getting into trouble?
I have the same problem. I have the same problem. how did you solve?
Thank you so much for this. It does not look at all like it needs to be removed.
Thank you, Jim, came here just to look for that advice!
Do I remove the blue film on the back of the screen before re-installing the front sensors and speaker? Or can it be removed after they are in place?
Jssamp -
can this piece assembly cause for the back camera and flashlight not work? All I did was change the screen and transfer this earpiece and it says warning sign that the flashlight needs to cool down and back camera not working
disregard my last post, problem solved on my end customer had a bad back camera due to bad fall and so i replaced it and now the back camera and flashlight works. :)
Hello I replaced today the second time iphone x display. The first time after a while the front camera stopped working. Today mounted the second time the display and the front camera works, while the rear one does not work. What can I do? Thanks
-
-
-
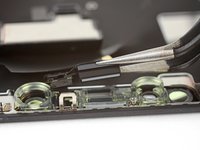
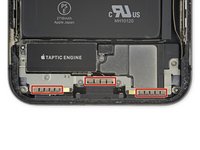
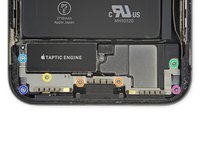
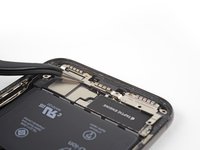
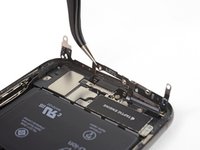
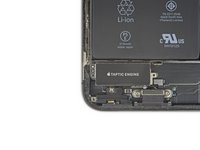
Remove the seven screws securing the bracket below the Taptic Engine and speaker:
-
Two Y000 1.9 mm screws
-
One Y000 1.2 mm screw
-
One Y000 1.6 mm screw
-
One Phillips 2.4 mm screw
-
One Phillips 1.7 mm screw
-
One Phillips 1.5 mm screw
For battery replacement:
It is not necessary to remove Taptic Engine and speaker to replace a battery. Go straight to the step #33
Additional video: https://youtu.be/2GfBOlJEW10
I wish I seen this before I did all that! Thank you for that information. Next time I do something like this. I'm gonna pay more attention to the comments.
Removing the Taptic Engine and speaker greatly improves your chances of getting the battery adhesive strips out intact. If those break, you’ll have a much tougher time.
Boy, I tried to skip removing these items but was unable to get the glue strips out with them in place, not much to grab and tabs were kind of stuck to a seam in the battery, and hard to tell the difference between the seam and the strip tabs. For me I had to remove these items to get this done.
I stopped removing things after getting the display side off. There were 3 screws stripped on the speaker cover which wouldn't come out so I punted. Just pried the battery out with a smudger tool and some patience, starting at the top and working towards the bottom. New battery is in and working fine.
Thanks for not removing the following steps. this made me break the connector for the bottom speakers >:(
The screws color and quantities in list don’t match the schematic ! I wish i had a magnetic screw mat before starting, because not only i removed the Taptic Engine and speaker unnecessarily, but i also lost a screw ?
Does anyone know the purpose of this bracket "with grounding pads"? What would be the possible side effects if it was damaged or not connected properly during reassembly?
Hello, in my case the grounding pads are damaged. I've had problems since EMC. When I try to charge wirelessly, the iphone starts wild button presses (Gosting).
Does anyone know, where I can get new grounding pads (with or without bracket)?Sure would like to know WHY the warning "Be careful not to touch the three rows of grounding pads..." What would or could happen if I did touch them??
Removing the battery strips is a major PITA, just skip this step and everything onwards, remove the one strip on the top part of the battery (according to step 33) and for the bottom part of the battery, pry it off with a plastic spudger.
Yes, this is not the elegant solution, but the quickest and easiest one. This method is better, as you don't want to keep the old battery anyway, so why bother. (You must not puncture the battery though! But as long as you're only working with a plastic tool and are careful, nothing can happen from my experience.)
Remove the adhesive from the top part of the battery, squirt some ipa into the bottom part and it will come off easily, then skip to 38.
-
-
-
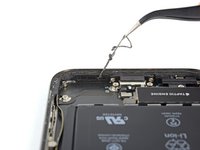
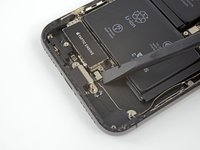
Lift the bracket from the edge nearest the battery. Don't try to remove it fully, as it's still connected via a small flex cable.
Does anyone know, where I can get new grounding pads (with or without bracket)?
-
-
-
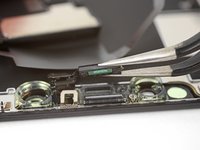
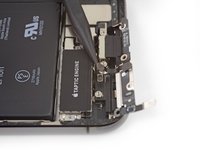
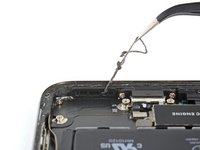
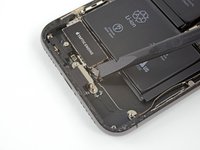
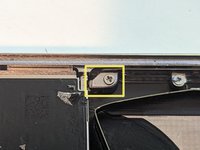
Remove the 2.1 mm Y000 screw securing the speaker connector cover.
L'unique vis non?
Effectivement ;-) Merci pour les bons yeux et la remarque !
-
-
-
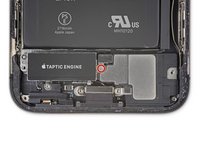
Use the tip of a spudger to pry up and disconnect the speaker connector.
As mentioned in a comment by timblake2112 (see step 29), this step is not necessary and can be skipped skipped. I would advise you to do so, as removing your speaker is guaranteed to ruin your gasket and rubber seal. This will result in loss of water resistancy of your iPhone and could potentially harm the sound quality of your speaker.
Try removing the Taptic Engine without removing the speaker. It might still be possible removing the battery adhesive strips and your speaker will stay in its original condition.
-
-
-
Hold the speaker by its side edges and rock it side-to-side, separating the adhesive securing it to the bottom edge of the iPhone.
-
Pull the speaker away from the bottom edge of the iPhone until the adhesive gasket separates.
As mentioned in a comment by timblake2112 (see step 29), this step is not necessary and can be skipped skipped. I would advise you to do so, as removing your speaker is guaranteed to ruin your gasket and rubber seal. This will result in loss of water resistancy of your iPhone and could potentially harm the sound quality of your speaker.
Try removing the Taptic Engine without removing the speaker. It might still be possible removing the battery adhesive strips and your speaker will stay in its original condition.
-
-
-
Remove the speaker.
You don’t need to remove the speaker and ruin its gasket. You can wiggle and slide the taptic engine out without removing the speaker. I’ve done this twice on rear shell replacement jobs.
-
-
-
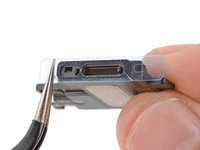
Use tweezers to peel off and remove all the old gasket from the frame and speaker.
-
Use a microfiber cloth and isopropyl alcohol to clean all the gasket's adhesive residue from the frame and speaker.
-
Before installing the speaker gasket, find its proper orientation on the bottom of the speaker—the large cutout on the gasket should go around the speaker grille mesh.
-
Remove the larger, clear liner from the gasket and use tweezers to carefully put the gasket into place on the bottom of the speaker.
-
Use your fingers or a spudger to firmly press the gasket into place to secure it with the adhesive.
-
Remove the remaining liner and put the speaker into place, making sure the speaker connector doesn't get stuck underneath.
-
-
-
Each piece of adhesive has a black pull-tab at the end, which is lightly adhered to the side edge of the battery.
-
-
-
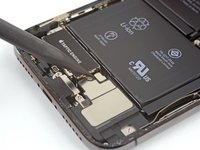
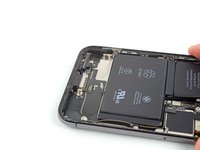
Separate the first battery adhesive tab from the bottom edge of the battery.
hole breaks instantly on pulling. adhesive tab does not release from side of battery
just pry it off, why bother
-
-
-
To increase your odds of success:
-
Don't press down on the battery. Hold the iPhone firmly by its sides.
-
Keep the strips flat and unwrinkled as you pull.
-
Pull very slowly, giving the strip time to stretch and separate. It takes around 15-30 seconds of stretching to remove each strip.
-
Pull at a low angle so the strip doesn't snag along the bottom edge of the battery.
-
If a strip does break off underneath the battery and cannot be retrieved, move on to the other strips and then continue with the additional steps below.
-
-
Bu adımda kullanılan alet:Tweezers$4.99
-
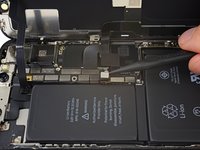
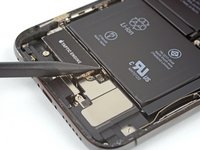
Grab one of the outer battery adhesive tabs and slowly pull it away from the battery, toward the bottom of the iPhone.
-
Pull steadily, maintaining constant tension on the strip until it slips out from between the battery and the rear case.
-
-
-
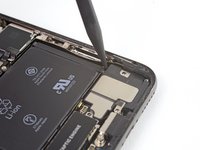
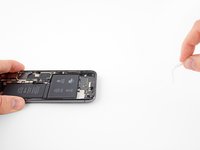
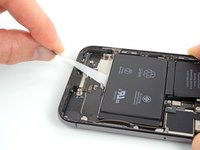
Peel and separate the pull tab on the final adhesive strip, on the top edge of the upper battery cell.
surtout ne pas passer avec la spatule par le bas, vous risqueriez d arracher la nappe du volume et du nfc,
-
-
-
If any of the adhesive strips broke off and the battery remains stuck to the rear case, prepare an iOpener or use a hair dryer to heat the rear case directly behind the battery.
-
Flip the iPhone back over and thread a strong piece of string (such as dental floss or a length of thin guitar string) underneath the battery.
-
Wrap the ends of the string around a cloth (or wear gloves) to protect your fingers.
-
Pull the string from side to side in a sawing motion all along the length of the battery to separate the adhesive. This can take some time since the adhesive is slow to deform, but with patience it will come free. Do not deform or damage the battery.
-
-
-
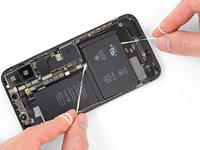
Grasp the battery from the bottom edge and remove it from the iPhone.
-
Adhere the battery, disconnect it, and continue reassembling your device.
When reinstalling the battery, the Taptic Engine does serve as a useful way to orient the battery, but it should also be noted that if you push right up against that as you install the battery (as I did) and don’t pay any attention to power connector (shown in step 14), there is a risk that the connector from the battery will not line exactly with the connector port on the board. Mine was only off a mm so I had to get a little creative to try to get it to stretch to reach and connect to the port on the board. Just keep that in mind as you place the battery (with adhesive) down.
-
-
-
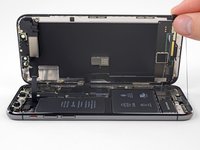
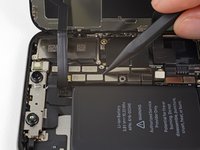
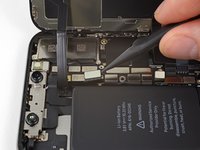
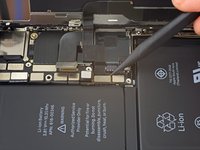
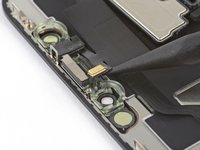
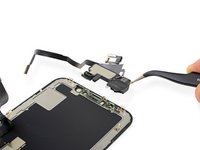
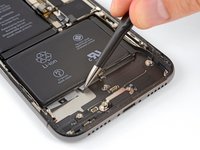
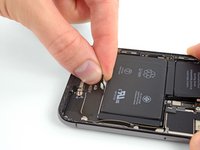
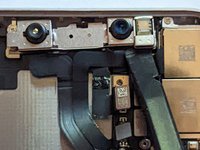
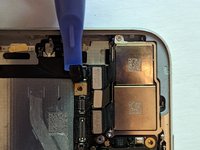
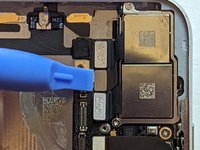
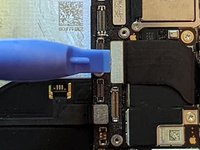
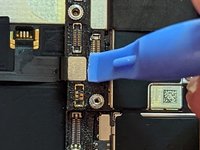
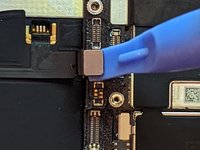
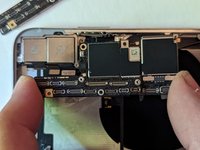
Using the flat end of a spudger, disconnect the three front camera assembly cables:
-
The dot projector.
-
The front camera.
-
The infrared camera.
This thing is highly prone to damage. Treat it with baby hands! Mine stopped working after changing my buttons and I was super careful
-
-
-
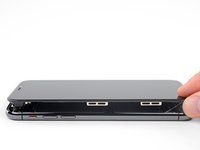
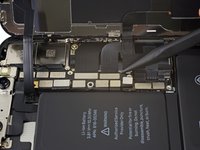
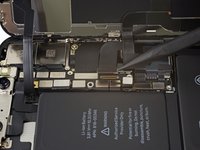
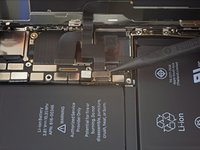
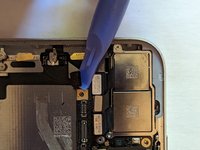
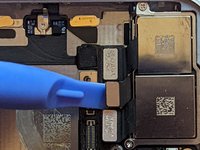
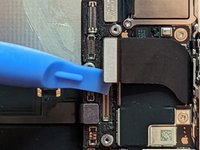
Disconnect the following cable connectors.
-
The WiFi Antenna connector.
-
The Wide-Angle Camera connector.
-
The Power Button / Flash / Microphone connector.
-
The Telephoto Camera connector.
-
The Dock Flex connector.
-
The Button / Wireless Charging connector.
-
The Cellular Antenna connector.
-
-
-
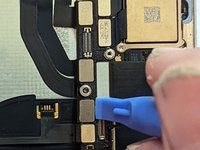
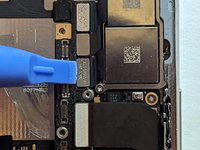
Disconnect the Power Button / Flash / Microphone cable connector.
-
-
-
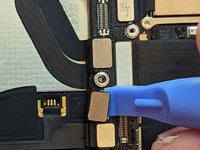
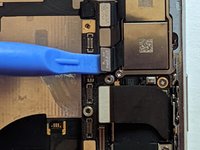
Disconnect the Dock Flex cable connector.
-
Bend the cable 90 degrees straight up to allow clearance to remove the logic board.
-
-
-
Disconnect the Button / Wireless Charging cable connector.
-
-
-
Disconnect the Cellular Antenna cable connector.
-
Bend the cable out of the way.
-
-
-
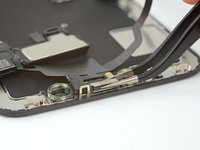
Remove the two Phillips mounting screws.
-
One 2.7 mm Phillips screw.
-
One 2.1 mm Phillips screw.
-
Remove the 2.0 mm Phillips grounding screw.
-
Remove the grounding tab.
-
-
-
When the SIM card is ejected, a pin slides out from the frame and pushes on the eject lever in the SIM card carrier. The pin needs to be pushed back into the frame so it will not block the removal of the logic board.
-
-
-
The logic board assembly is mounted on two posts going through the lower board and are secured to the upper board. In order to remove it, you must lift it evenly straight up to clear the stand-offs.
-


To reassemble your device, follow these instructions in reverse order.
To reassemble your device, follow these instructions in reverse order.
İptal et: Bu kılavuzu tamamlamadım.
16 farklı kişi bu kılavuzu tamamladı.

Ekip

4 Yorum
If I change the upper screen speakers can my face if start working back cause the one that is there before is not working again
It may be a language issue, but I am not completely clear about what you are asking.
The upper speaker is attached to the earpiece speaker assembly that also has the flood illuminator, which is part of the Face ID system. That same assembly also contains a microphone and proximity sensor, but only the flood illuminator is required for Face ID to work.
So as long as you have the original flood illuminator, the other parts of that assembly can be replaced, given a technician with sufficient skills and equipment. The earpiece speaker is held on with just two solder points and is relatively easy to replace, but the other components require microsoldering skills.
So as long as you have the original earpiece speaker assembly, Face ID should work. If you replace the entire assembly, you will lose Face ID. You can, however, replace just the speaker itself as long as you keep the rest of the original assembly.
iPhone X Earpiece Speaker Replacement Without Losing Face ID
Since this got published I think MS has released a bypass on broken face ID replacements.
If the MS you mention stands for Microsoft, then you're way off base, as only Apple can do this sort of thing.
It's my understanding the release of iOS 18 has enabled the replacement of some parts that formerly caused pairing issues, but as far as I know, the Face ID parts are not covered. I would love to hear from someone with authoritative knowledge if that's not the case.