Giriş
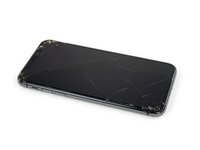
The logic board, also known as the motherboard, contains the CPU and most of the integrated circuit chips that control the operation of the phone. iPhone X logic boards are notoriously difficult to repair, as they consist of two boards stacked on top of one another and soldered together to form a single unit. Repairing any component sandwiched between the two boards requires them to be disassembled, an additional and difficult step in board repair that is already hard enough and requires microsoldering expertise.
This guide will show you how to replace the logic board.
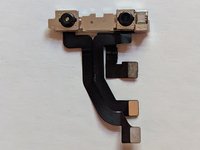
However, in order to keep the Face ID function working, the Earphone / Proximity Sensor assembly and the front camera assembly, both of which must be paired to the logic board, must also be replaced.
If the loss of Face ID is acceptable, then you can use this guide to to replace the logic board by itself.
Neye ihtiyacın var
-
-
Insert a SIM card eject tool or a paperclip into the small hole in the SIM card tray, located near the side button on the edge of the iPhone.
-
Press firmly to eject the tray.
-
-
-
Power off your iPhone before beginning disassembly.
-
Remove the two 6.9 mm-long pentalobe screws at the bottom edge of the iPhone.
-
-
-
Measure 3 mm from the tip and mark the opening pick with a permanent marker.
-
-
-
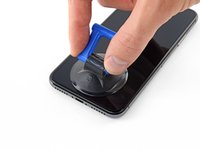
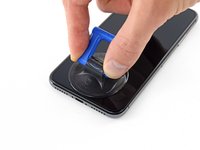
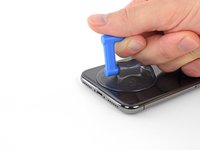
Lay overlapping strips of clear packing tape over the iPhone's screen until the whole face is covered.
-
If you can't get the suction cup to stick in the next few steps, fold a strong piece of tape (such as duct tape) into a handle and lift the screen with that instead.
-
-
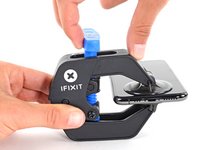
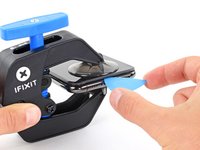
Bu adımda kullanılan alet:Clampy - Anti-Clamp$24.95
-
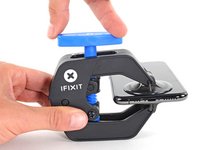
Pull the blue handle backwards to unlock the Anti-Clamp's arms.
-
Slide the arms over either the left or right edge of your iPhone.
-
Position the suction cups near the bottom edge of the iPhone—one on the front, and one on the back.
-
Squeeze the cups together to apply suction to the desired area.
-
-
-
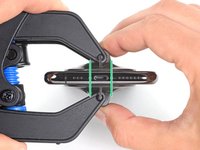
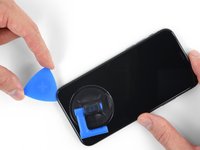
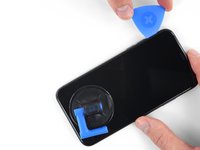
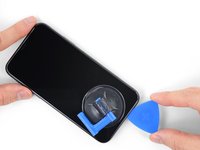
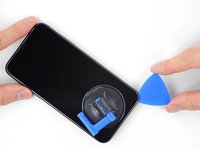
Heat an iOpener and thread it through the arms of the Anti-Clamp.
-
Fold the iOpener so it lays on the bottom edge of the iPhone.
-
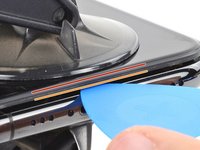
Wait one minute to give the adhesive a chance to release and present an opening gap.
-
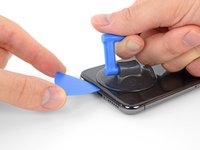
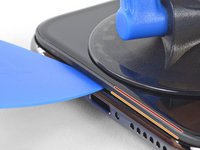
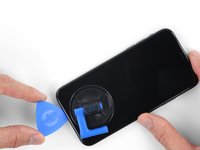
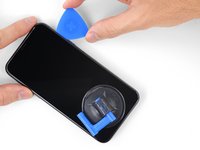
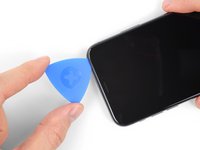
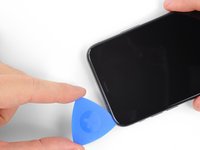
Insert an opening pick under the screen and the plastic bezel, not the screen itself.
-
Skip the next three steps.
-
-
-
Use a hairdryer or heat gun or prepare an iOpener and apply it to the lower edge of the iPhone for about a minute in order to soften up the adhesive underneath.
-
-
Bu adımda kullanılan alet:Magnetic Project Mat$19.95
-
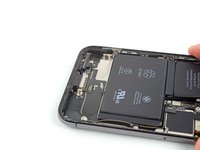
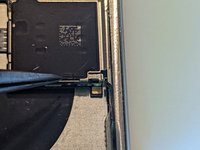
Remove five Y000 screws securing the logic board connector bracket, of the following lengths:
-
Three 1.1 mm screws
-
One 3.1 mm screw
-
One 3.7 mm screw
-
-
-
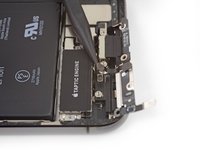
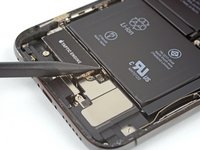
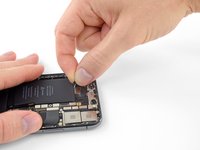
Use the point of a spudger or a clean fingernail to pry the battery connector up from its socket on the logic board.
-
Bend the connector slightly away from the logic board to prevent it from accidentally making contact with the socket and providing power to the phone during your repair.
-
-
-
-
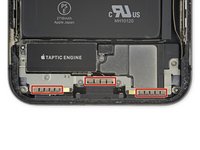
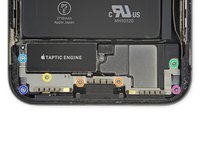
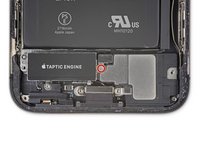
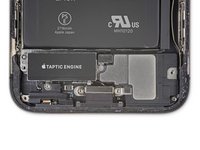
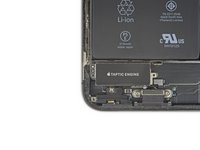
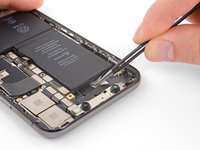
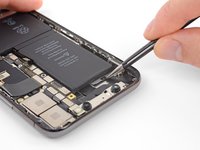
Remove the seven screws securing the bracket below the Taptic Engine and speaker:
-
Two Y000 1.9 mm screws
-
One Y000 1.2 mm screw
-
One Y000 1.6 mm screw
-
One Phillips 2.4 mm screw
-
One Phillips 1.7 mm screw
-
One Phillips 1.5 mm screw
-
-
-
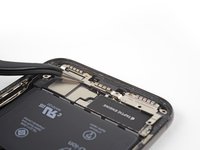
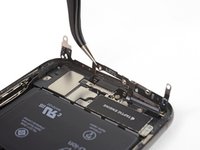
Use tweezers to peel off and remove all the old gasket from the frame and speaker.
-
Use a microfiber cloth and isopropyl alcohol to clean all the gasket's adhesive residue from the frame and speaker.
-
Before installing the speaker gasket, find its proper orientation on the bottom of the speaker—the large cutout on the gasket should go around the speaker grille mesh.
-
Remove the larger, clear liner from the gasket and use tweezers to carefully put the gasket into place on the bottom of the speaker.
-
Use your fingers or a spudger to firmly press the gasket into place to secure it with the adhesive.
-
Remove the remaining liner and put the speaker into place, making sure the speaker connector doesn't get stuck underneath.
-
-
-
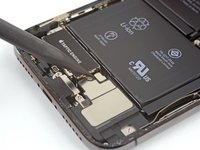
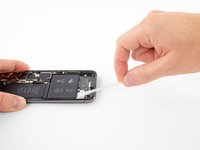
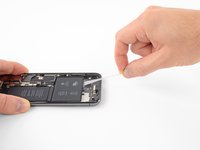
Each piece of adhesive has a black pull-tab at the end, which is lightly adhered to the side edge of the battery.
-
-
-
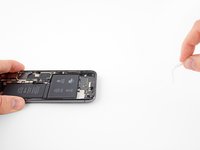
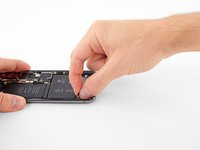
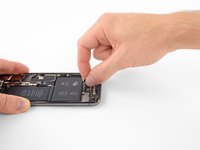
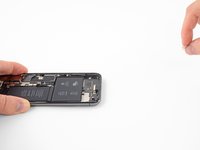
To increase your odds of success:
-
Don't press down on the battery. Hold the iPhone firmly by its sides.
-
Keep the strips flat and unwrinkled as you pull.
-
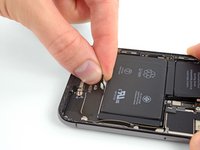
Pull very slowly, giving the strip time to stretch and separate. It takes around 15-30 seconds of stretching to remove each strip.
-
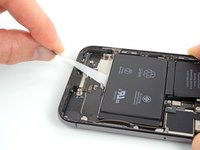
Pull at a low angle so the strip doesn't snag along the bottom edge of the battery.
-
If a strip does break off underneath the battery and cannot be retrieved, move on to the other strips and then continue with the additional steps below.
-
-
-
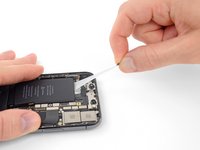
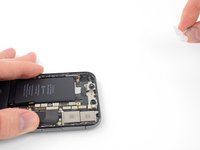
If any of the adhesive strips broke off and the battery remains stuck to the rear case, prepare an iOpener or use a hair dryer to heat the rear case directly behind the battery.
-
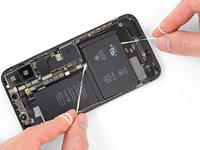
Flip the iPhone back over and thread a strong piece of string (such as dental floss or a length of thin guitar string) underneath the battery.
-
Wrap the ends of the string around a cloth (or wear gloves) to protect your fingers.
-
Pull the string from side to side in a sawing motion all along the length of the battery to separate the adhesive. This can take some time since the adhesive is slow to deform, but with patience it will come free. Do not deform or damage the battery.
-
-
-
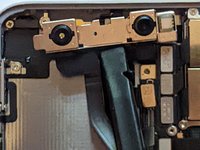
Using the flat end of a spudger, disconnect the three front camera assembly cables:
-
The dot projector.
-
The front camera.
-
The infrared camera.
-
-
-
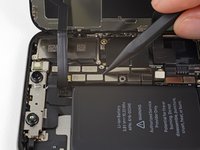
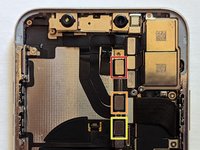
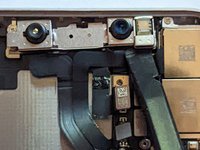
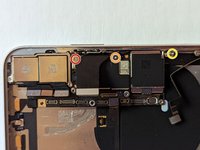
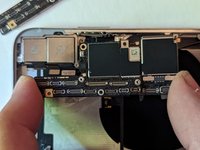
Disconnect the following cable connectors.
-
The WiFi Antenna connector.
-
The Wide-Angle Camera connector.
-
The Power Button / Flash / Microphone connector.
-
The Telephoto Camera connector.
-
The Dock Flex connector.
-
The Button / Wireless Charging connector.
-
The Cellular Antenna connector.
-
-
-
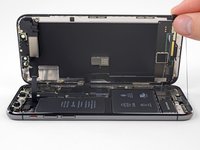
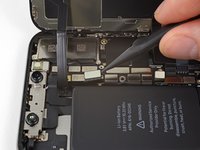
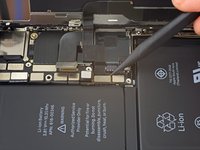
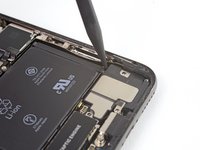
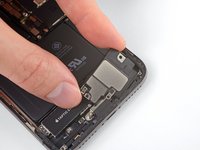
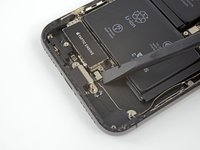
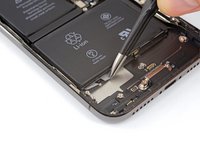
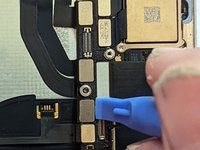
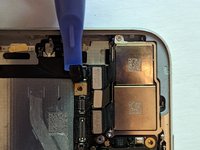
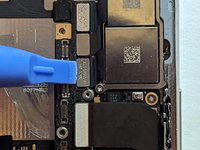
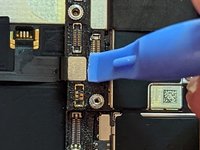
Disconnect the Power Button / Flash / Microphone cable connector.
-
-
-
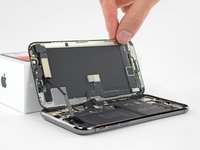
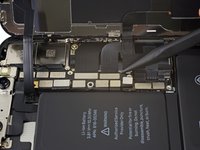
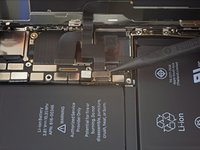
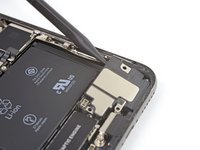
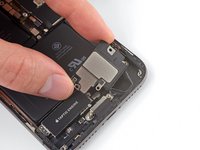
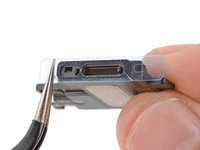
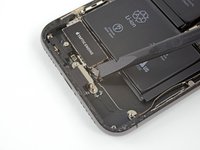
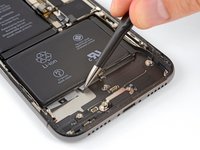
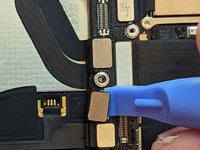
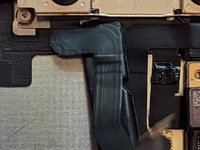
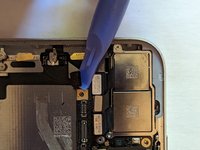
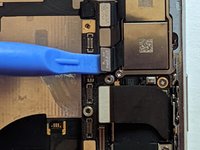
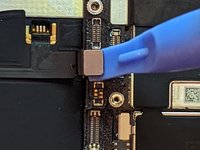
Disconnect the Dock Flex cable connector.
-
Bend the cable 90 degrees straight up to allow clearance to remove the logic board.
-
-
-
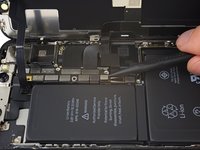
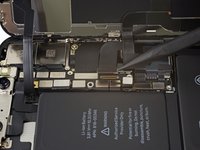
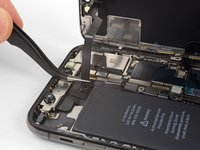
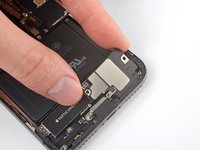
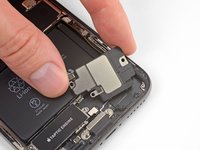
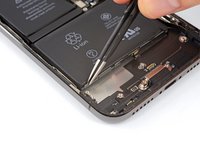
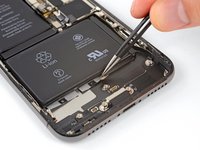
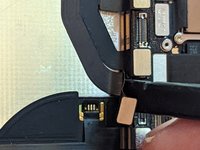
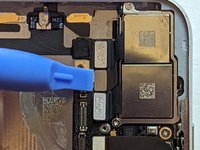
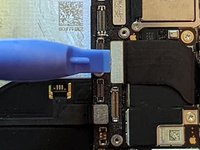
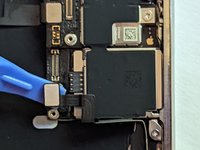
Disconnect the Button / Wireless Charging cable connector.
-
-
-
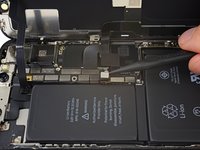
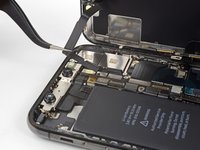
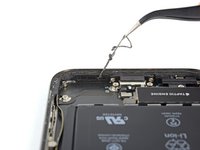
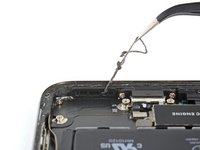
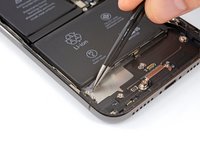
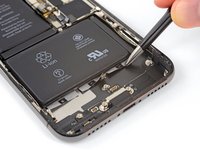
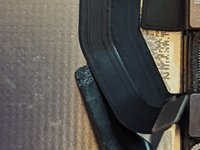
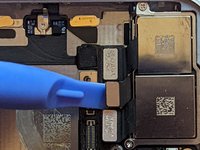
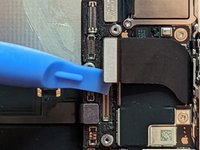
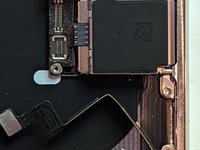
Disconnect the Cellular Antenna cable connector.
-
Bend the cable out of the way.
-
-
-
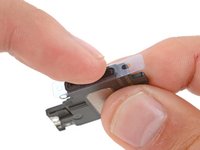
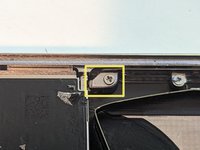
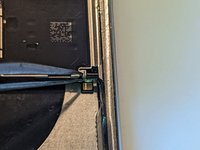
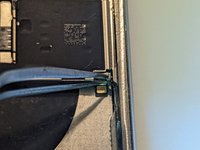
When the SIM card is ejected, a pin slides out from the frame and pushes on the eject lever in the SIM card carrier. The pin needs to be pushed back into the frame so it will not block the removal of the logic board.
-


To reassemble your device, follow these instructions in reverse order.
To reassemble your device, follow these instructions in reverse order.
İptal et: Bu kılavuzu tamamlamadım.
15 farklı kişi bu kılavuzu tamamladı.

Ekip

16Kılavuz Yorumları
Existe compatibilidad entre la tarjeta lógica del iPhone X y el iPhone XS ??
Es decir, puedo sustituir la del X por la del XS ?
Hi Omar,
In general the answer to that is pretty much always no. Each phone is designed with a customized motherboard made specifically for that phone, along with all of the components inside it. Unfortunately for us, that means there is virtually no possibility of interchange between different models and that holds true for the iPhone X and XS. Each model tends to change the type of parts that are plugged into it, the position of those connections and even the type of connector. Those changes also result in different shapes and mounting points of the logic boards, meaning they won't even physically fit into a different housing.
Hello Jerry,
Thanks for this tutorial, however are there apple brand motherboards for iphone x available on the market? There are numerous items on numerous websites, how can I be sure it's reliable and works properly etc.?
Hi Ray,
Although it's entirely possible for companies (Chinese ones in particular) to reverse engineer iPhone motherboards and components and make a decent copy, the catch is that Apple controls the firmware that goes on them and there are parts of the software that cannot be duplicated. As a result no one but Apple can make a fully functioning iPhone X motherboard, especially not one that is paired to the Face ID components.
However, there is a large market for phones that have been scrapped and scavenged for parts, so there are a lot of places that sell those. Most of the sellers ensure that the motherboards they sell do not have iCloud or SIM locks in place, but you'll want to verify that the seller states that explicitly. And if you want Face ID to work, you have to buy the paired components that go with the motherboard; specifically the front camera assembly and the earpiece speaker assembly on the display.
(Continued...)
(...Continued)
Since all the motherboards on the market are used, obviously you can't be 100% sure that every function is going to work correctly, but the reputable sellers will have tested the boards they sell to weed out the ones with issues. The ones sold on AliExpress, for example are generally tested and should have a guarantee of functionality. There are also reputable online stores that sell the parts as well; go through some of the answers forums to get an idea of which companies get recommendations.
eBay can be a good source to save money, but it's definitely a buyer beware situation, depending on the seller. You'll want to verify the IMEI number on an IMEI checking website to make sure the Find My iPhone function is turned off, that it's not iCloud locked and that it's not SIM locked. In general, the boards are pretty reliable so in most cases if it powers up at all, it will usually work.
So it's like buying anything used; you want to find a reputable seller who will guarantee their product.