Giriş
(Careful) Teardown of the HP model 11 of G5 EE, Commonly used in schools.
Graciously donated for guide making by my employer (IT department at school)
-
-
This is the HP Chromebook 11 G5 Education Edition, Commonly used in schools.
-
To start, remove all screws on the bottom of the device. This includes 10 PH1 screws, all of which are hidden by a rubber insert. This can be easily done with your smallest flat head screwdriver or something like a paperclip.
-
-
-
-
Starting with the removal of the battery, which appears to be made of 3 cells.
-
Disconnect the battery by pulling the cable out of the motherboard
-
The battery is held in with a single PH0 screw. Once removed, it can be pulled out.
-
Opening up the battery does, indeed, affirm it is made of 3 cells, as wekk as a controller.
-
The battery appears to have an internal sensor for temperature, to protect against it exploding in unsafe environments.
-
-
-
Focusing our attention back on the main body of the display you can remove the metal hinges from the top cover by removing 8 PH1 screws
-
There is also a sort of sticker holding the right hinge in. this can be carefully peeled off.
-
The display/webcam cable can be eased out by lightly pulling it out of its grooves, and disconnecting it from the webcam.
-
you can now remove the webcam by lightly prying it from the top cover, making sure to not actually break it.
-
-
Bu adımda kullanılan alet:Tweezers$4.99
-
Now, moving onto the speakers we can unplug them by disconnecting the connector on the left of the device. This connector can be quite tight, so you can leverage it out with tweezers.
-
from there, the speakers can be lifted out. (this may require some force)
-
-
-
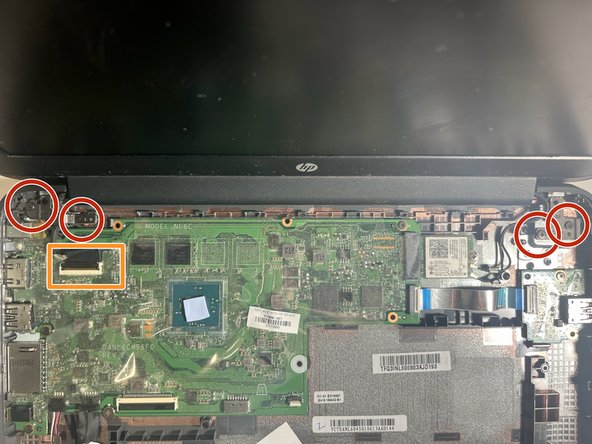
The motherboard is the next component to be removed.
-
First, disconnect the barrel plug from the motherboard.
-
Next, remove the 4 PH1 screws that secure the motherboard to the enclosure
-
Finally, remove the single PH1 screw securing the barrel plug to the enclosure, and remove the motherboard.
-
The barrel plug cable can then be pulled out with the barrel plug by simply lifting it off the enclosure, as it uses very little adhesive
-