Ana içeriğe geç

Google Pixel 2 XL Battery Replacement

Neye ihtiyacın var

  1. Dikkatli ol: adımlar 1-12 yapım altında olarak işaretlenen bir kılavuzdan alınmıştır.

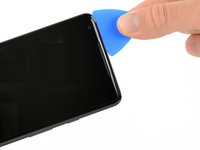
    Google Pixel 2 XL Battery Replacement, Opening Procedure: adım 1, 2 resimden 1. Google Pixel 2 XL Battery Replacement, Opening Procedure: adım 1, 2 resimden 2.
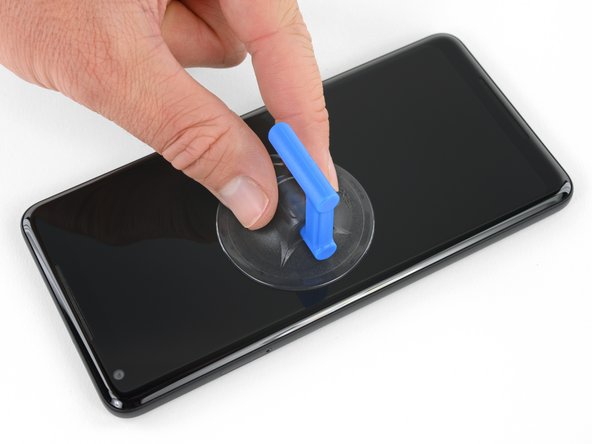
    • If your display glass is cracked, tape over the glass to prevent bodily harm and further breakage. This also makes a smooth surface allowing the suction cup to bond.

    • Apply a suction cup as close to the SIM slot edge of the phone as you can while avoiding the curved edge.

    • The suction cup will not make a good seal on the curved portion of the glass.

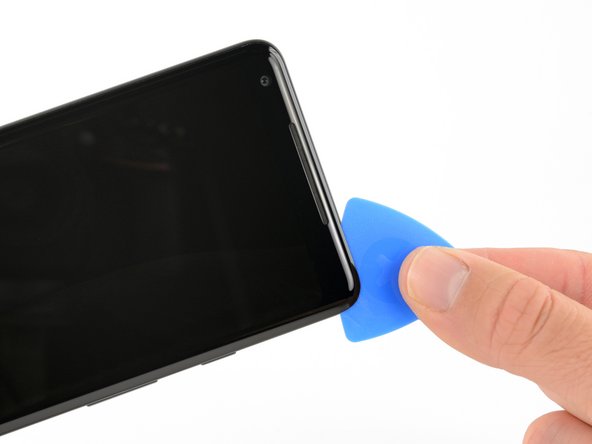
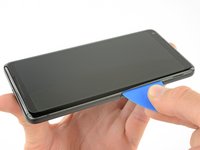
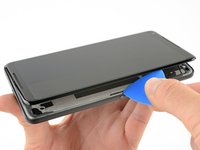
  2. Google Pixel 2 XL Battery Replacement: adım 2, 3 resimden 1. Google Pixel 2 XL Battery Replacement: adım 2, 3 resimden 2. Google Pixel 2 XL Battery Replacement: adım 2, 3 resimden 3.
    • Pull up on the suction cup with firm, constant pressure and insert an opening pick between the front panel and rear case.

    • This requires a significant amount of force and patience. If you have trouble, rock the suction cup and screen to weaken the adhesive, or apply heat with an iOpener, heat gun, or hair dryer.

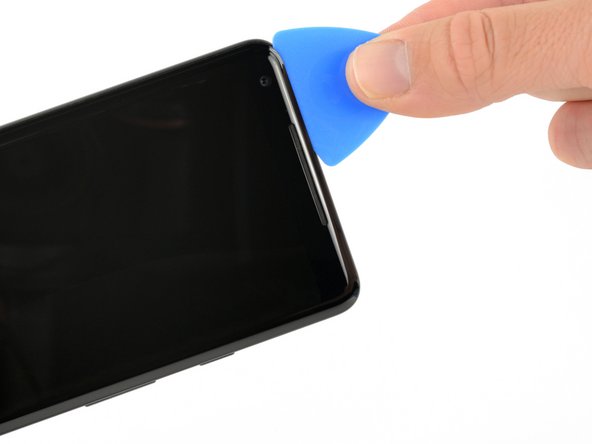
  3. Google Pixel 2 XL Battery Replacement: adım 3, 2 resimden 1. Google Pixel 2 XL Battery Replacement: adım 3, 2 resimden 2.
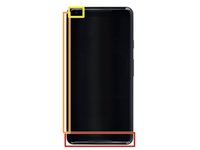
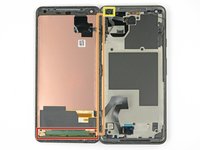
    • In the following steps, extra caution is required in certain areas to avoid damage to the phone:

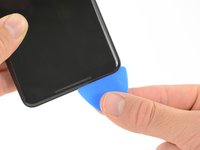
    • Do not insert the pick more than 0.25 inches (6 mm) into the bottom edge of the phone. If the pick contacts the folded portion of the OLED panel, it can damage the display.

    • Do not cut along the left edge; there are delicate display cables that can be damaged.

    • Only make very shallow cuts in the upper left corner; prying deeply can damage the front-facing camera.

  4. Google Pixel 2 XL Battery Replacement: adım 4, 2 resimden 1. Google Pixel 2 XL Battery Replacement: adım 4, 2 resimden 2.
    • Slide the opening pick down the right side of the phone to separate the display adhesive.

  5. Google Pixel 2 XL Battery Replacement: adım 5, 3 resimden 1. Google Pixel 2 XL Battery Replacement: adım 5, 3 resimden 2. Google Pixel 2 XL Battery Replacement: adım 5, 3 resimden 3.
    • In the following steps, use the flat edge of the opening pick, rather than a corner, to cut. This will help prevent inserting the pick too deeply.

    • Slide the opening pick around the lower-right corner and along the bottom edge of the phone.

  6. Google Pixel 2 XL Battery Replacement: adım 6, 3 resimden 1. Google Pixel 2 XL Battery Replacement: adım 6, 3 resimden 2. Google Pixel 2 XL Battery Replacement: adım 6, 3 resimden 3.
    • Reinsert the flat edge of the pick at the top-right corner of the phone, and slide it around the corner and the top edge of the phone.

  7. Google Pixel 2 XL Battery Replacement: adım 7, 2 resimden 1. Google Pixel 2 XL Battery Replacement: adım 7, 2 resimden 2.
    • Gently lift the display from the right side of the phone, opening it like a book.

    • If the display doesn't readily lift, do some extra prying to separate the last of the adhesive.

    • Don't try to fully separate the display yet, as fragile ribbon cables still connect it to the phone's motherboard.

    • Carefully lay the display flat on the table next to the rest of the phone, keeping it close to the phone to avoid straining the display and digitizer cables.

  8. Google Pixel 2 XL Battery Replacement: adım 8, 2 resimden 1. Google Pixel 2 XL Battery Replacement: adım 8, 2 resimden 2.
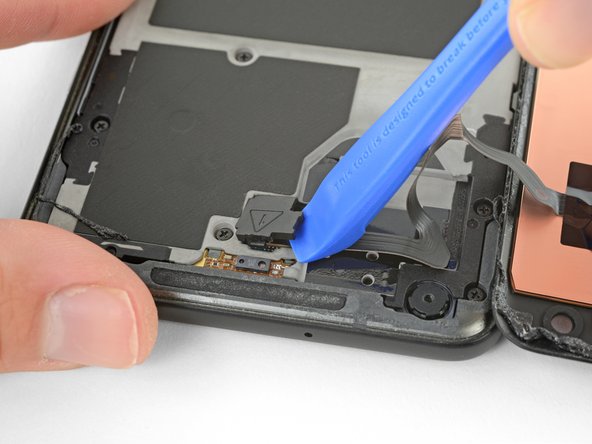
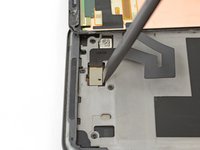
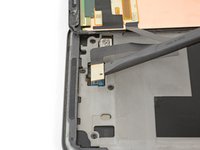
    • Use the corner of an opening tool to pry up and unclip on the lower edge of the digitizer cable connector cover.

    • The clip securing this cover is along the bottom edge.

    • Pry carefully to avoid damaging the cable underneath, or losing the cover itself.

    • Remove the connector cover.

    • Make sure to keep this component so you can reinstall it during reassembly.

  9. Google Pixel 2 XL Battery Replacement: adım 9, 2 resimden 1. Google Pixel 2 XL Battery Replacement: adım 9, 2 resimden 2.
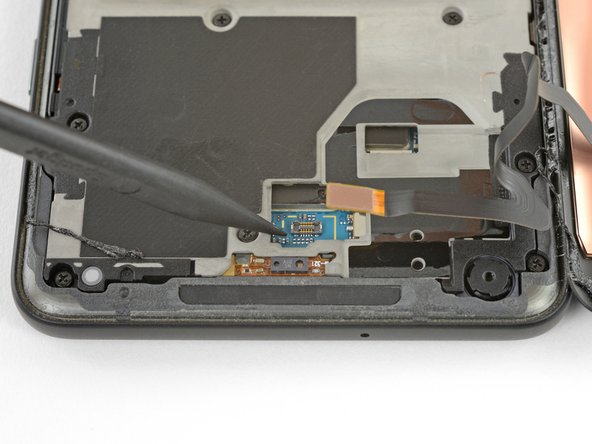
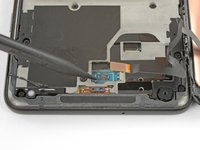
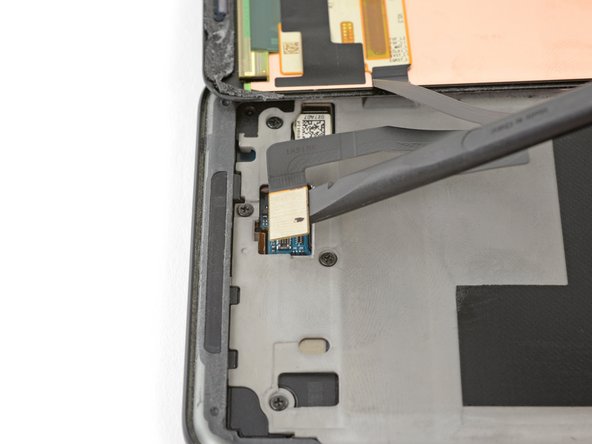
    • Use the point of a spudger to lift the digitizer cable connector up and out of its socket on the motherboard.

    • To re-attach press connectors like this one, carefully align and press down on one side until it clicks into place, then repeat on the other side. Do not press down on the middle. If the connector is misaligned, the pins can bend, causing permanent damage.

    • If any part of your screen doesn't respond to touch after your repair, re-seat this connector, making sure it clicks fully into place and that there's no dust or other obstruction in the socket.

  10. Google Pixel 2 XL Battery Replacement: adım 10, 1 resimden 1.
    • Use tweezers to remove any tape from the display connector cover.

  11. Google Pixel 2 XL Battery Replacement: adım 11, 2 resimden 1. Google Pixel 2 XL Battery Replacement: adım 11, 2 resimden 2.
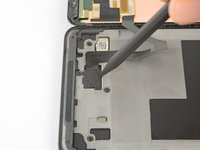
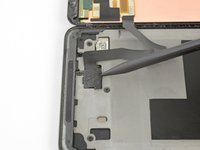
    • Insert the point of a spudger into the small hole on the edge of the display connector cover.

    • Use the spudger to pry the cover out of its recess.

    • Remove the connector cover.

    • Make sure to keep this component so you can reinstall it during reassembly.

  12. Google Pixel 2 XL Battery Replacement: adım 12, 2 resimden 1. Google Pixel 2 XL Battery Replacement: adım 12, 2 resimden 2.
  13. Google Pixel 2 XL Battery Replacement, Midframe: adım 13, 1 resimden 1.
    Bu adımda kullanılan alet:
    Magnetic Project Mat
    $19.95
    Satın Al
    • Remove eleven 3.8 mm Phillips screws securing the midframe.

    • Throughout this repair, keep track of each screw and make sure it goes back exactly where it came from.

  14. Google Pixel 2 XL Battery Replacement: adım 14, 3 resimden 1. Google Pixel 2 XL Battery Replacement: adım 14, 3 resimden 2. Google Pixel 2 XL Battery Replacement: adım 14, 3 resimden 3.
    • Insert an opening tool into the notch in the midframe near the volume buttons and pry the midframe up and away from the rest of the phone.

    • Remove the midframe.

  15. Google Pixel 2 XL Battery Replacement, Battery Connector: adım 15, 2 resimden 1. Google Pixel 2 XL Battery Replacement, Battery Connector: adım 15, 2 resimden 2.
    • Use the flat end of a spudger to disconnect the battery connector.

  16. Google Pixel 2 XL Battery Replacement, Battery: adım 16, 1 resimden 1.
    • If available, apply some isopropyl alcohol under each corner of the battery and allow it to penetrate for several minutes to help weaken the adhesive.

    • Alternatively, apply a heated iOpener to the back of the phone over the battery for at least two minutes. Reheat and reapply the iOpener as needed until the battery adhesive is sufficiently weakened.

  17. Google Pixel 2 XL Battery Replacement: adım 17, 2 resimden 1. Google Pixel 2 XL Battery Replacement: adım 17, 2 resimden 2.
    Bu adımda kullanılan alet:
    Plastic Cards
    $2.99
    Satın Al
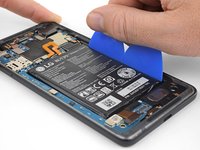
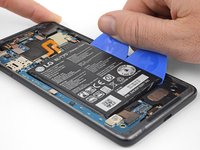
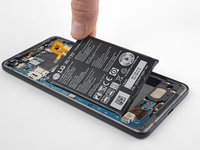
    • Insert a couple of opening picks or a plastic card along the right edge of the battery.

    • Apply steady, even pressure to slowly lever the battery up and out of the phone.

    • Try your best not to deform the battery during this process. Soft-shell lithium-ion batteries can leak dangerous chemicals, catch fire, or even explode if damaged. Do not use excessive force or pry at the battery with metal tools.

  18. Google Pixel 2 XL Battery Replacement: adım 18, 2 resimden 1. Google Pixel 2 XL Battery Replacement: adım 18, 2 resimden 2.
    • Remove the battery.

    • Do not reuse the battery after it has been removed, as doing so is a potential safety hazard. Replace it with a new battery.

    • If there's any alcohol solution remaining in the phone, carefully wipe it off with a lint-free cloth or allow it to air dry before installing your battery.

    • To install a new battery:

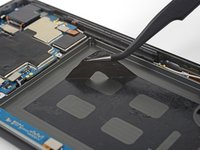
    • Use tweezers to peel away any remaining adhesive from the phone, and clean the glued areas with isopropyl alcohol and a lint-free cloth.

    • Secure the new battery with pre-cut adhesive or double-sided adhesive tape. In order to position it correctly, apply the new adhesive into the phone, not directly onto the battery. The adhesive should not touch any of the cables under the battery.

    • Press the battery firmly into place for 20-30 seconds.

Sonuç

To reassemble your device, follow the above steps in reverse order.

For optimal performance, after completing this guide, calibrate your newly installed battery.

Take your e-waste to an R2 or e-Stewards certified recycler.

Repair didn’t go as planned? Check out our Answers community for troubleshooting help.

60 farklı kişi bu kılavuzu tamamladı.

Adam O'Camb

Üyelik tarihi: 04/11/15

195.318 İtibar

416 adet Kılavuz yazıldı

18 Yorum

Just completed this last night. They weren't kidding when they all say the battery is no fun.

I managed to get it, but doesn't mean the old one wasn't bent like crazy when I was done. I was planning on keeping it as a backup since it wasn't bad, but I don't think I would risk it at this rate. Getting a thin stiff plastic to push through the adhesive along with the spudger helped.

There are a lot of components and boards along the edge of the battery. It's hard to pry without touching them. I saw a guide recommend taking the guts out to remove the battery.

One thing I would recommend while you're in there is to replace the thermal paste. Mine wasn't too bad after a year, but I'm sure it won't make a solid and effective cover on the processor to the heat pipe.

Gage Cook - Yanıt

Can I just use Artic silver MX4 for thermal paste? Or is there a paste specifically for it?

DheerajR -

Arctic Silver should be fine!

Arthur Shi -

Its pretty easy to do if you use the iPhone battery tool/pryer thing!

Warren Binder - Yanıt

Never again, a nightmare to get it changed out.

Jamal Hussain - Yanıt

Yorum Ekle

İstatistikleri Görüntüle:

Son 24 Saat: 16

Son 7 gün: 89

Son 30 gün: 352

Her zaman: 62,943