Giriş
This repair guide was authored by the iFixit staff and hasn’t been endorsed by Google. Learn more about our repair guides here.
Use this guide to remove and replace the rear camera assembly on the Google Pixel 5. Both cameras modules are replaced as a single unit.
Neye ihtiyacın var
-
-
Heat an iOpener and apply it to the bottom edge of the screen for one minute.
-
-
-
Screen seam: This seam separates the screen from the rest of the phone. Do not pry at this seam.
-
Bezel seam: This is where the plastic bezel designed to protect the screen meets the frame. It's held in place by plastic clips. This is where you should pry.
Please remove the image of the pick in the bottom of the phone in Step 2. This led me to place a pick there BEFORE step 5 which damaged my digitizer. Now I have to replace the entire screen as a result.
Alternatively, add the image from step 5 with the suction cup in place, or just draw an arrow digitally to the seam you're referring to in step 2. Or call "Step 2" "Important Note" instead of a step.
Wow, I'm glad I read this first. I too assumed this step was about inserting the pick, but wasn't sure because it wasn't clearly written that way.
Agreed with the "important note" idea, along with combining this with step 5 where the context is actually relevant.
-
-
-
Pull the blue handle towards the hinge to disengage opening mode.
-
Position the suction cups near the bottom edge of the screen—one on the front, and one on the back.
-
Push down on the cups to apply suction to the desired area.
-
-
-
Push the blue handle away from the hinge to engage opening mode.
-
Turn the handle clockwise until you see the cups start to stretch.
-
Wait one minute to give the adhesive a chance to release and present an opening gap.
-
Insert an opening pick under the screen and its bezel frame when the Anti-Clamp creates a large enough gap.
-
Skip the next step.
-
-
-
Apply a suction cup to the screen, as close to the heated edge as possible.
-
Pull up on the suction cup with strong, steady force to create a gap.
-
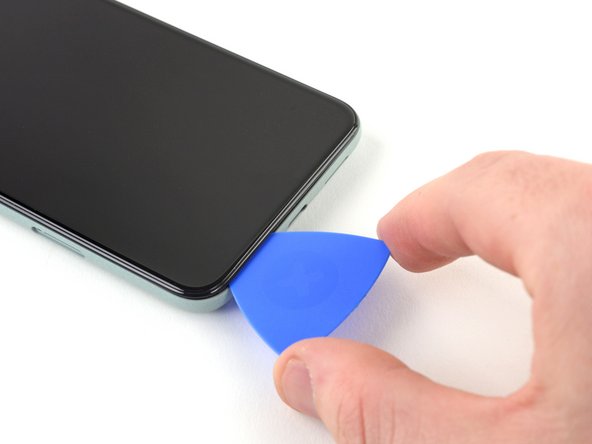
Insert the opening pick into the gap.
"Insert the opening pick into the gap." NOT the gap under the glass, the second gap... If not you will probably break your screen, at least I did. Especially important if your pixel 5 shipped with the screen gap :(
-
-
-
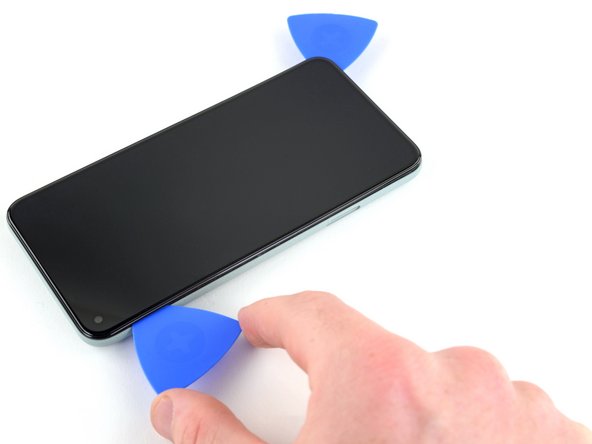
Slide the opening pick back and forth along the bottom of the screen to slice the adhesive.
-
Leave the pick inserted in the bottom right corner to prevent the adhesive from re-sealing.
-
-
-
Apply a heated iOpener to the left edge of the screen for one minute.
-
-
-
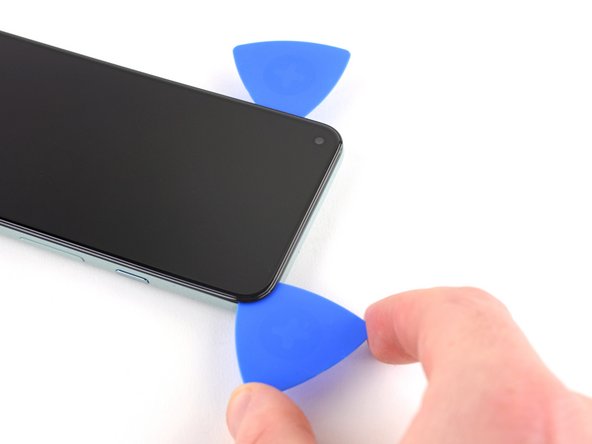
Insert another opening pick into the bottom left corner of the screen.
-
Slide the opening pick around the left corner.
-
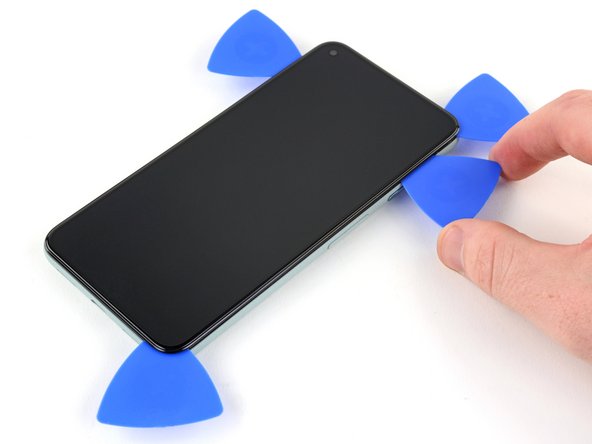
Continue to slide the pick up towards the front camera to slice the adhesive on the left edge of the screen.
-
Leave the pick inserted to prevent the adhesive from re-sealing.
I suggest placing an orientation sticker on the screen so you don't lose track of where that delicate ribbon cable is. I gently bent one, immediately after doing a successful one, resulting in a costly screen replacement. It's important to know that it's incredibly delicate.
-
-
-
-
Use the opening pick from the top left corner to lift up the left edge of the screen a few millimeters. This will keep the clips from snapping back down into the case.
-
Lift up on the right side of the screen and open up the phone like a book.
-
-
-
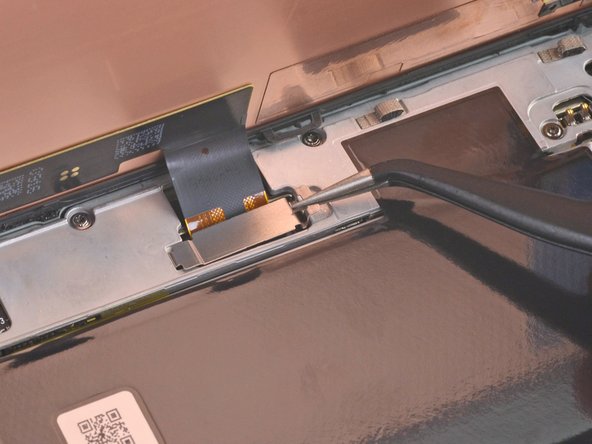
Use tweezers to grip the screen connector cover securing the screen flex cable.
-
Push the clip in towards the connector to unlatch it.
I found it easier to use the spudger here rather than the tweezers (which have sharp ends that could damage something if you happen to slip).
some 5a models will have a screw instead of clip , here's a photo https://imgur.com/a/9dZG5pQ
-
-
-
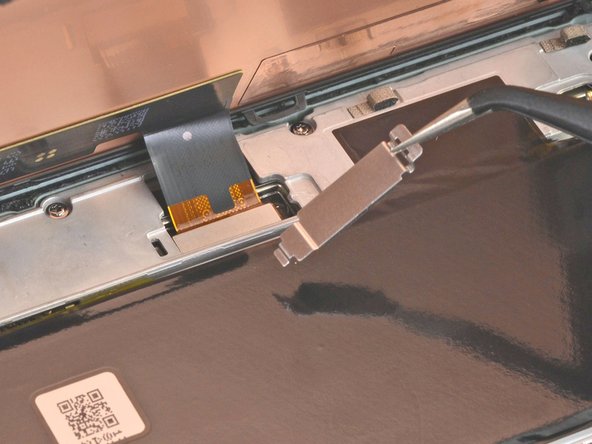
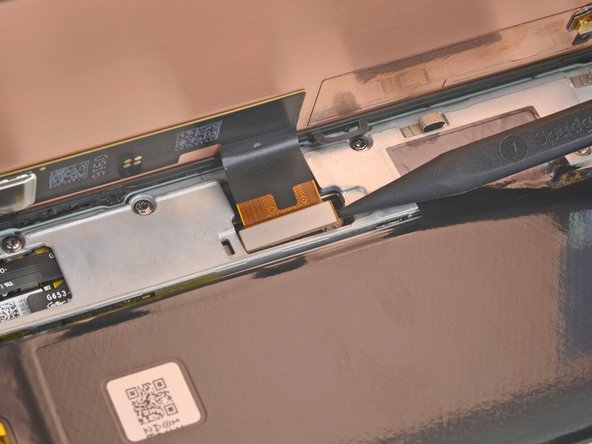
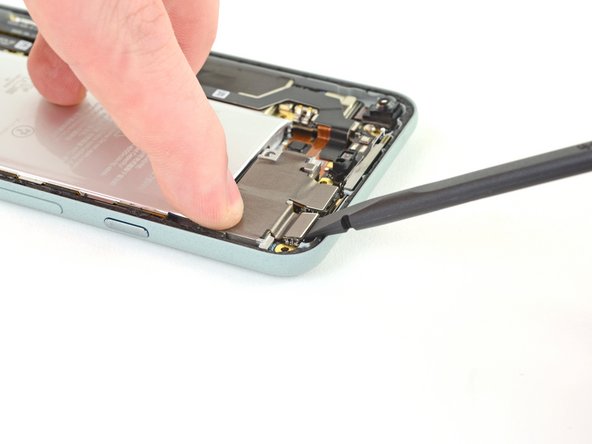
Use the tip of the spudger to pry up and disconnect the screen flex cable.
The curved ends of the blue iFixit Opening Tool helped me reseat the connector when installing the new screen.
So hard to get this thing reseated to test the screen, even before putting the adheasive round the phone edge to finish the job. What made it particularly hard was that the flex cable on mine seemed very short compared to video's i've seen online.
-
-
-
Remove the screen.
Where from we can buy the screen. Thanks
the screen does not fit
After reconnecting the screen, is it necessary to remove a screen protector (if installed) for the a proper screen calibration?
Yes. Remove the screen protector when installing the screen.
-
-
-
Use tweezers to lift up the graphite tape until you are able to grip it with your fingers.
-
Peel off the graphite tape.
On reassembly, I missed the graphite tape installation. Will this be an issue?
I believe graphite tape is used for heat dissipation to help keep the phone cool and not overheat so I would say it's an important component. If you can reinstall then do as heat will affect the operation of the device and impact the battery and internal components.
Luckily the kit came with graphite tape replacement as I accidentally tore through mine when using the sharp tweezers. Here I recommend using the crocodile tweezers as these aren't as sharp and have a bigger surface area to grip.
-
-
-
Use tweezers to peel off the graphite pad covering the charging plate cover.
I found the sharp tweezers accidentally cut through the graphite tape and graphite pad. Use the crododile tweezers instead of the pointed ones to avoid ripping the tape.
-
-
-
Use a T3 Torx driver to remove the two 4.6 mm-long screws securing the charging plate cover to the midframe.
-
-
-
Use tweezers to lift up the right side of the midframe.
-
Remove the midframe.
Removing the midframe may cause a metal-foam spacer above the light sensor to pop out. After placing in the midframe on re-assembly, you can use the tweezers to squeeze the spacer back in between the midframe and the metal divider near the top of the phone.
There is a picture of this spacer at https://www.ifixit.com/Guide/Google+Pixe.... To replace it, first replace the midframe. Then, before screwing the midframe back down, use the tweezers to pinch the space together, compressing the foam in the middle, and slide it into place.
FYI My model Pixel 5 SKU: GA01316-UK does not have a spacer.
I was very careful and looking specifically for this when removing the screen however it is just an empty cavity with nothing there. I guess it differs based on different PIxel 5 models?
-
-
-
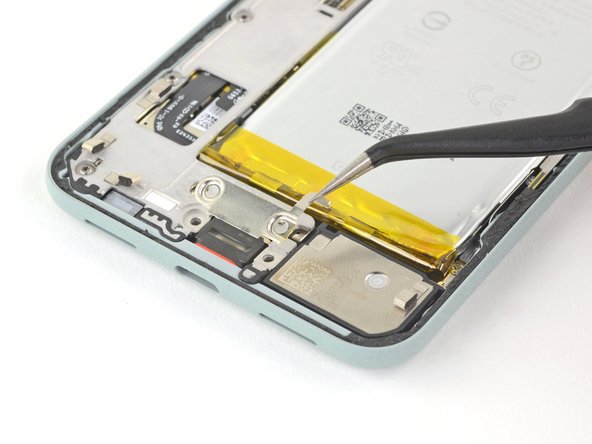
Use the pointed end of the spudger to pry the battery connector straight up and disconnect it from the motherboard.
-
-
-
Use a T3 Torx driver to remove the 4.1 mm shouldered screw.
-
-
-
Use the spudger to disconnect the two rear camera press connectors from the motherboard.
-
-
-
Use tweezers to lift up on the rear camera assembly to remove it from its housing.
-


Compare your new replacement part to the original part—you may need to transfer remaining components or remove adhesive backings from the new part before installing.
To reassemble your device, follow the above steps in reverse order.
Take your e-waste to an R2 or e-Stewards certified recycler.
Repair didn’t go as planned? Try some basic troubleshooting, or ask our Answers community for help.
İptal et: Bu kılavuzu tamamlamadım.
4 farklı kişi bu kılavuzu tamamladı.

2 Yorum
Hi! Will this procedure mess with the IP68 certification?
Hi Mariano! That would depend on well you were able to replace the screen adhesive.
It would be helpful to know for how long ally the heated pad
Yuri Deglin - Yanıt
Agreed, my friend from the past.
Albert Einstein -
If you click on the "iOpener" link, it tells you to heat it up for 30 seconds, and if you're using a microwave with a carousel, make sure it moves freely.
Azurina Schalk-Smith - Yanıt
How long do you think it would take with a hair dryer?
Gen L. - Yanıt