Ana içeriğe geç

Google Pixel 5 Screen Replacement

Neye ihtiyacın var

  1. Google Pixel 5 Screen Replacement, Heat the bottom edge of the screen: adım 1, 1 resimden 1.
    • Heat an iOpener and apply it to the bottom edge of the screen for one minute.

    • A hair dryer, heat gun, or hot plate may also be used, but be careful not to overheat the phone—the display and internal battery are both susceptible to heat damage.

  2. Google Pixel 5 Screen Replacement, Screen removal information: adım 2, 3 resimden 1. Google Pixel 5 Screen Replacement, Screen removal information: adım 2, 3 resimden 2. Google Pixel 5 Screen Replacement, Screen removal information: adım 2, 3 resimden 3.
    • While you're waiting for the adhesive to loosen, take note of the following:

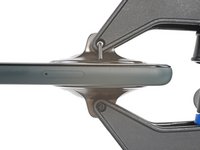
    • Screen seam: This seam separates the screen from the rest of the phone. Do not pry at this seam.

    • Bezel seam: This is where the plastic bezel designed to protect the screen meets the frame. It's held in place by plastic clips. This is where you should pry.

  3. Google Pixel 5 Screen Replacement, Anti-Clamp instructions: adım 3, 3 resimden 1. Google Pixel 5 Screen Replacement, Anti-Clamp instructions: adım 3, 3 resimden 2. Google Pixel 5 Screen Replacement, Anti-Clamp instructions: adım 3, 3 resimden 3.
    Bu adımda kullanılan alet:
    Anti-Clamp
    $24.95
    Satın Al
    • The next two steps demonstrate the Anti-Clamp, a tool we designed to make the opening procedure easier. If you aren't using the Anti-Clamp, skip down two steps for an alternate method.

    • For complete instructions on how to use the Anti-Clamp, check out this guide.

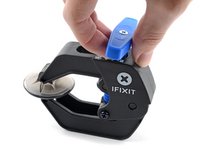
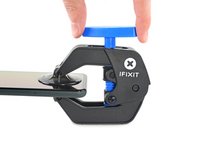
    • Pull the blue handle towards the hinge to disengage opening mode.

    • Position the suction cups near the bottom edge of the screen—one on the front, and one on the back.

    • Push down on the cups to apply suction to the desired area.

    • If you find that the surface of your device is too slippery for the Anti-Clamp to hold onto, you can use packing tape to create a grippier surface.

  4. Google Pixel 5 Screen Replacement: adım 4, 3 resimden 1. Google Pixel 5 Screen Replacement: adım 4, 3 resimden 2. Google Pixel 5 Screen Replacement: adım 4, 3 resimden 3.
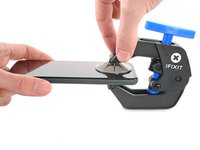
    • Push the blue handle away from the hinge to engage opening mode.

    • Turn the handle clockwise until you see the cups start to stretch.

    • Make sure the suction cups remain aligned to each other. If they begin to slip out of alignment, loosen the suction cups slightly and realign the arms.

    • Wait one minute to give the adhesive a chance to release and present an opening gap.

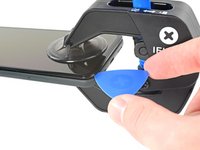
    • Insert an opening pick under the screen and its bezel frame when the Anti-Clamp creates a large enough gap.

    • If the Anti-Clamp doesn't create a sufficient gap, apply more heat to the area and rotate the handle clockwise half a turn.

    • Don't crank more than a half a turn at a time, and wait one minute between turns. Let the Anti-Clamp and time do the work for you.

    • Skip the next step.

  5. Google Pixel 5 Screen Replacement, Insert an opening pick: adım 5, 3 resimden 1. Google Pixel 5 Screen Replacement, Insert an opening pick: adım 5, 3 resimden 2. Google Pixel 5 Screen Replacement, Insert an opening pick: adım 5, 3 resimden 3.
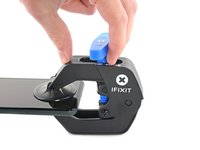
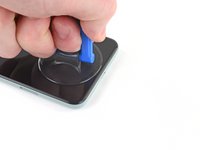
    • Apply a suction cup to the screen, as close to the heated edge as possible.

    • If your screen is badly cracked, follow this guide to tape over the cracked screen. If all else fails, you can superglue the suction cup to the broken screen.

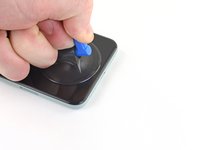
    • Pull up on the suction cup with strong, steady force to create a gap.

    • Depending on the age of your device, this may be difficult. If you have trouble, apply more heat and try again.

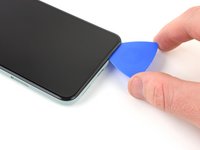
    • Insert the opening pick into the gap.

  6. Google Pixel 5 Screen Replacement, Slice the bottom adhesive: adım 6, 3 resimden 1. Google Pixel 5 Screen Replacement, Slice the bottom adhesive: adım 6, 3 resimden 2. Google Pixel 5 Screen Replacement, Slice the bottom adhesive: adım 6, 3 resimden 3.
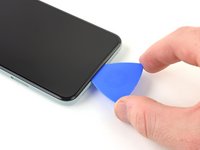
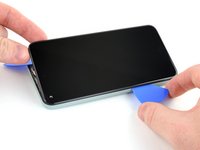
    • Slide the opening pick back and forth along the bottom of the screen to slice the adhesive.

    • Leave the pick inserted in the bottom right corner to prevent the adhesive from re-sealing.

  7. Google Pixel 5 Screen Replacement, Heat the left edge of the screen: adım 7, 1 resimden 1.
    • Apply a heated iOpener to the left edge of the screen for one minute.

  8. Google Pixel 5 Screen Replacement: adım 8, 3 resimden 1. Google Pixel 5 Screen Replacement: adım 8, 3 resimden 2. Google Pixel 5 Screen Replacement: adım 8, 3 resimden 3.
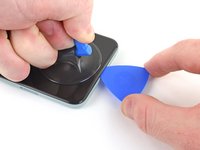
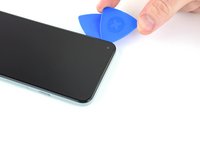
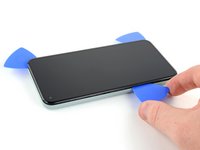
    • Insert another opening pick into the bottom left corner of the screen.

    • Slide the opening pick around the left corner.

    • Do not insert the pick more than 1/4 inch (6 mm) or you may damage the screen's flex cable located in the middle of the left edge.

    • Continue to slide the pick up towards the front camera to slice the adhesive on the left edge of the screen.

    • Leave the pick inserted to prevent the adhesive from re-sealing.

  9. Google Pixel 5 Screen Replacement: adım 9, 3 resimden 1. Google Pixel 5 Screen Replacement: adım 9, 3 resimden 2. Google Pixel 5 Screen Replacement: adım 9, 3 resimden 3.
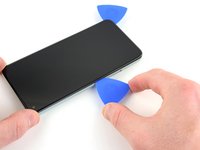
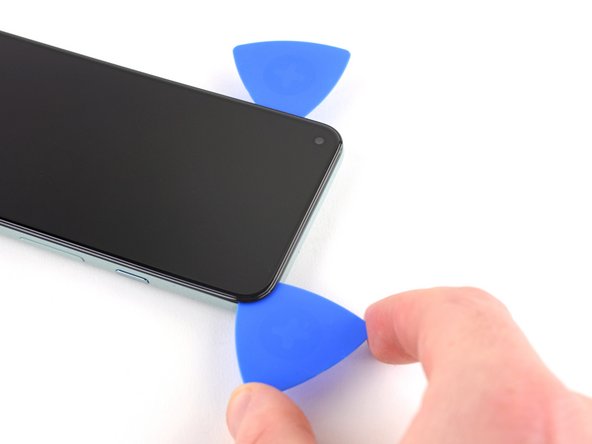
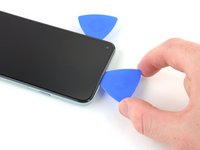
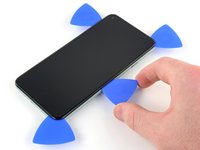
    • Insert another opening pick into the top left corner of the screen.

    • Slide the pick around the front camera and across the top edge of the phone.

    • If the adhesive is difficult to slice, apply heat to the area for one minute and try again.

    • Slide the pick to the top right corner of the phone and leave the pick inserted.

  10. Google Pixel 5 Screen Replacement: adım 10, 3 resimden 1. Google Pixel 5 Screen Replacement: adım 10, 3 resimden 2. Google Pixel 5 Screen Replacement: adım 10, 3 resimden 3.
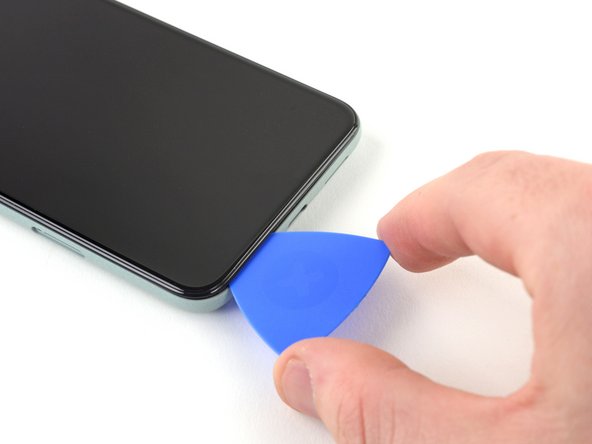
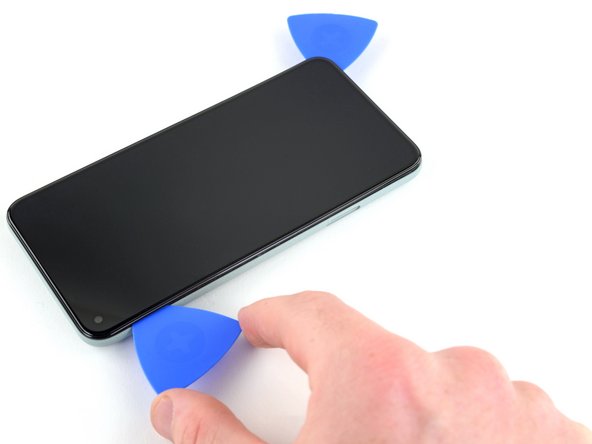
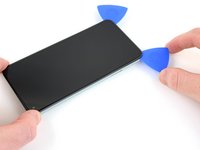
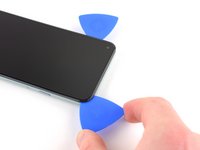
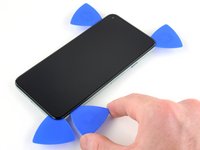
    • Insert an opening pick into the bottom right corner of the screen.

    • Slide the pick up to the top right corner to slice the last edge of adhesive.

    • You may need to run an opening pick around the edges again to ensure all the adhesive is cut. It is applied the thickest on the four corners.

  11. Google Pixel 5 Screen Replacement, Open up the screen: adım 11, 2 resimden 1. Google Pixel 5 Screen Replacement, Open up the screen: adım 11, 2 resimden 2.
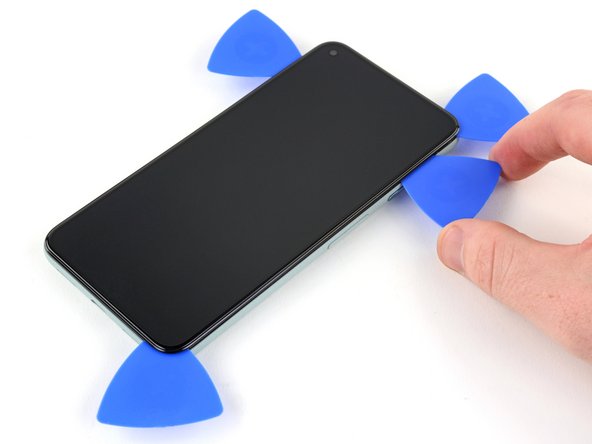
    • Use the opening pick from the top left corner to lift up the left edge of the screen a few millimeters. This will keep the clips from snapping back down into the case.

    • Lift up on the right side of the screen and open up the phone like a book.

    • Do not open the screen more than 90 degrees to prevent damaging the screen flex cable.

  12. Google Pixel 5 Screen Replacement, Disconnect the screen: adım 12, 2 resimden 1. Google Pixel 5 Screen Replacement, Disconnect the screen: adım 12, 2 resimden 2.
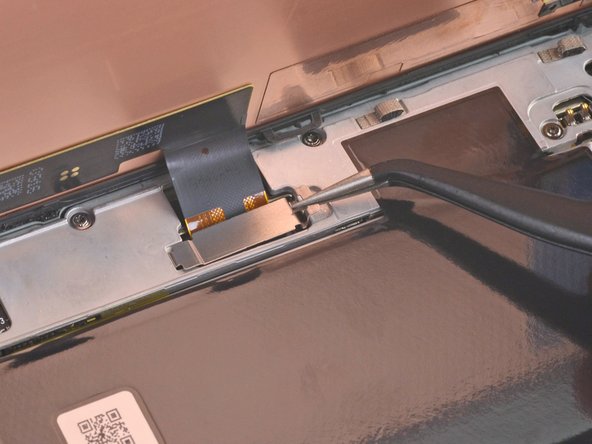
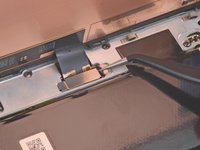
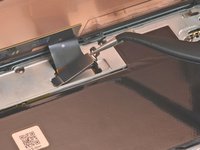
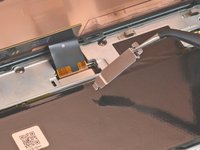
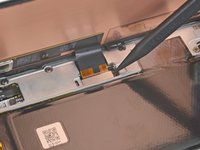
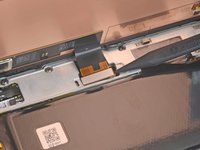
    • Use tweezers to grip the screen connector cover securing the screen flex cable.

    • Push the clip in towards the connector to unlatch it.

  13. Google Pixel 5 Screen Replacement: adım 13, 2 resimden 1. Google Pixel 5 Screen Replacement: adım 13, 2 resimden 2.
    • Remove the screen connector cover.

    • Make sure to keep this component to reinstall it during reassembly.

  14. Google Pixel 5 Screen Replacement: adım 14, 2 resimden 1. Google Pixel 5 Screen Replacement: adım 14, 2 resimden 2.
    • Use the tip of the spudger to pry up and disconnect the screen flex cable.
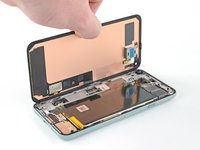
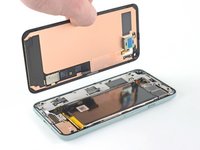
    • To re-attach press connectors like this one, carefully align and press down on one side until it clicks into place, then repeat on the other side. Do not press down on the middle. If the connector is misaligned, the pins can bend, causing permanent damage

  15. Google Pixel 5 Screen Replacement, Remove the screen: adım 15, 2 resimden 1. Google Pixel 5 Screen Replacement, Remove the screen: adım 15, 2 resimden 2.
    • Remove the screen.

    • Use tweezers to pick off the remaining adhesive on the case.

    • If you use isopropyl alcohol to clean the adhesive off the display, be sure to not let it splash onto any unintended components, as this can weaken their adhesive bond.

    • If you replaced the screen, check the screen's front-facing camera hole and remove any protective liners covering it.

    • If your replacement screen's display cable is held down by tape, remove the tape before installation.

    • If you are using a custom-cut adhesive, follow this guide to correctly apply new screen adhesive.

    • If you are using Tesa tape to reattach the screen, follow this guide.

    • During the boot-up process after reassembly, the screen will go through a calibration sequence. Do not touch the screen during this process, as it could result in improper touch calibration and create touch issues.

Sonuç

Compare your new replacement part to the original part—you may need to transfer remaining components or remove adhesive backings from the new part before installing.

To reassemble your device, follow the above steps in reverse order.

Take your e-waste to an R2 or e-Stewards certified recycler.

Repair didn’t go as planned? Try some basic troubleshooting, or ask our Answers community for help.

50 farklı kişi bu kılavuzu tamamladı.

Robert Boyd

Üyelik tarihi: 02/01/21

26.243 İtibar

94 adet Kılavuz yazıldı

28 Yorum

if i want only screen (lcd display) of pixel 5 from where can i get the screen. sudhri@gmail.com my mail address

Digvijay Engineers - Yanıt

Hello! This tutorial is well explained and seems ok to realize, but the problem i’m facing is to find the right spare part… Once contacted, google assistance said the only option is to send it back to them for 138€ and 7-10 days… Can you recommand a trustworsthy website for that?

Aurelien Malot - Yanıt

Usually i look on amazon (sent by amazon) to get the warranty if i got any problem.

Daniele Carminati -

Check out the iFixit store. We stock some parts for the Pixel 5, including the screen and battery.

Zac Hall -

The screen that I ordered has a cable that runs the wrong way. It would need to be twisted to make it fit my Pixel 5. Any suggestions?

Gordon Stephenson - Yanıt

Yorum Ekle

İstatistikleri Görüntüle:

Son 24 Saat: 38

Son 7 gün: 290

Son 30 gün: 1,295

Her zaman: 90,862