Giriş
This repair guide was authored by the iFixit staff and hasn’t been endorsed by Google. Learn more about our repair guides here.
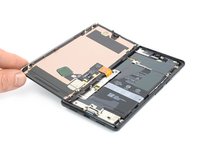
Use this guide to replace a cracked or broken screen on your Google Pixel 6 Pro.
Your new replacement screen will come with the fingerprint reader already attached. If not, you will need to reinstall the original fingerprint reader to your new replacement screen. If you are replacing the fingerprint reader, you will need to recalibrate the reader to maintain its functionality.
If the frame is deformed, it's important to replace it to make sure the new screen will mount correctly and won’t suffer damage from uneven pressure.
If your battery is swollen, take appropriate precautions. Before disassembling your device, discharge the battery below 25%. This reduces the risk of a dangerous thermal event if the battery is accidentally damaged during the repair.
Caution: The Pixel 6 Pro contains class 1 lasers. Disassembly could result in exposure to invisible infrared laser emissions.
Retaining water resistance after the repair will depend on how well you reapply the adhesive, but your device will lose its IP (Ingress Protection) rating.
Before you begin this procedure, be sure to have a set of replacement adhesives for both the rear glass and the screen.
Neye ihtiyacın var
-
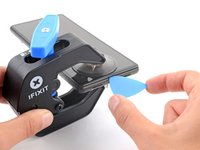
Bu adımda kullanılan alet:Clampy - Anti-Clamp$24.95
-
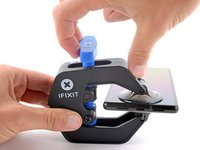
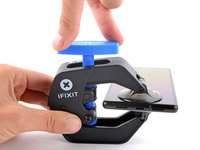
Pull the blue handle backwards to unlock the Anti-Clamp's arms.
-
Slide the arms over either the left or right edge of your phone.
-
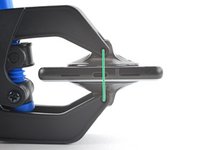
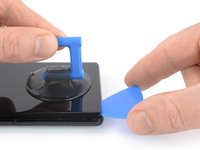
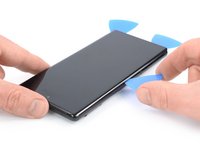
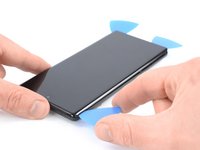
Position the suction cups near the bottom edge of the phone—one on the front, and one on the back.
-
Squeeze the cups together to apply suction.
-
-
-
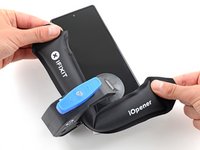
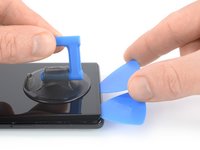
Heat an iOpener and thread it through the arms of the Anti-Clamp.
-
Fold the iOpener so it lays on the bottom edge of the phone.
-
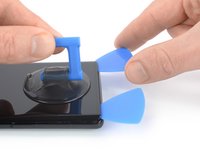
Wait one minute to give the adhesive a chance to release and present an opening gap.
-
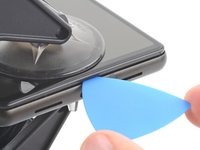
Insert an opening pick under the screen frame when the Anti-Clamp creates a large enough gap.
-
Skip the next two steps.
-
-
-
Apply a heated iOpener to the screen to loosen the adhesive underneath. Apply the iOpener for at least 3 minutes.
-
-
-
Once the screen is warm to the touch, apply a suction handle to the bottom edge of the screen.
-
Lift the screen including its safety frame with the suction handle to create a small gap between the screen and the phone assembly.
-
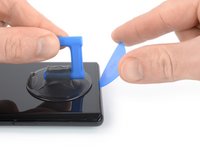
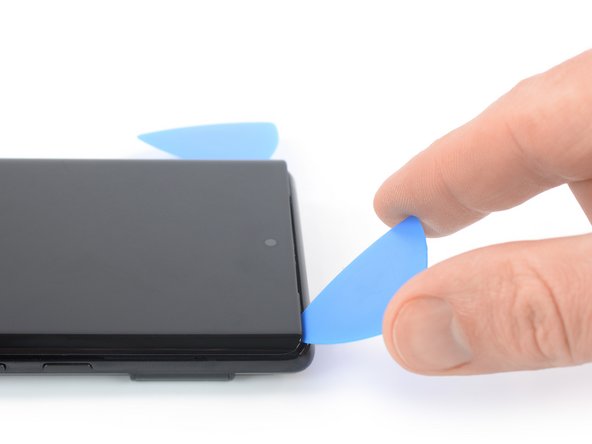
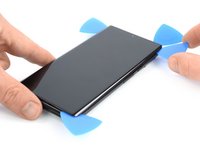
Insert an opening pick into the gap between the screen frame and the phone assembly.
-
Slide the opening pick to the bottom left corner of the screen to slice its adhesive.
-
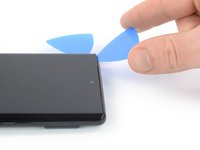
Leave the opening pick in place to prevent the adhesive from resealing.
-
-
-
-
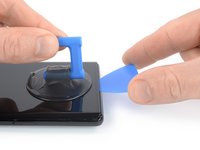
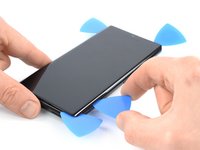
Insert a second opening pick at the bottom edge and slide it to the bottom right corner of the screen to slice the adhesive.
-
Leave the opening pick in place to prevent the adhesive from resealing.
-
-
-
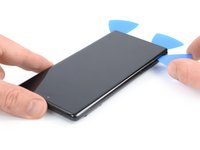
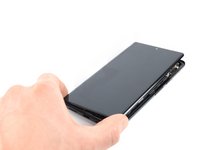
Carefully fold the screen to the left side of the phone assembly like you would open the front cover of a book.
-
-
Bu adımda kullanılan alet:Magnetic Project Mat$16.96
-
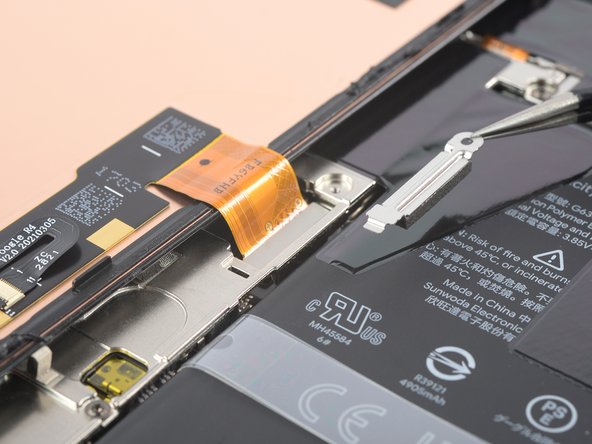
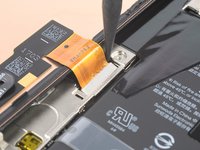
Use a Torx T3 screwdriver to remove the 2.0 mm-long 3IP Torx Plus screw securing the display cable metal bracket.
-
-
Bu adımda kullanılan alet:Tweezers$4.99
-
Use a pair of tweezers to remove the metal bracket sitting on top of the display cable connector.
-
-
-
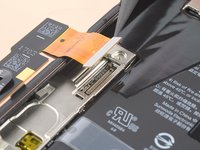
Use a spudger to disconnect the display flex cable by prying the connector straight up from its socket.
-
-
-
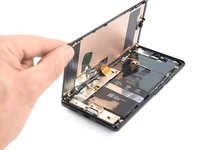
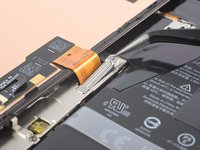
When handling your screen, grip it by its edges.
-
When placing the screen on your work area, make sure nothing is touching the bottom of the screen. Consider placing it on a soft, lint-free cloth.
-
-
-
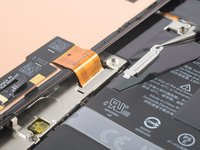
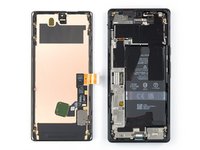
Remove the screen.
-
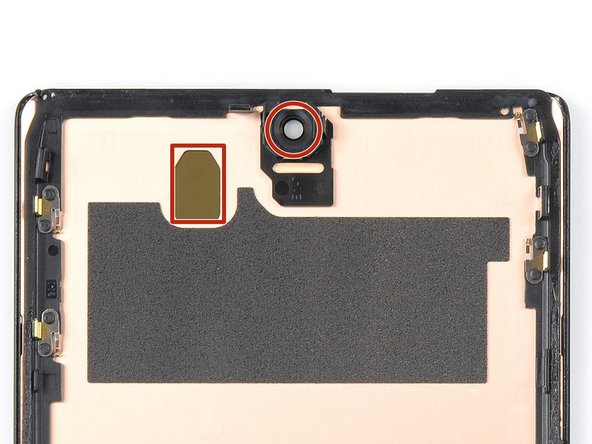
If you replaced the screen, check the screen's front-facing camera hole and sensor cutout for any protective liners. Remove these liners before you close the phone up.
-
This is a good point to test your phone before sealing it up. Temporarily connect your screen, power on your phone, and make sure it works as expected. Before continuing with reassembly, power off your phone and disconnect the screen.
-
Follow this guide if you're using custom-cut adhesives for your device.
-
Follow this guide in case you're using a pre-cut adhesive card.
-
If you're installing a new screen, follow this guide to calibrate the fingerprint sensor.
-


If possible, turn on your device and test your repair before installing new adhesive and resealing.
To reassemble your device, follow these instructions in reverse order.
The best way to secure the new screen is to apply a sheet of custom-cut double-sided tape to the back of the screen.
To run a diagnostics test with the built-in Pixel Diagnostic tool, click here.
Take your e-waste to an R2 or e-Stewards certified recycler.
Repair didn’t go as planned? Try some basic troubleshooting, or ask our Answers community for help.
İptal et: Bu kılavuzu tamamlamadım.
114 farklı kişi bu kılavuzu tamamladı.


66Kılavuz Yorumları
The fingerprint scanner doesn't work. I get a message that I need to visit, but the website doesn't exist. Google has a fingerprint repair tool where you connect your phone and boot into rescue mode, but the program says I can't use it as my phone's firmware is newer than the tool's firmware.
Do a google search to see, there are many others with this issue and a few Google support threads where google acknowledged the issue for over two years but doesn't address the issue other than to say it should be fixed in the future firmware update.
So, now I'm stuck without a fingerprint scanner that I used for all security and banking apps.
Did you transfer your existing fingerprint scanner from your original screen to the new one ?
See my note below; I found a solution for this.