Giriş
Use this guide to replace a worn-out or dead battery in your Galaxy A50.
If your battery is swollen, take appropriate precautions. For your safety, discharge your battery below 25% before disassembling your phone. This reduces the risk of a dangerous thermal event if the battery is accidentally damaged during the repair.
You’ll need replacement adhesive to reattach components when reassembling the device.
Neye ihtiyacın var
-
-
Insert a SIM card eject tool, a SIM eject bit or a straightened paper clip into the hole on the SIM tray located at the left side of the phone.
-
Press firmly to eject the tray.
-
Remove the SIM card tray.
-
-
-
Start by switching off your phone.
-
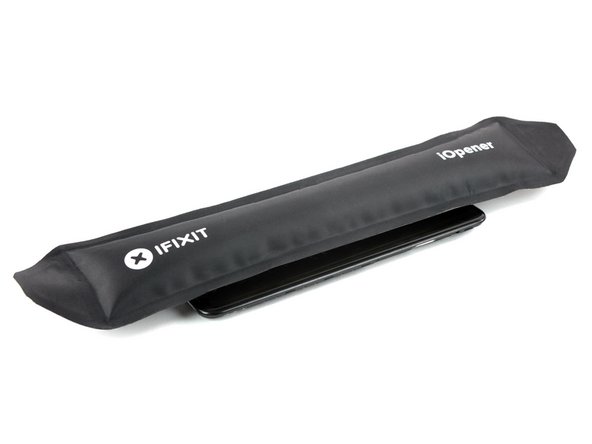
Heat an iOpener and apply it to the back cover to soften the adhesive.
Überhitzen das Gerät nicht, das AMOLED-Display und der Akku sind sehr hitzeempfindlich.
Nur ein kleiner Tippfehler-Hinweis: (Überhitze das Gerät nicht)
OK, korrigiert. Das kann übrigens jeder machen, iFixit ist ein Wiki.
VauWeh -
how long should the heat pack be used for?
The heat pack is in the wrong position in photo - the glue that you are heating is actually all around the edge of the phone!
-
-
-
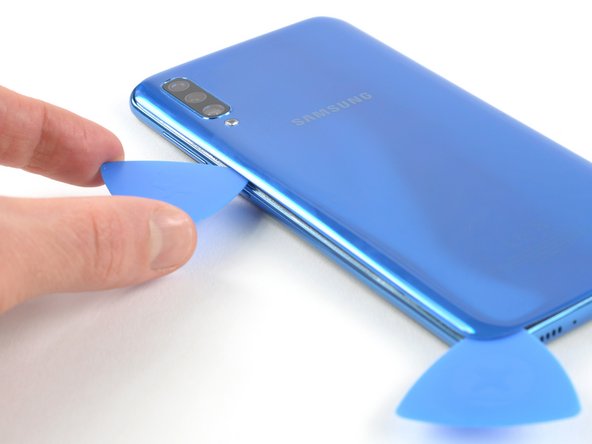
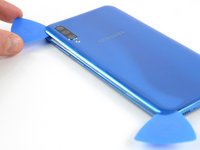
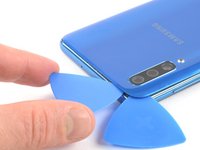
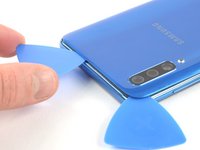
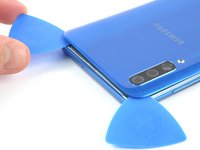
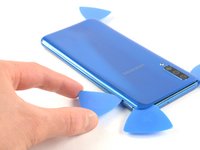
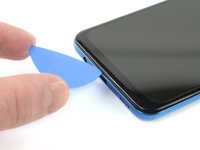
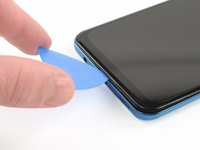
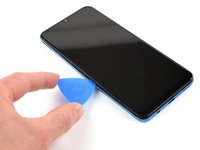
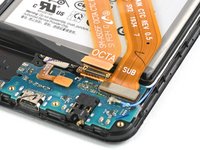
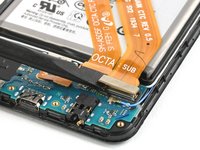
Insert an opening pick at the bottom of your phone near the USB-C port.
-
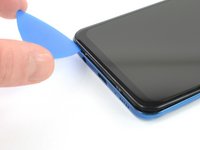
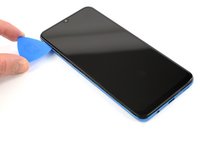
Slide the opening pick to the bottom left corner.
It would be much better to attempt the opening from the top of the phone as there is a delicate flex PCB antenna at the bottom just where you stick the pick in that can get damaged.
Wish I would have read your comment before, since I destroyed that cable while opening my phone... It's a cable for microphone, speaker and headphone jack. Replacing it was a real pain because it's glued but luckily I was able to find a spare.
H.W -
-
-
-
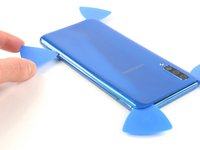
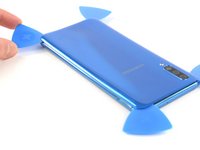
Remove the back cover.
Very straight forward and simple replacement to do with the right tools, I used my hot air gun work station so this might have been alot easier for me then someone without one? Hair dryers work too, just in case a hot airgun station is not available to you dont worry you can do this repair without, but some form of heat will make life alot simpler :)
-
-
-
-
Remove the 13 Phillips #00 screws (4 mm length).
To separate the screen from the mid-frame a few pointers I picked up from a video
1. use a hard pry tool such as iFixit Opening Tool
2. start on a long side about quarter way down from corner
3. work around the frame careful not hook the button assembly -
-
-
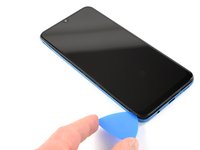
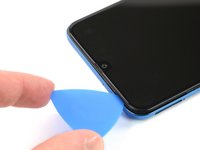
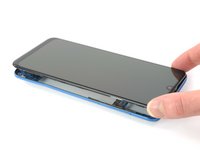
Insert an opening pick between the display and the midframe at the bottom of your phone above the USB-C port.
-
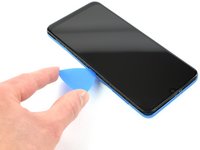
Slide the pick along the bottom edge to release the clips.
-
-
-
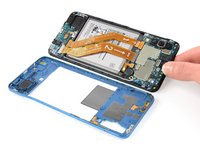
Use a spudger to disconnect the battery by prying the connector straight up from its socket.
-
-
-
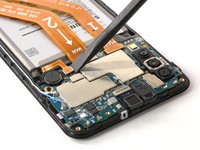
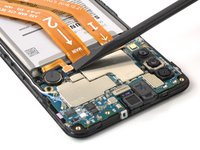
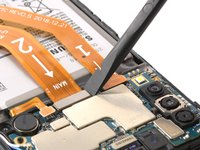
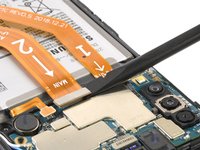
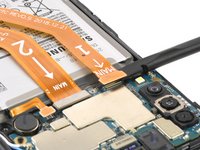
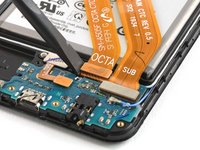
Use the flat end of a spudger to pry up and disconnect the interconnect and display flex cables from the motherboard.
-
-
-
Apply some isopropyl alcohol under each corner of the battery and allow it to penetrate for several minutes to help weaken the adhesive.
-
Alternatively, apply a heated iOpener to the display directly behind the battery for two minutes to help soften the adhesive. Repeat the process as necessary.
Pro tip. i Highly recommend that you decharge the battery 100% before you even try to touch the battery. Reason is these kind of batterys do not like to be bend og damaged at all. If the battery is charged and you bend it, it can burst into flames or even explode, if you hear a hissing sound or see smoke instant push the phone away from you.. in worst case it can send out a 30cm burning flame or maybe it just make smoke and nothing happen.. So always drain the telephone of power before you try to remove the battery… Example turn on wifi and make it stream a movie or something until it run out of power is an easy way to do this ;-) No matter what i recommend to use safety glasses just in case. PRO tip.. in general if you repair any machine with a battery disconnect it and make sure it has no power.. A car battery is safe, but the kind in some electronic devices are not.. so make sure battery has no power.!!!!
-
-
Bu adımda kullanılan alet:Plastic Cards$2.99
-
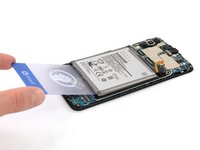
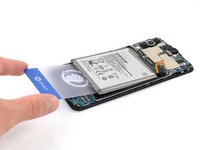
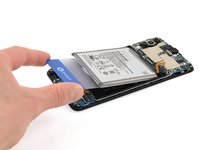
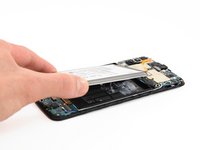
Insert a plastic card underneath the bottom edge of the battery and carefully slide it underneath the battery.
-
Continue sliding the plastic card underneath the battery to loosen the battery adhesive.
Pro tip. i Highly recommend that you decharge the battery 100% before you even try to touch the battery. Reason is these kind of batterys do not like to be bend og damaged at all. If the battery is charged and you bend it, it can burst into flames or even explode, if you hear a hissing sound or see smoke instant push the phone away from you.. in worst case it can send out a 30cm burning flame or maybe it just make smoke and nothing happen.. So always drain the telephone of power before you try to remove the battery… Example turn on wifi and make it stream a movie or something until it run out of power is an easy way to do this ;-) No matter what i recommend to use safety glasses just in case. PRO tip.. in general if you repair any machine with a battery disconnect it and make sure it has no power.. A car battery is safe, but the kind in some electronic devices are not.. so make sure battery has no power.!!!!
-


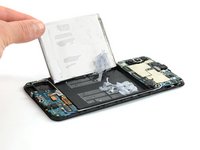
If possible, turn on your device and test your repair before installing new adhesive and resealing.
Secure the new battery with pre-cut adhesive or double-sided adhesive tape. In order to position it correctly, apply the new adhesive into the device at the places where the old adhesive was located, not directly onto the battery. Press the new battery firmly into place.
To reassemble your device, follow these instructions in reverse order. Apply new adhesive where necessary after cleaning the relevant areas with isopropyl alcohol (>90%).
For optimal performance, calibrate your newly installed battery: Charge it to 100% and keep charging it for at least 2 more hours. Then use your device until it shuts off due to low battery. Finally, charge it uninterrupted to 100%.
Take your e-waste to an R2 or e-Stewards certified recycler.
Repair didn’t go as planned? Try some basic troubleshooting, or ask our Answers community for help.
İptal et: Bu kılavuzu tamamlamadım.
47 farklı kişi bu kılavuzu tamamladı.


16Kılavuz Yorumları
Great guide.. One tip… ALWAYS make sure to decharge the battery so it have no power before you do anything… example turn on wifi and stream a movie and when phone is out of power you can remove the battery.. never bend it, use heat, use fluid to desolve the glue behind battery.. never cut/damage or bend the battery and use safety glasses just in case. Battery in a mobile phone is NOT a toy
Teşekkürler. Çok açıklayıcı ve anlaşılır biçimde hazırlanan değerli bir rehber olmuş. Gerçekten başarılı.
My a50 just got a black screen, I have tried the forced reboot for a couple of time it opened but returns to black screen, now I can't open it with force reboot, is this battery or something else
I have same problem in same time. On the screen, I only have a circle charging sign, but not a percentage of battery charge when it's charging normally. I think the battery's dead.
Hi Allan, It's difficult to remotely identify what's wrong with your A50. Let us know what the reason is if you can figure it out.
Perfecte handleiding! ik heb deze gevolgd en binnen een uurtje was mijn telefoon voorzien van een nieuwe batterij.
Kleine opmerking nog, bij de stappen 9-13 moet je de openingsplectrum wel een beetje schuin naar beneden houden zoals duidelijk te zien is in stap 9/ Als je hem iets vlakker houdt zoals ik eerst deed dan gaan de klemmetjes niet los.
Hi @Gertjan, we’re happy to hear that your smartphone is up and running again. Thanks for your feedback!
Can I use iPhone adhesive strips to hold down the new battery?
Sure, you can use them for your Samsung as well. Good luck with your repair :).
Clear and informative instructions that are well illustrated. They enabled me to make a successful replacement of the battery. Thank you!
الله يبارك ماشاء الله
i had the same problem too, i replace it with a new battery and now i got a new problem that give a temperature icon when i connect it to the charger ???
When refitting the back cover, what adhesive is used? Step 19 says to remove any remaining adhesive -- does that include whatever was used to hold the back cover on originally?
Yes, I bought pre-cut adhesive with the new battery. Removing old adhesive was really a pain in the a**. If anyone have any tips on how to remove old adhsive easily, I'd be happy to hear. i used IPA and lint free cloth, but it was a ton of scrapping and a lot of mess.
H.W -
use double sided mini phone tape (really thin tape for phones thats double sided) , much more eadier then adhesive ....just buy a good quality brand.