Giriş
This guide shows how to remove and replace the battery in a Samsung Galaxy S10.
The battery is held in place with strong adhesive. Using iFixit’s adhesive remover or high concentration (over 90%) isopropyl alcohol will make the battery removal process significantly easier.
Be sure to have replacement adhesive or Tesa tape at hand in order to re-adhere the battery and back cover.
If your battery is swollen, take appropriate precautions and do not heat your phone.
For your safety, discharge your battery below 25% before disassembling your phone. This reduces the risk of a dangerous thermal event if the battery is accidentally damaged during the repair.
Some steps may show the lower midframe/loudspeaker assembly removed. You do not need to remove it for the battery procedure.
Neye ihtiyacın var
-
-
Unplug and power off your phone before you begin.
-
Heat an iOpener and apply it to the back cover's right edge for two minutes.
-
As you wait, take a look at the image of the removed back cover and take note of where the adhesive is located.
-
-
-
Rest the heated right edge of the phone on something that is about 0.5 inches (13 mm) thick. This angles the phone for the opening tool.
-
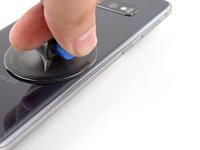
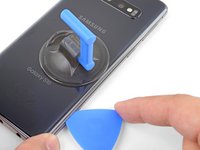
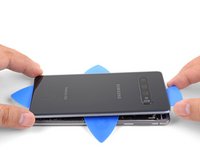
Brace the left edge of the phone with your fingers so that the phone won't slide. Pull on the suction cup with firm pressure.
-
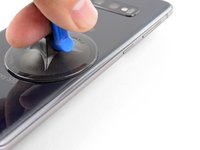
Press the edge of an opening tool into the seam between the back cover and the frame.
-
With the opening tool in place in the seam, slide it back and forth along the seam to loosen the back cover.
-
-
-
Heat an iOpener and apply it to the same edge of the phone for two minutes.
-
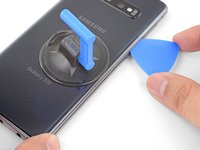
Apply a suction cup to the back of the phone, as close to the center of the right edge as possible (where the adhesive is narrowest).
-
Pull on the suction cup with strong, steady force to create a gap between the back cover and the frame.
-
Insert the point of an opening pick into the gap.
-
If you are having trouble creating a gap, the adhesive isn't weakened enough. Make sure you have heated the edge until just barely too hot to touch try this step again.
-
You can try applying a few drops of high concentration (over 90%) isopropyl alcohol into the seam to help loosen the adhesive.
-
-
-
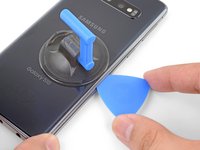
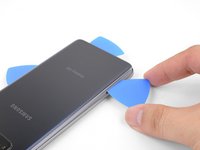
Slide the opening pick along the edge of the phone, slicing through the adhesive.
-
Leave a pick in the seam to prevent the adhesive from re-sealing.
-
-
-
Apply a heated iOpener to the bottom edge of the phone for two minutes.
-
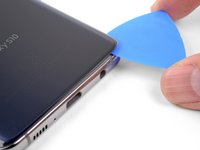
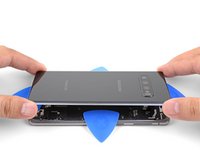
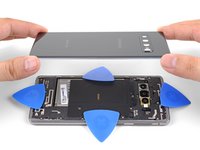
Insert an opening pick into the right edge near the bottom right corner.
-
Carefully slide the pick around the corner. Continue cutting along the bottom edge and around the bottom left corner.
-
Leave an opening pick in the seam to prevent the adhesive from re-sealing.
-
-
-
-
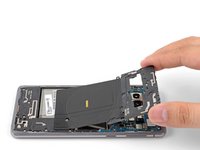
Remove the eight 4 mm Phillips screws securing the top midframe to the phone.
-
-
-
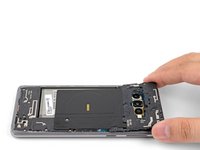
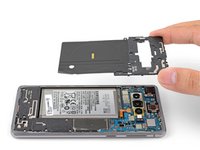
Lift the midframe from the top corners and remove it from the phone.
-
To reinstall the top midframe:
-
Align the midframe's top edge to the phone and lay the frame down on the phone.
-
Use fingers to apply pressure along the midframe perimeter to snap the midframe clips back into place. The edges should sit flush against the phone edge.
-
-
-
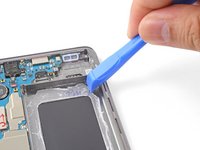
Insert the flat end of a spudger underneath the battery connector, which is attached to the motherboard below the rear-facing camera.
-
Pry upwards to disconnect the connector from its socket.
-
Gently push the battery's flex cable away from the motherboard socket to prevent accidental contact.
-
-
-
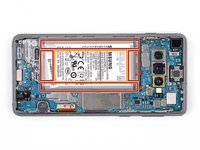
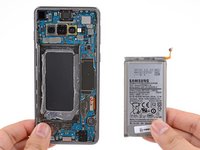
The battery is heavily glued in place. Note the marked areas under the battery:
-
The frame, where the battery is held by strong adhesive.
-
A cutout in the frame, exposing the fragile display assembly underneath. Be careful when prying in this area, or you may damage the display.
-
-
Bu adımda kullanılan alet:iFixit Adhesive Remover$19.99
-
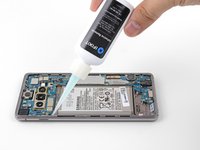
If you are using adhesive remover, follow these preparation steps first.
-
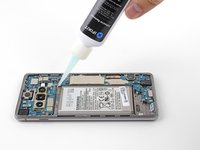
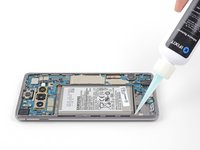
Apply a 1-2 drops of adhesive remover or isopropyl alcohol in each battery corner.
-
Wait for a minute to allow the liquid to weaken the adhesive.
-
Alternatively, heat an iOpener and apply it to the right side of the front of the phone for two minutes or until the battery is warm to the touch (from the transferred heat).
-
-
-
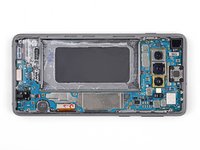
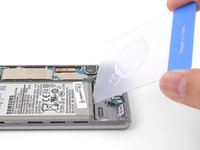
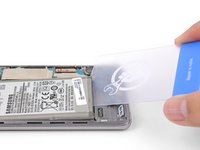
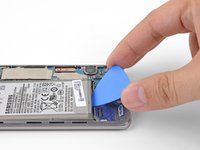
Insert the corner of an opening card into the crevice between the battery and the bottom midframe.
-
Pry the battery out of its recess using firm, constant pressure.
-
Try using an opening pick, an opening tool, or a spudger to pry the battery out. Do not use metal tools.
-
Repeat the adhesive remover/isopropyl alcohol application step and try again.
-
Try applying more heat with an iOpener.
-


To reassemble your device, follow these instructions in reverse order.
For optimal performance, calibrate your newly installed battery after completing this guide.
Take your e-waste to an R2 or e-Stewards certified recycler.
Repair didn’t go as planned? Check out our Answers community for troubleshooting help.
İptal et: Bu kılavuzu tamamlamadım.
77 farklı kişi bu kılavuzu tamamladı.


24Kılavuz Yorumları
Selbst als Selbständiger muss man ab und zu nachforschen, dank dieser Webseite-Info habe ich mich vergewissert dass ich alles genau so richtig wie beschrieben und auf den Bildern machen wollte.
Danke dem Autor dieser Information.
MFG
AK Computer Service
Sehr gut. :) Dafür gibt’t diese Seite.
You need to screw the midframe down again before trying to do a power on test, not just reconnect the battery. If you don’t, you’ll get an overheat error icon (red thermometer in yellow warning triangle) when trying to power it on because the NFC sensor is on the midplate and the pogo pins connecting it need screw down pressure to make a solid connection. (No I don’t know why NFC is needed to power the phone on, or why its absence shows as an overheat error.) After figuring this out (shut out to Go Cell Phone Repair on Youtube) the battery repair worked fine.
I had the same issue. I was stressing out so bad haha, but everything worked out fine in the end :)
The iFixit kit to replace the battery in S10 worked fine, including the heating sausage. Jus need to take your time and take great care to follow the instructions in order. The most stressful bit was getting the new adhesive in the correct spot to achieve a flawless finish. It is brilliant that these phones are repairable and that there is so much support for same. Shame on you Apple. We have to stop throwing repairable things away, both to save money and to save the planet. Thanks iFixit.