Giriş
Use this guide to replace a worn-out or dead battery in your Xiaomi Poco M3.
If your battery is swollen, take appropriate precautions. For your safety, discharge your battery below 25% before disassembling your phone. This reduces the risk of a dangerous thermal event if the battery is accidentally damaged during the repair.
You’ll need replacement adhesive to reattach components when reassembling the device.
Neye ihtiyacın var
-
-
Insert a SIM card eject tool or a paperclip into the small hole in the SIM card tray, located near the top left corner of the Poco M3.
-
Press firmly to eject the SIM card tray.
-
Remove the SIM card tray from the phone by pulling it out of the phone assembly.
-
-
-
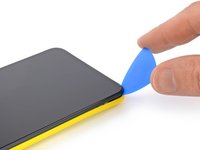
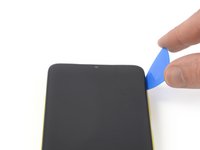
Insert a spudger into the charging port at a steep angle.
-
Use the spudger to create a gap between the phone assembly and the back cover by prying the back cover away from the bottom edge of the screen.
-
-
-
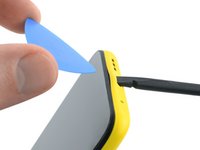
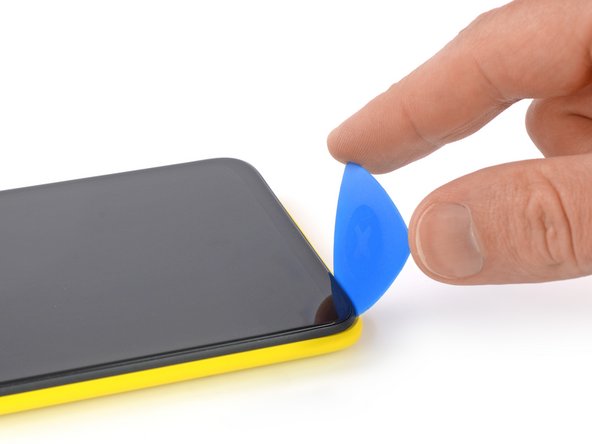
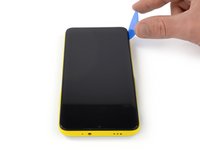
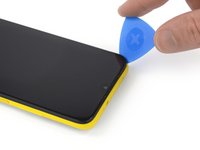
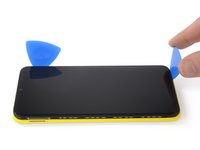
Insert an opening pick into the gap between the phone assembly and the back cover.
-
Remove the spudger.
-
-
-
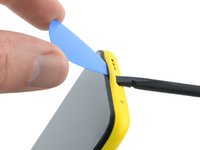
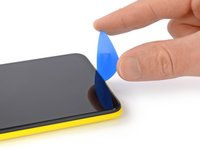
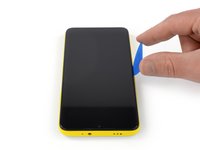
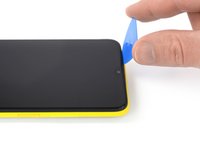
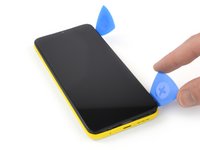
Slide the opening pick to the bottom left corner of the phone to release the plastic clips holding the back cover in place.
-
Slide the opening pick around the bottom left corner.
-
-
-
-
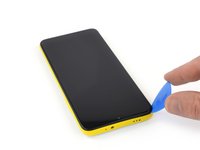
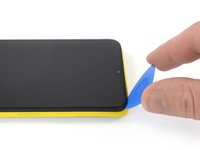
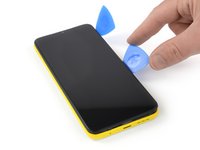
Insert another opening pick into the gap at the bottom edge of your phone.
-
Slide the opening pick around the bottom right corner to release the plastic clips securing the back cover.
-
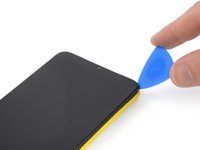
Slide the opening pick along the right edge of the phone to release the remaining plastic clips. Stop just below the fingerprint reader.
-
-
-
Use a Phillips #00 screwdriver to remove the ten 3.9 mm-long screws.
-
-
-
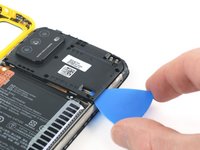
Slide an opening pick under the bottom right corner of the motherboard cover.
-
Slide the opening pick along the right edge of the motherboard cover to release the plastic clips holding it in place.
-
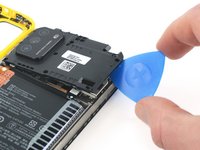
At the top right corner, twist the opening pick countercockwise to pry up the motherboard cover.
-
-
-
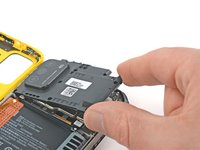
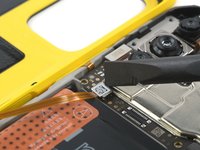
Use the flat end of a spudger to pry up and disconnect the fingerprint sensor cable at the bottom left corner of the motherboard.
-
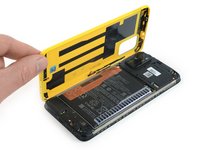
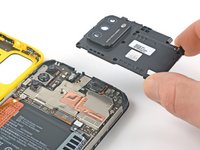
Remove the back cover assembly.
-
-
-
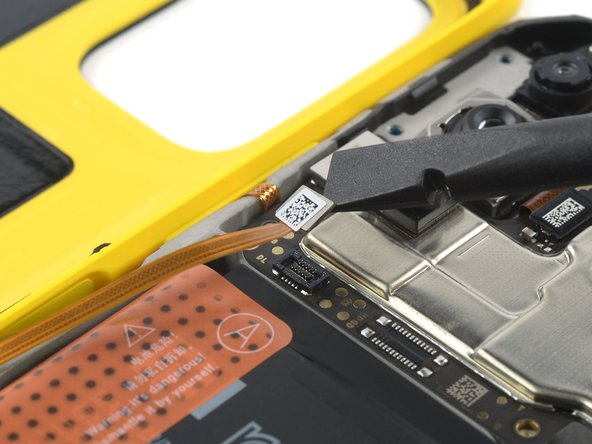
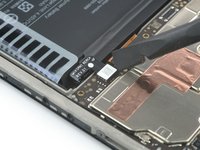
Use the flat end of a spudger to pry up and disconnect the battery cable at the bottom right corner of the motherboard.
-
-
Bu adımda kullanılan alet:Tweezers$4.99
-
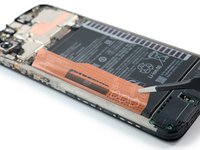
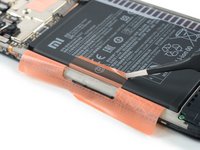
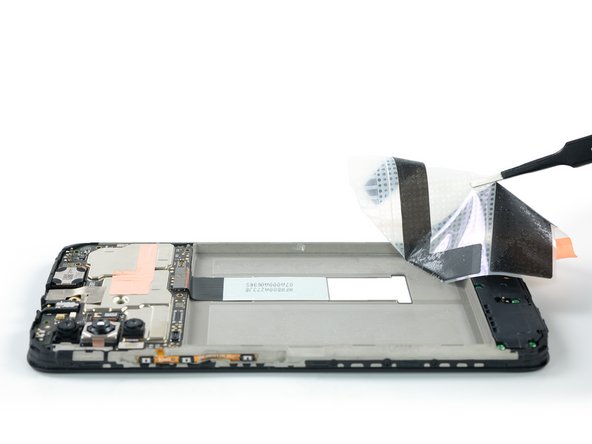
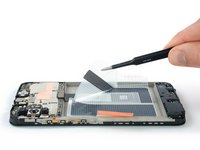
Use a pair of blunt nose tweezers or a clean fingernail to peel the top edge of the orange adhesive strip labeled with an A off the battery.
-
Use a pair of blunt nose tweezers or a clean fingernail to peel the bottom edge of the orange adhesive strip labeled with an A off the battery.
-
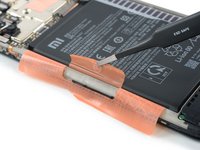
Fold down the adhesive strip labeled with an A.
-
-
-
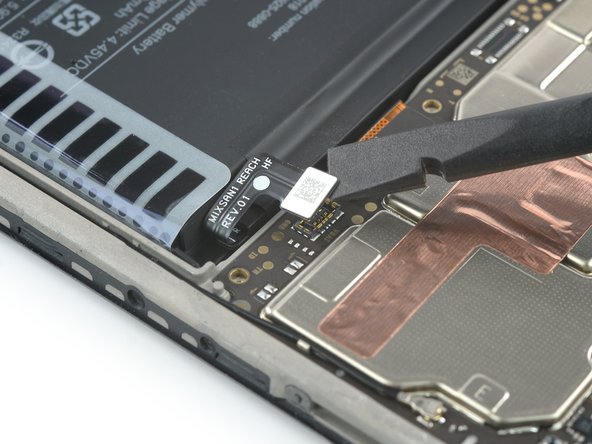
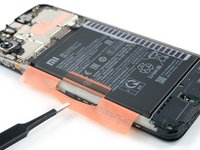
Use a pair of blunt nose tweezers or a clean fingernail the orange adhesive strip labeled with a B off the battery.
-
-
-
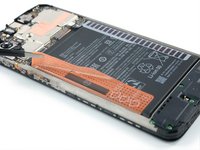
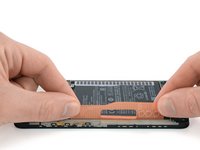
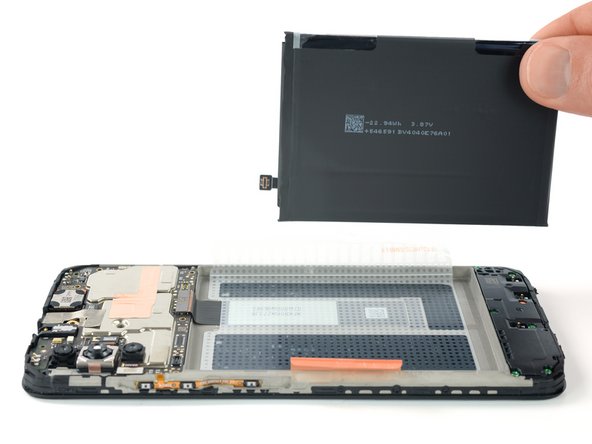
Grab both corners of the orange adhesive strip labeled with an A.
-
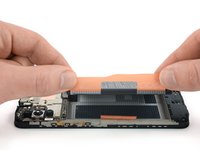
Pull upwards to lift the battery out of its recess and swing it to an upright position.
-


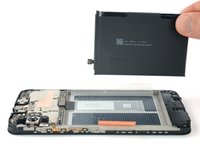


If possible, turn on your device and test your repair before installing new adhesive and resealing.
Secure the new battery with pre-cut adhesive or double-sided adhesive tape. In order to position it correctly, apply the new adhesive into the device at the places where the old adhesive was located, not directly onto the battery. Press the new battery firmly into place.
To reassemble your device, follow these instructions in reverse order. Apply new adhesive where necessary after cleaning the relevant areas with isopropyl alcohol (>90%).
For optimal performance, after completing this guide, calibrate your newly installed battery.
Take your e-waste to an R2 or e-Stewards certified recycler.
Repair didn’t go as planned? Try some basic troubleshooting, or ask our Answers community for help.
İptal et: Bu kılavuzu tamamlamadım.
22 farklı kişi bu kılavuzu tamamladı.


2Kılavuz Yorumları
This by far the greatest step by step I've ever seen 100/10 :D