Ana içeriğe geç
Onarım Topluluğuna Katılın - Hesap Oluşturun

iPhone 12 Battery Replacement

Neye ihtiyacın var

    1. iPhone 12 Battery Replacement, Eject the SIM card tray: adım 1, 2 resimden 1. iPhone 12 Battery Replacement, Eject the SIM card tray: adım 1, 2 resimden 2.
      • Insert a SIM card eject tool or a paperclip into the small hole in the SIM card tray, located on the volume button edge of the iPhone.

      • Press firmly to eject the tray.

      FixBot'a Sor

      Yorum Ekle

    2. iPhone 12 Battery Replacement, Remove the SIM card tray: adım 2, 3 resimden 1. iPhone 12 Battery Replacement, Remove the SIM card tray: adım 2, 3 resimden 2. iPhone 12 Battery Replacement, Remove the SIM card tray: adım 2, 3 resimden 3.
      • Remove the SIM card tray from the iPhone.

      • The SIM card will fall out of the tray easily.

      • When reinserting the SIM card, make sure it's in the proper orientation inside the tray.

      • A thin rubber gasket around the SIM tray provides water and dust protection. If this gasket is damaged or missing, replace the gasket or the entire SIM tray to protect your iPhone's internal components.

      FixBot'a Sor

      Yorum Ekle

    1. iPhone 12 Battery Replacement, Remove the pentalobe screws: adım 3, 1 resimden 1.
      • Caution: Before you begin, discharge your iPhone battery below 25%. A charged lithium-ion battery can catch fire and/or explode if accidentally punctured.

      • Power off your iPhone before beginning disassembly.

      • Remove the two 6.75 mm long pentalobe P2 screws at the bottom edge of the iPhone.

      • Opening the iPhone's display will compromise its waterproof seals. Have replacement seals ready before you proceed past this step, or take care to avoid liquid exposure if you reassemble your iPhone without replacing the seals.

      FixBot'a Sor

      Yorum Ekle

    1. iPhone 12 Battery Replacement, Mark your opening picks: adım 4, 3 resimden 1. iPhone 12 Battery Replacement, Mark your opening picks: adım 4, 3 resimden 2. iPhone 12 Battery Replacement, Mark your opening picks: adım 4, 3 resimden 3.
      • If inserted too far, an opening pick can damage your device. Follow this step to mark your pick and prevent damage.

      • Measure 3 mm from the tip and mark the opening pick with a permanent marker.

      • You can also mark the other corners of the pick with different measurements.

      • Alternatively, tape a coin to a pick 3 mm from the tip.

      FixBot'a Sor

      Yorum Ekle

    1. iPhone 12 Battery Replacement, Tape over any cracks: adım 5, 3 resimden 1. iPhone 12 Battery Replacement, Tape over any cracks: adım 5, 3 resimden 2. iPhone 12 Battery Replacement, Tape over any cracks: adım 5, 3 resimden 3.
      • Glass shards can complicate disassembly—or worse, cause injury. If your phone has a cracked screen, follow this step.

      • Wear safety glasses to protect your eyes from any glass shaken free during the repair.

      • Apply strips of packing tape to the cracked glass until the whole screen is covered—this will help keep the glass contained and allow the suction cup to stick to the screen.

      • Make sure there's a single strip (not overlapping) of tape across the bottom edge, big enough for a suction cup to fit on.

      • If you can't get the suction cup to stick in the next few steps, fold a strong piece of tape (such as duct tape) into a handle and lift the screen with that instead.

      • If all else fails, you can superglue the suction cup to the screen.

      FixBot'a Sor

      Yorum Ekle

    2. iPhone 12 Battery Replacement, Anti-Clamp instructions: adım 6, 3 resimden 1. iPhone 12 Battery Replacement, Anti-Clamp instructions: adım 6, 3 resimden 2. iPhone 12 Battery Replacement, Anti-Clamp instructions: adım 6, 3 resimden 3.
      Bu adımda kullanılan alet:
      Clampy - Anti-Clamp
      $24.95
      • The next three steps demonstrate the Anti-Clamp, a tool we designed to make the opening procedure easier. If you aren't using the Anti-Clamp, skip down three steps for an alternate method.

      • For complete instructions on how to use the Anti-Clamp, check out this guide.

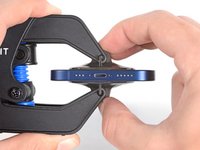
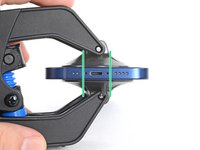
      • Pull the blue handle backwards to unlock the Anti-Clamp's arms.

      • Slide the arms over either the left or right edge of your iPhone.

      • Position the suction cups near the bottom edge of the iPhone—one on the front, and one on the back.

      • Squeeze the cups together to apply suction to the desired area.

      • If you find that the surface of your iPhone is too slippery for the Anti-Clamp to hold onto, you can use tape to create a grippier surface.

      FixBot'a Sor

      Yorum Ekle

    3. iPhone 12 Battery Replacement: adım 7, 3 resimden 1. iPhone 12 Battery Replacement: adım 7, 3 resimden 2. iPhone 12 Battery Replacement: adım 7, 3 resimden 3.
      • Pull the blue handle forwards to lock the arms.

      • Turn the handle clockwise 360 degrees or until the cups start to stretch.

      • Make sure the suction cups remain aligned with each other. If they begin to slip out of alignment, loosen the suction cups slightly and realign the arms.

      FixBot'a Sor

      Yorum Ekle

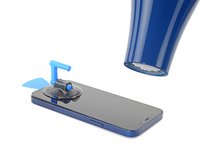
    4. iPhone 12 Battery Replacement: adım 8, 3 resimden 1. iPhone 12 Battery Replacement: adım 8, 3 resimden 2. iPhone 12 Battery Replacement: adım 8, 3 resimden 3.
      • Support your iPhone on something sturdy such as a hardcover book so it rests hands-free and parallel to the ground; this makes it easier to work with in the following steps.

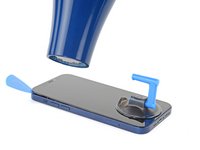
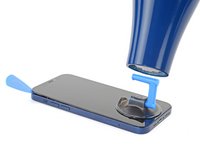
      • Use a hair dryer to heat along the bottom edge of the iPhone. The screen should feel slightly too hot to touch.

      • For complete instructions on how to use a hair dryer, check out this guide.

      • Wait one minute to give the adhesive a chance to release and present an opening gap.

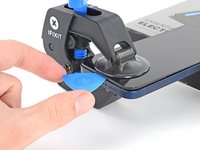
      • Insert an opening pick under the screen's plastic bezel when the Anti-Clamp creates a large enough gap.

      • If the Anti-Clamp doesn't create a sufficient gap, apply more heat to the area and rotate the handle a quarter turn.

      • Don't crank more than a quarter turn at a time, and wait one minute between turns. Let the Anti-Clamp and time do the work for you.

      • Skip the next three steps.

      FixBot'a Sor

      Yorum Ekle

    5. iPhone 12 Battery Replacement, Heat the bottom edge: adım 9, 1 resimden 1.
      • Use a hair dryer or heat gun to heat the bottom half of the screen until it’s slightly too hot to touch. This softens the adhesive securing it.

      • Improper use of a heat gun can destroy the display and/or battery—review this guide for instructions. To prevent screen damage, keep your heat source moving rather than focused on one spot.

      • For tips on using a hair dryer to soften adhesive, check out this guide.

      FixBot'a Sor

      Yorum Ekle

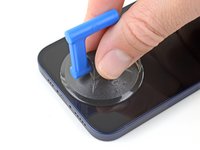
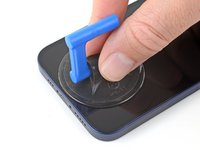
    6. iPhone 12 Battery Replacement, Apply a suction cup: adım 10, 2 resimden 1. iPhone 12 Battery Replacement, Apply a suction cup: adım 10, 2 resimden 2.
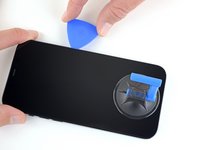
      • Apply a suction handle to the bottom edge of the screen.

      FixBot'a Sor

      Yorum Ekle

    7. iPhone 12 Battery Replacement, Screen information: adım 11, 1 resimden 1.
      • To avoid damaging your screen in the next step, note the following:

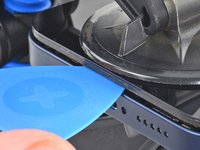
      • There's a plastic bezel on the underside of the screen. Your opening pick will go underneath this bezel.

      • There's a seam between the plastic bezel and the display panel. Don't insert your pick here or you'll damage the screen.

      • Sometimes the display panel separates from the bezel before you even get a chance to insert a pick. This may be unavoidable depending on the condition of the adhesive. In this case, you’ll most likely need to replace your entire screen.

      FixBot'a Sor

      Yorum Ekle

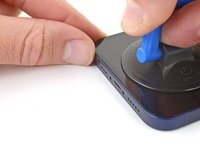
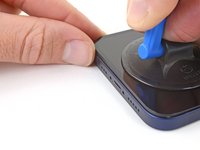
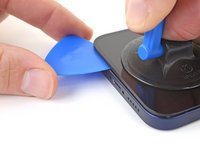
    8. iPhone 12 Battery Replacement, Lift the screen slightly: adım 12, 3 resimden 1. iPhone 12 Battery Replacement, Lift the screen slightly: adım 12, 3 resimden 2. iPhone 12 Battery Replacement, Lift the screen slightly: adım 12, 3 resimden 3.
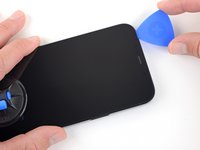
      • Pull up on the suction handle with firm, constant pressure to create a slight gap under the screen’s plastic bezel.

      • The adhesive holding the screen in place is very strong. If you're having a hard time, be patient, apply more heat, and try again.

      • Insert an opening pick into the gap.

      • Remember to insert the opening pick under the thick plastic bezel to avoid damaging your screen.

      FixBot'a Sor

      Yorum Ekle

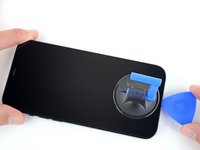
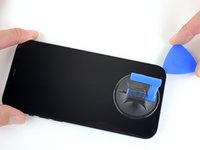
    9. iPhone 12 Battery Replacement, Separate the bottom edge adhesive: adım 13, 3 resimden 1. iPhone 12 Battery Replacement, Separate the bottom edge adhesive: adım 13, 3 resimden 2. iPhone 12 Battery Replacement, Separate the bottom edge adhesive: adım 13, 3 resimden 3.
      • Don't insert your opening pick deeper than 3 mm along the bottom edge.

      • Slide your pick back and forth along the bottom edge to separate the adhesive.

      • Leave your pick inserted in the bottom right corner to prevent the adhesive from re-sealing.

      FixBot'a Sor

      Yorum Ekle

    10. iPhone 12 Battery Replacement, Heat the right edge: adım 14, 2 resimden 1. iPhone 12 Battery Replacement, Heat the right edge: adım 14, 2 resimden 2.
      • Use a hair dryer to heat the right edge of the iPhone (the edge with the power button) until the screen is slightly too hot to touch.

      FixBot'a Sor

      Yorum Ekle

    11. iPhone 12 Battery Replacement, Separate the right adhesive: adım 15, 3 resimden 1. iPhone 12 Battery Replacement, Separate the right adhesive: adım 15, 3 resimden 2. iPhone 12 Battery Replacement, Separate the right adhesive: adım 15, 3 resimden 3.
      • Slide the opening pick around the bottom right corner of the iPhone to separate its adhesive.

      • Continue sliding up the right edge of the iPhone until you reach the top right corner.

      • Don't insert your pick more than 3 mm, as you may damage internal components.

      • Leave the pick in the top right corner before continuing.

      FixBot'a Sor

      Yorum Ekle

    12. iPhone 12 Battery Replacement, Heat the top edge: adım 16, 1 resimden 1.
      • Use a hair dryer to heat the top edge of the iPhone until the screen is slightly too hot to touch.

      FixBot'a Sor

      Yorum Ekle

    13. iPhone 12 Battery Replacement, Separate the top adhesive: adım 17, 3 resimden 1. iPhone 12 Battery Replacement, Separate the top adhesive: adım 17, 3 resimden 2. iPhone 12 Battery Replacement, Separate the top adhesive: adım 17, 3 resimden 3.
      • Slide the opening pick around the top right corner of the iPhone to separate the top adhesive.

      • Don't insert your pick more than 3 mm, as you may damage the top sensors.

      • Leave the pick in the top left corner before continuing.

      FixBot'a Sor

      Yorum Ekle

    14. iPhone 12 Battery Replacement, Heat the left edge: adım 18, 2 resimden 1. iPhone 12 Battery Replacement, Heat the left edge: adım 18, 2 resimden 2.
      • Use a hair dryer to heat the left edge of the iPhone until the screen is slightly too hot to touch.

      FixBot'a Sor

      Yorum Ekle

    15. iPhone 12 Battery Replacement, Separate the left adhesive: adım 19, 3 resimden 1. iPhone 12 Battery Replacement, Separate the left adhesive: adım 19, 3 resimden 2. iPhone 12 Battery Replacement, Separate the left adhesive: adım 19, 3 resimden 3.
      • Don't insert your pick deeper than 2 mm along the left edge to avoid the two cables connecting the screen to the phone.

      • Rotate your pick around the top left corner of the screen.

      • Slide your pick down the left edge of the screen to separate the adhesive.

      • If you're having trouble separating the adhesive, reheat the left edge.

      FixBot'a Sor

      Yorum Ekle

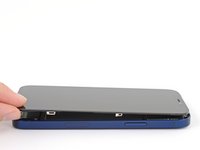
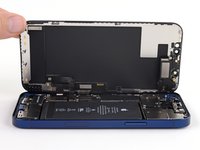
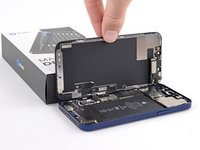
    16. iPhone 12 Battery Replacement, Open the iPhone: adım 20, 3 resimden 1. iPhone 12 Battery Replacement, Open the iPhone: adım 20, 3 resimden 2. iPhone 12 Battery Replacement, Open the iPhone: adım 20, 3 resimden 3.
      • Rotate your iPhone so the right edge faces you.

      • Open the iPhone by swinging the display up from the right side, like the front cover of a book.

      • Don't try to fully separate the display yet, as several fragile ribbon cables still connect it to the iPhone's logic board.

      • Lean the display against something to keep it propped up while you're working on the phone.

      • During reassembly, lay the display in position, align the clips along the top edge, and carefully press the top edge into place before snapping the rest of the display down. If it doesn't click easily into place, check the condition of the clips around the perimeter of the display and make sure they aren't bent.

      FixBot'a Sor

      Yorum Ekle

    17. iPhone 12 Battery Replacement, Unscrew the battery and display connector cover: adım 21, 1 resimden 1.
      Bu adımda kullanılan alet:
      Magnetic Project Mat
      $19.95
      • Remove two 1.1 mm long Y000 screws securing the battery and display connector cover.

      • Throughout this repair, keep track of each screw and make sure it goes back exactly where it came from to avoid damaging your iPhone.

      • During reassembly, this is a good point to power on your iPhone and test all functions before you seal the display in place. Be sure to power your iPhone back down completely before you continue working.

      FixBot'a Sor

      Yorum Ekle

    18. iPhone 12 Battery Replacement, Remove the battery and display connector cover: adım 22, 1 resimden 1.
      • Remove the cover.

      FixBot'a Sor

      Yorum Ekle

    19. iPhone 12 Battery Replacement, Disconnect the battery: adım 23, 2 resimden 1. iPhone 12 Battery Replacement, Disconnect the battery: adım 23, 2 resimden 2.
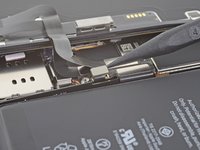
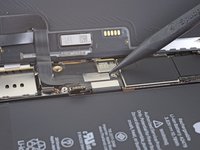
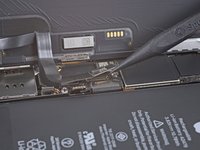
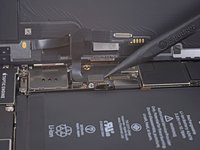
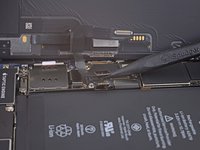
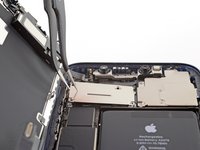
      • Use a spudger or a clean fingernail to pry the battery connector up from its socket on the logic board.

      • Try not to damage the black silicone seal surrounding this and other board connections. These seals provide extra protection against water and dust intrusion.

      • Bend the connector slightly away from the logic board to prevent it from accidentally making contact with the socket and providing power to the phone during your repair.

      FixBot'a Sor

      Yorum Ekle

    20. iPhone 12 Battery Replacement, Disconnect the display cable: adım 24, 2 resimden 1. iPhone 12 Battery Replacement, Disconnect the display cable: adım 24, 2 resimden 2.
      • Use a spudger or a fingernail to disconnect the display cable connector.

      • To re-attach press connectors like this one, carefully align and press down on one side until it clicks into place, then repeat on the other side. Do not press down on the middle. If the connector is misaligned, the pins can bend, causing permanent damage.

      FixBot'a Sor

      Yorum Ekle

    21. iPhone 12 Battery Replacement, Disconnect the digitizer cable: adım 25, 2 resimden 1. iPhone 12 Battery Replacement, Disconnect the digitizer cable: adım 25, 2 resimden 2.
      • Use a spudger or a fingernail to disconnect the digitizer cable connector.

      • If any part of your screen doesn't respond to touch after your repair, disconnect the battery and then re-seat this connector, making sure it clicks fully into place and that there's no dust or other obstruction in the socket.

      FixBot'a Sor

      Yorum Ekle

    22. iPhone 12 Battery Replacement, Unscrew the front sensor connector cover: adım 26, 1 resimden 1.
      • Use a Y000 driver to remove four screws securing the front sensor connector cover.

      • Three 1.1 mm long screws

      • One 1.4 mm long screw

      FixBot'a Sor

      Yorum Ekle

    23. iPhone 12 Battery Replacement, Remove the front sensor connector cover: adım 27, 3 resimden 1. iPhone 12 Battery Replacement, Remove the front sensor connector cover: adım 27, 3 resimden 2. iPhone 12 Battery Replacement, Remove the front sensor connector cover: adım 27, 3 resimden 3.
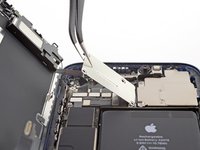
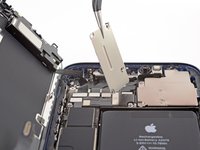
      • Swing the cover up from the left until the small clip on the right unhooks.

      • Remove the cover.

      • During reassembly, insert the clip on the right edge into its slot first, then hinge the rest of the cover into place.

      FixBot'a Sor

      Yorum Ekle

    24. iPhone 12 Battery Replacement, Disconnect the front sensors: adım 28, 2 resimden 1. iPhone 12 Battery Replacement, Disconnect the front sensors: adım 28, 2 resimden 2.
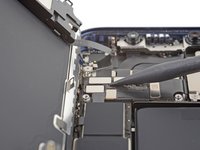
      • Use a spudger or a fingernail to disconnect the front sensor assembly cable connector.

      FixBot'a Sor

      Yorum Ekle

    25. iPhone 12 Battery Replacement, Remove the display assembly: adım 29, 1 resimden 1.
      FixBot'a Sor

      Yorum Ekle

    1. iPhone 12 Battery Replacement, Unscrew the loudspeaker: adım 30, 1 resimden 1.
      • Use a Phillips driver to remove the four 1.6 mm screws securing the loudspeaker.

      FixBot'a Sor

      Yorum Ekle

    2. iPhone 12 Battery Replacement, Remove the loudspeaker: adım 31, 1 resimden 1.
      • Remove the loudspeaker.

      FixBot'a Sor

      Yorum Ekle

    1. iPhone 12 Battery Replacement, Unscrew the SIM card reader connector cover: adım 32, 1 resimden 1.
      • Use a Y000 driver to remove the two 1.4 mm long screws securing the SIM card reader connector cover.

      FixBot'a Sor

      Yorum Ekle

    2. iPhone 12 Battery Replacement, Remove the SIM card reader cable connector cover: adım 33, 1 resimden 1.
      • Remove the SIM card reader cable connector cover.

      FixBot'a Sor

      Yorum Ekle

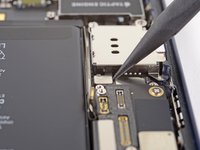
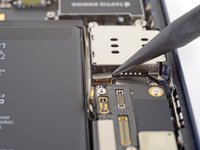
    3. iPhone 12 Battery Replacement, Disconnect the SIM card reader: adım 34, 2 resimden 1. iPhone 12 Battery Replacement, Disconnect the SIM card reader: adım 34, 2 resimden 2.
      • Use the point of a spudger to pry the SIM card reader cable connector straight up and out of its socket on the logic board.

      FixBot'a Sor

      Yorum Ekle

    4. iPhone 12 Battery Replacement, Unscrew the SIM card reader: adım 35, 1 resimden 1.
      • Use a Y000 driver to remove the three screws securing the SIM card reader.

      • Two 1.4 mm screws

      • One 1.1 mm screw

      FixBot'a Sor

      Yorum Ekle

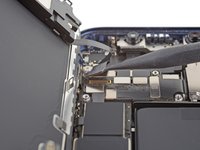
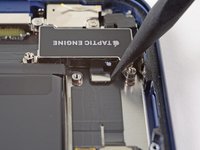
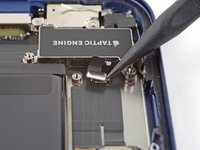
    5. iPhone 12 Battery Replacement, Remove the Taptic Engine cable connector bracket: adım 36, 1 resimden 1.
      • Remove the Taptic Engine cable connector bracket.

      FixBot'a Sor

      Yorum Ekle

    6. iPhone 12 Battery Replacement, Unscrew the SIM card reader: adım 37, 1 resimden 1.
      Bu adımda kullanılan alet:
      Standoff Screwdriver for iPhones
      $5.49
      • Use a standoff or a small flathead driver to remove the 2.82 mm long standoff screw securing the SIM card reader.

      • Standoff screws are best removed using a standoff screwdriver or bit.

      • In a pinch, a small flathead screwdriver will do the job—but use extra caution to ensure it doesn't slip and damage surrounding components.

      FixBot'a Sor

      Yorum Ekle

    7. iPhone 12 Battery Replacement, Remove the SIM card reader: adım 38, 1 resimden 1.
      • Remove the SIM card reader.

      • Before reinstallation, make sure the SIM eject plunger is pushed into the edge of the phone.

      FixBot'a Sor

      Yorum Ekle

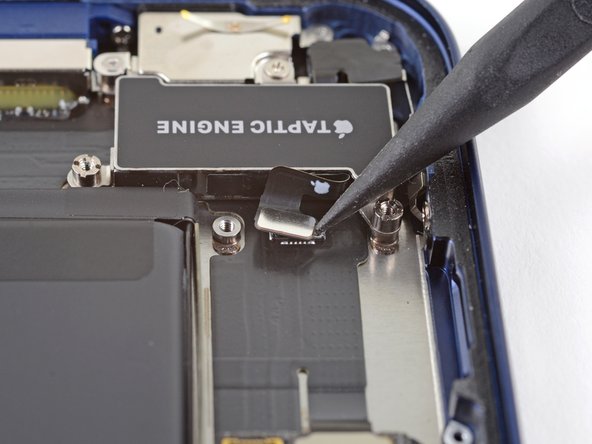
    1. iPhone 12 Battery Replacement, Disconnect the Taptic Engine: adım 39, 2 resimden 1. iPhone 12 Battery Replacement, Disconnect the Taptic Engine: adım 39, 2 resimden 2.
      • Use the point of a spudger to pry the Taptic Engine cable connector straight up and out of its socket on the logic board.

      FixBot'a Sor

      Yorum Ekle

    2. iPhone 12 Battery Replacement, Unscrew the Taptic Engine: adım 40, 1 resimden 1.
      • Remove the three screws securing the Taptic Engine.

      • Two 2.8 mm long standoff screws

      • One 1.8 mm Phillips screw

      FixBot'a Sor

      Yorum Ekle

    3. iPhone 12 Battery Replacement, Remove the Taptic Engine: adım 41, 1 resimden 1.
      • Remove the Taptic Engine.

      FixBot'a Sor

      Yorum Ekle

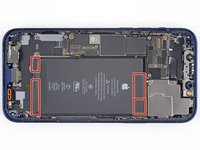
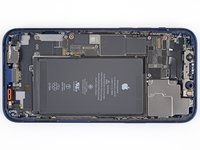
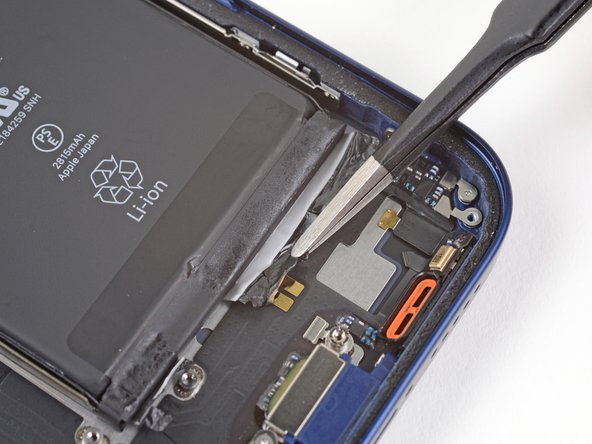
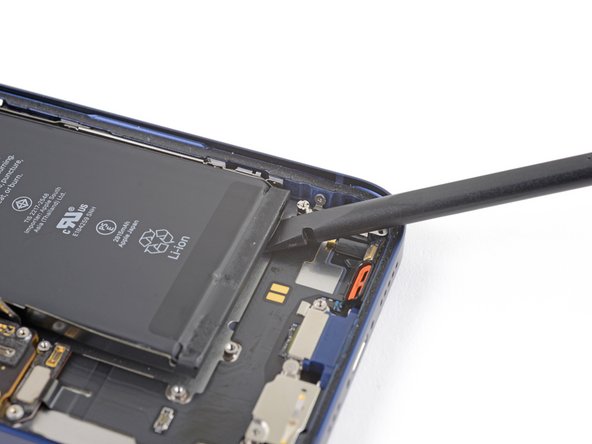
    1. iPhone 12 Battery Replacement, Locate the adhesive pull-tabs: adım 42, 3 resimden 1. iPhone 12 Battery Replacement, Locate the adhesive pull-tabs: adım 42, 3 resimden 2. iPhone 12 Battery Replacement, Locate the adhesive pull-tabs: adım 42, 3 resimden 3.
      • The battery is secured to the rear case with four pieces of stretch-release adhesive—two on the bottom edge of the battery, and two on the top edge.

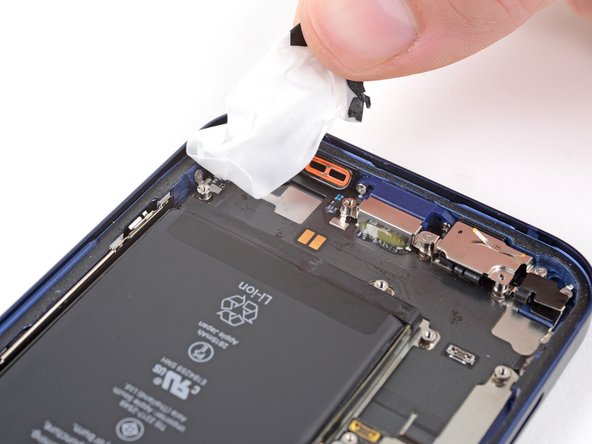
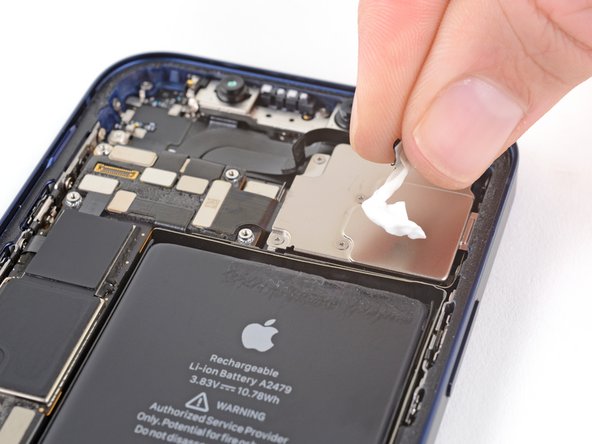
      • Each piece of adhesive has a black pull-tab at the end, which is lightly adhered to the edge of the battery.

      • In the following steps, you'll pull each tab to slowly stretch out the adhesive underneath the battery. These "command-strip" style adhesives lose their stick when stretched, so you can remove the battery with ease.

      • If the strips break, don't panic! They don't always work as intended. Keep reading for tips on removing broken strips.

      FixBot'a Sor

      Yorum Ekle

    2. iPhone 12 Battery Replacement, Remove the stretch-release adhesive: adım 43, 2 resimden 1. iPhone 12 Battery Replacement, Remove the stretch-release adhesive: adım 43, 2 resimden 2.
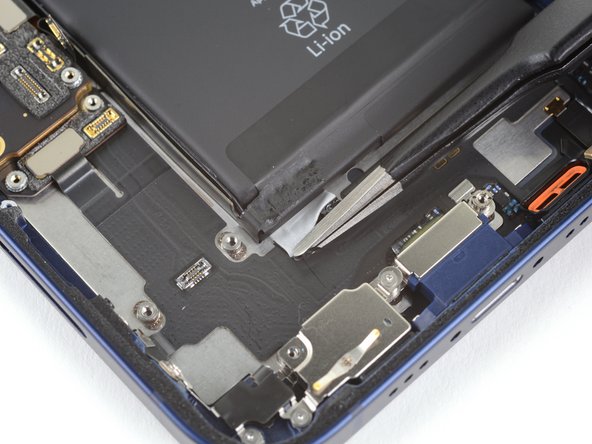
      • Peel down the first battery adhesive pull-tab to un-stick it from the bottom edge of the battery.

      • Caution: Don't jab the battery with any sharp tools. A punctured battery may leak dangerous chemicals or catch fire.

      FixBot'a Sor

      Yorum Ekle

    3. iPhone 12 Battery Replacement: adım 44, 2 resimden 1. iPhone 12 Battery Replacement: adım 44, 2 resimden 2.
      • Peel down the second battery adhesive pull-tab to un-stick it from the bottom edge of the battery.

      FixBot'a Sor

      Yorum Ekle

    4. iPhone 12 Battery Replacement: adım 45, 3 resimden 1. iPhone 12 Battery Replacement: adım 45, 3 resimden 2. iPhone 12 Battery Replacement: adım 45, 3 resimden 3.
      Bu adımda kullanılan alet:
      Tweezers
      $4.99
      • Grab the first pull-tab with your fingers and slowly pull it away from the battery, toward the bottom of the iPhone.

      • Pull hard enough to maintain tension on the strip, but don't force it. Give it plenty of time to stretch and un-stick from under the battery.

      • Don't press down on the battery. Hold the iPhone firmly by its sides.

      • Keep the strip flat and unwrinkled. Try to pull evenly on the whole strip, rather than pulling mainly in the middle or on one side.

      • Pull at a low angle so the strip doesn't snag on the edge of the battery.

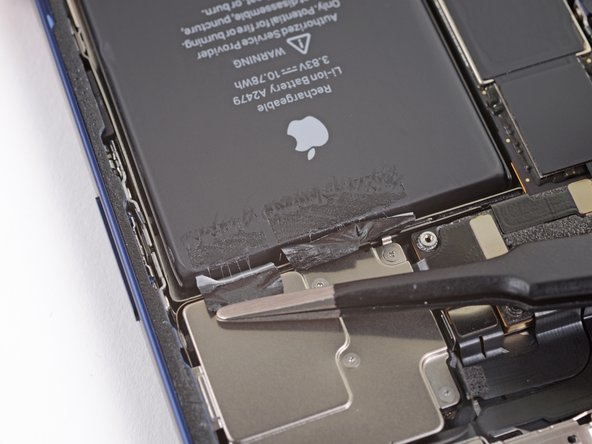
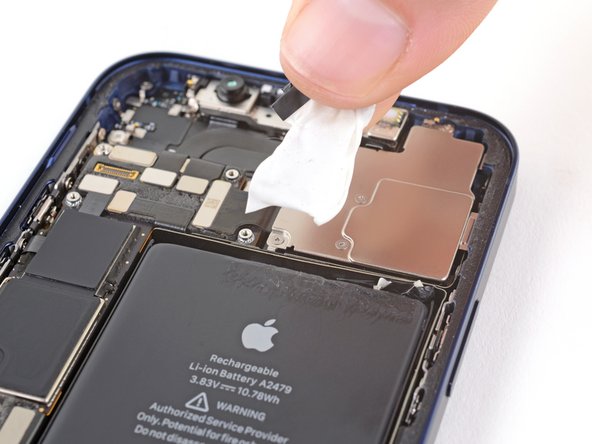
      • If the adhesive strip breaks off, try to retrieve it using your fingers or blunt tweezers, and continue pulling—but do not pry under the battery.

      • If any of the adhesive strips break off underneath the battery and can't be retrieved, try to remove the other strips, and then proceed as instructed below.

      FixBot'a Sor

      Yorum Ekle

    5. iPhone 12 Battery Replacement: adım 46, 3 resimden 1. iPhone 12 Battery Replacement: adım 46, 3 resimden 2. iPhone 12 Battery Replacement: adım 46, 3 resimden 3.
      • Grab the second pull-tab with your fingers and pull it away from the battery, toward the bottom of the iPhone.

      • Follow the same procedure as with the previous strip: don't press down on the battery, keep the strip flat and unwrinkled, and pull at a low angle.

      • If the adhesive strip breaks off, try to retrieve it using your fingers or blunt tweezers, and continue pulling—but do not pry under the battery.

      • If the adhesive breaks off underneath the battery and can't be retrieved, continue with the next step.

      FixBot'a Sor

      Yorum Ekle

    6. iPhone 12 Battery Replacement: adım 47, 3 resimden 1. iPhone 12 Battery Replacement: adım 47, 3 resimden 2. iPhone 12 Battery Replacement: adım 47, 3 resimden 3.
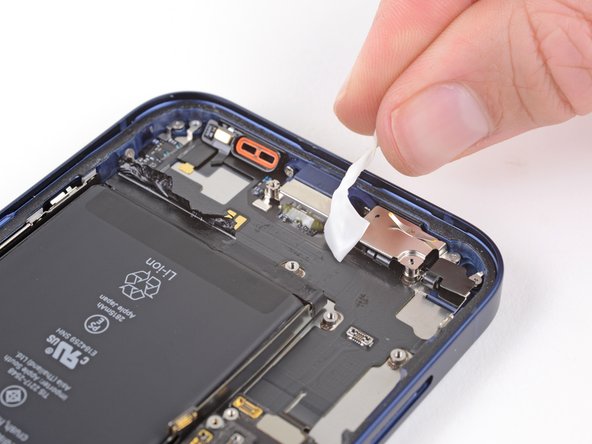
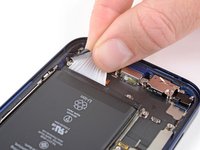
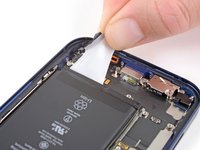
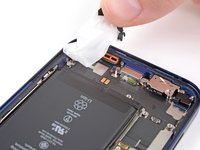
      • Peel up the two remaining battery adhesive pull-tabs to un-stick them from the top edge of the battery.

      FixBot'a Sor

      Yorum Ekle

    7. iPhone 12 Battery Replacement: adım 48, 3 resimden 1. iPhone 12 Battery Replacement: adım 48, 3 resimden 2. iPhone 12 Battery Replacement: adım 48, 3 resimden 3.
      • Using the same procedure as before, pull the remaining two tabs, one at a time, to stretch and remove the remaining adhesive strip holding the battery in place. Try not to snag the adhesive on anything.

      • Be careful not to fling the battery from the iPhone as the final adhesive strip comes out.

      • If you removed all the adhesive strips successfully, skip the next step.

      • Otherwise, continue with the next step below.

      FixBot'a Sor

      Yorum Ekle

    8. iPhone 12 Battery Replacement, How to remove a stuck battery: adım 49, 2 resimden 1. iPhone 12 Battery Replacement, How to remove a stuck battery: adım 49, 2 resimden 2.
      • If you're still having trouble removing the battery, apply a few drops of high concentration (over 90%) isopropyl alcohol under the edge of the battery in the area of the broken adhesive strip(s).

      • Wait about one minute for the alcohol solution to weaken the adhesive.

      • Use an opening pick or the flat end of a spudger to gently lift the battery.

      • Don't try to forcefully lever the battery out. If needed, apply a few more drops of alcohol to further weaken the adhesive. Never deform or puncture the battery with your pry tool.

      FixBot'a Sor

      Yorum Ekle

    9. iPhone 12 Battery Replacement, Remove the battery: adım 50, 1 resimden 1.
      • Remove the battery.

      • If there's any alcohol solution remaining in the phone, carefully wipe it off or allow it to air dry before installing your new battery.

      • If your new battery didn't come with adhesive preinstalled, refer to this guide for help replacing the adhesive strips.

      • Perform a force restart after reassembly. This can prevent several issues and simplify troubleshooting.

      FixBot'a Sor

      Yorum Ekle

Sonuç

Compare your new replacement part to the original part—you may need to transfer remaining components or remove adhesive backings from the new part before installing.

To reassemble your device, follow the above steps in reverse order.

After your repair, depending on the replacement part, you may be able to calibrate it using Apple's Repair Assistant, available as of iOS 18. Update your device, navigate to Settings General About Parts & Service History, tap Restart & Finish Repair, and follow the onscreen prompts.

Take your e-waste to an R2 or e-Stewards certified recycler.

Repair didn’t go as planned? Try some basic troubleshooting, or ask our iPhone 12 Answers community for help.

İptal et: Bu kılavuzu tamamlamadım.

137 farklı kişi bu kılavuzu tamamladı.

Adam O'Camb

Üyelik tarihi: 04/11/15

224.536 İtibar

416 adet Kılavuz yazıldı

11Kılavuz Yorumları

bravo! thank you

Forr Rest - Yanıt Paylaş

Good work.

A few words of advice

If you don't have the original disassembly kit, be really careful with the LCD, it's as crunchy as anything. Heat a lot (100-120C) and if you're careful, a few drops of isopropyl will dissolve the annoying double-sided tape - but don't pour it there (you'll destroy the display), just a few drops and always wait a bit and move the pry bar Most pry bars for separating the LCD from the frame are very thick, it is better to use durable foil, metal plates or high-quality paper playing cards.
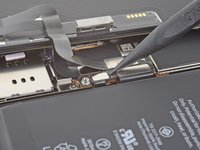
Don't be lazy to remove the SIM box and taptic engine, it will be easier to remove the straps under the battery. If you have twitches, isopropyl and heat will help ''''

Before gluing it (I recommend the original gluing kit), carefully clean the surfaces so that there are no old tape clumps and verify all functions. Do the programming of the original battery on the disassembled piece and all tests including face ID, SIM card, vibrations, if you play with shuffling electronics and JCID cable

milosbartu - Yanıt Paylaş

Hallo , ich habe den neuen Akku eingesetzt und jetzt erscheint in den Einstellungen: Batterie nicht erkannt unbekanntes Gerät.

Woran liegt das ?

Verdieck - Yanıt Paylaş

Da Apple-Akkus verschlüsselt sind, wenn sie nicht mit den vom Originalgerät ausgelesenen Daten übereinstimmen, sind der Akku von Drittanbietern, Apple und der offizielle Akku unbekannte Teile, wenn Sie einen offiziellen Apple-Akku kaufen, sind nur einige Reparaturdienste von Drittanbietern von Apple autorisiert, sie können den offiziellen Diagnosedienst von Apple verwenden, um den Zustand des Akkus wiederherzustellen. oder wenden Sie sich an den autorisierten Reparaturservice von Apple, um die Batterie auszutauschen, und die Batterie des Drittanbieters muss die Batterieschutzplatine des Originalgeräts ersetzen, um den Batteriezustand wiederherzustellen

recall0320 - Yanıt Paylaş

biggest mistake of my life first i had bough a used phone that got repaired then the battery went inflated and then i bough the set and all things werent origial like the speaker and other things so stupidddd........... then i PAID 40 DOLLARS I WOULD EVEN GO TO A APPLE STORE TO PAY 100 TO GET IT FIXED OMG ONE TIME AND NEVER i was sitting at the cold ass winter breeze out and got almost freezed im not gonna do that anymore and brake my body

Simon Muehlhaupt - Yanıt Paylaş

Yorum Ekle

İstatistikleri Görüntüle:

Son 24 Saat: 387

Son 7 gün: 2,425

Son 30 gün: 11,209

Her zaman: 645,900