Ana içeriğe geç

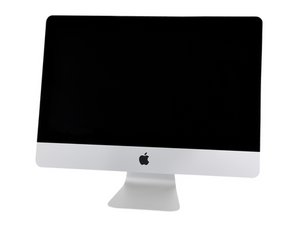
A2116 / 2019 / 3.6 GHz quad-core i3, 3.0 GHz 6-core i5, or 3.2 GHz 6-core i7 processor. Released March 19, 2019.

78 Soru Tümünü görüntüle

iMac display did not stay on

I upgraded the RAM using tools and adhesive strips from this site. A few days later, the display separated from the chassis and torn some wires away from the display connector in the process.

I have a few questions:

  • What did I likely do wrong when I replaced the display? The strips are still attached to the chassis. Was I supposed to heat or significantly pressurize the display?
  • Can the ribbon cable be repaired or replaced in the display?
  • Where can I order a new display if that’s what I need?

Thanks!

John

Bu soruyu yanıtla Ben de bu sorunu yaşıyorum

Bu iyi bir soru mu?

Puan 0
Yorum Ekle

1 Cevap

Filtre ölçütü:
En Yararlı Yanıt

Ouch not good ;-{

Did you follow this guide putting on the tapes? iMac Intel 21.5" Retina 4K Display 2019 Adhesive Strips Replacement do read the warnings and the notes carefully.

At this point you’ll need a new display assembly, hopefully you hadn’t damaged the logic board connector. If you think you have take some pics and post them here for us to see Adding images to an existing question

Here’s the needed part: 21.5” iMac Retina 4K Display Assembly and here’s the guide iMac Intel 21.5" Retina 4K Display 2019 Display Replacement

iFixit Görseli

Kılavuz

Adding images to an existing question

Zorluk:

Çok kolay

2 - 5 minutes

iMac Intel 21.5" Retina 4K Display 2019 Display Görseli

Kılavuz

iMac Intel 21.5" Retina 4K Display 2019 Display Replacement

Zorluk:

Orta

20 - 40 minutes

iMac Intel 21.5" Retina 4K Display 2019 Adhesive Strips Görseli

Kılavuz

iMac Intel 21.5" Retina 4K Display 2019 Adhesive Strips Replacement

Zorluk:

Orta

10 - 30 minutes

Bu yanıt yardımcı oldu mu?

Puan 1

1 Yorum:

Thanks. TL;DR: the machine runs, I failed to cut a mic notch and I think I just need replacement data and power cables for the display along with new adhesive strips. I followed the guide mostly correctly and I have *no idea at all* why the adhesive failed. Do I need to heat it?

This is very helpful. I learned two things here:

1) I used the right guide but failed to cut a mic notch!

2) The replacement display assembly is ridiculously expensive. It's more than 70% the cost of a new machine :-(

I will post photos once I can open it up again. Right now, the machine is functioning and I'm using blue tape to hold the screen on.

The data and power tables running from the display are slightly damaged as the wires enter the connector. Can this be repaired? I will show pictures when I have them. As I said, the machine is running, but the cable(s) look damaged, so I think they will eventually be a problem. The sockets on the board look fine.

tarafından

Yorum Ekle

Yanıtını ekle

JRC sonsuza kadar minnettar olacak.
İstatistikleri Görüntüle:

Son 24 Saat: 0

Son 7 gün: 0

Son 30 gün: 1

Her zaman: 60