Giriş
This repair guide was authored by the iFixit staff and hasn’t been endorsed by Google. Learn more about our repair guides here.
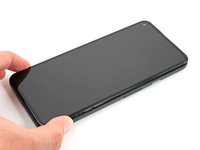
Use this guide to remove or replace the battery on your Google Pixel 5a.
For your safety, discharge the battery below 25% before disassembling your phone. This reduces the risk of a fire if the battery is accidentally damaged during the repair. If your battery is swollen, take appropriate precautions.
For optimal performance, calibrate your newly installed battery after completing this guide.
Neye ihtiyacın var
-
-
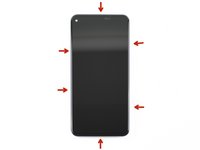
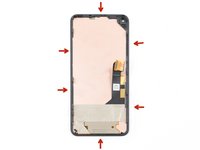
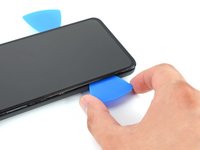
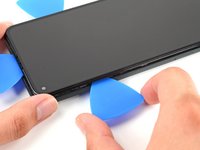
Take note of the two seams on the edge of the phone:
-
Screen seam: This seam separates the screen from the rest of the phone. Do not pry at this seam.
-
Bezel seam: This is where the plastic bezel designed to protect the screen meets the frame. It's held in place by plastic clips. This is where you should pry.
-
-
-
Apply a heated iOpener to the right edge of the display for one minute to soften the adhesive.
-
-
-
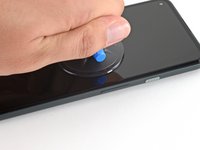
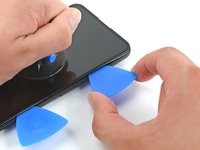
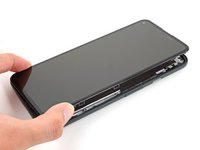
Place a suction cup as close to the right edge of the screen as possible.
-
Lift the suction cup with a strong steady force until a small gap forms between the bezel and midframe.
-
-
-
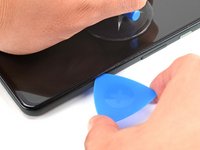
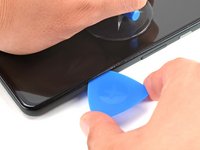
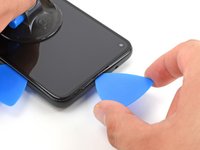
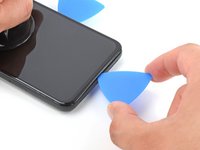
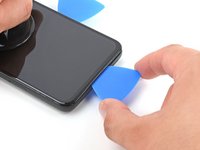
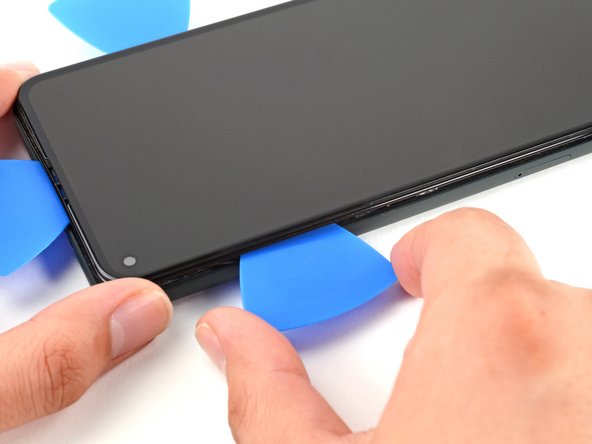
Insert the tip of an opening pick into the bezel seam about 4-5 cm from the bottom of the phone.
-
-
-
Bu adımda kullanılan alet:Tweezers$4.99
-
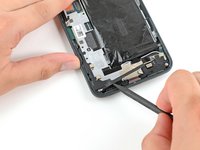
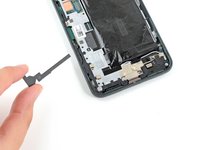
Use a pair of tweezers to remove the screen connector bracket.
-
-
-
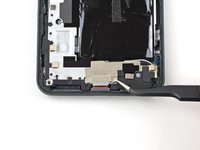
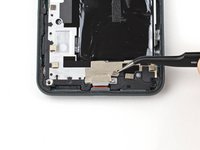
Use the tip of a spudger to pry up and disconnect the screen flex cable.
-
-
-
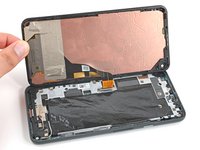
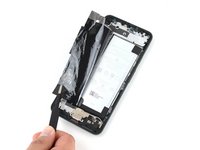
When handling your screen, grip it by its edges.
-
When placing the screen on your work area, make sure nothing is touching the bottom of the screen. Consider placing it on a soft, lint-free cloth.
-
-
-
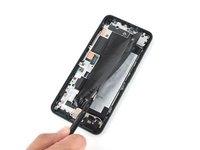
Remove the screen from the phone.
-
If you replaced the screen, check the screen's front-facing camera hole and remove any protective liners covering it.
-
If you are using a custom-cut adhesive, follow this guide to correctly apply new screen adhesive.
-
If you are using Tesa tape to reattach the screen, follow this guide.
-
During the boot-up process after reassembly, the screen will go through a calibration sequence. Do not touch the screen during this process, as it could result in improper touch calibration and create touch issues.
-
-
-
Use a T3 Torx driver to remove six of the screws securing the midframe to the motherboard:
-
Four 4.6 mm screws
-
One 4.0 mm screw
-
One 2.0 mm screw
-
-
-
Use the pointed end of a spudger to pry up on the black plastic cover at the bottom left of the phone.
-
-
-
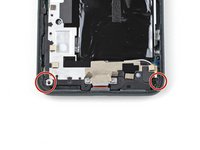
Use a T3 Torx driver to remove the remaining four screws securing the midframe to the motherboard:
-
Three 4.6 mm screws
-
One 4.0 mm screw
-
-
-
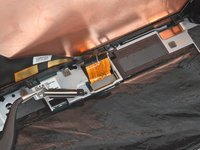
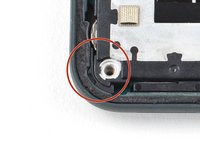
Insert the pointed end of a spudger under the top right corner of the midframe.
-
There is a black plastic clip at the top of the midframe that secures it to the top of the frame. To detach it, use the spudger to pull the midframe down and then pry up.
-
-
-
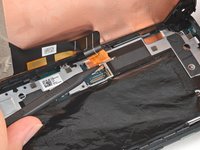
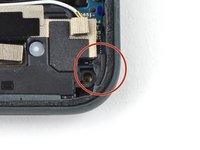
There are two small plastic bits that help hold the midframe in place. Take care not to misplace them, as without the midframe to hold them in place, they are very easy to lose.
-
-
-
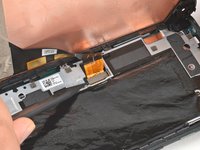
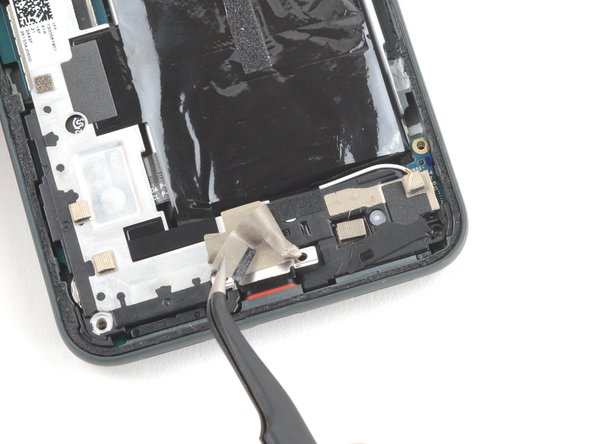
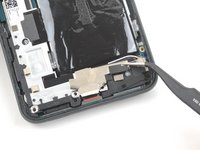
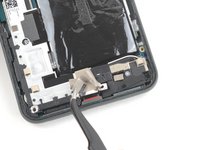
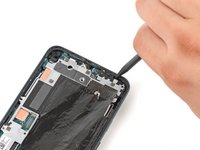
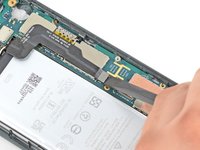
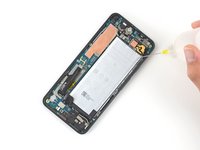
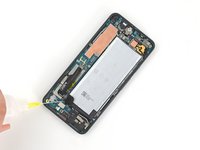
Use the flat end of a spudger to pry up on the battery connector to disconnect it.
-
-
-
Apply 2-3 drops of high concentration (90% or higher) isopropyl alcohol under each corner of the battery and allow it to penetrate for 2-3 minutes to help weaken the adhesive.
-
-
-
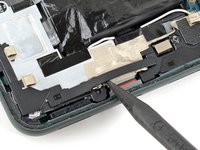
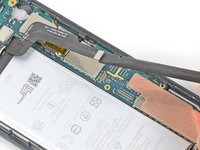
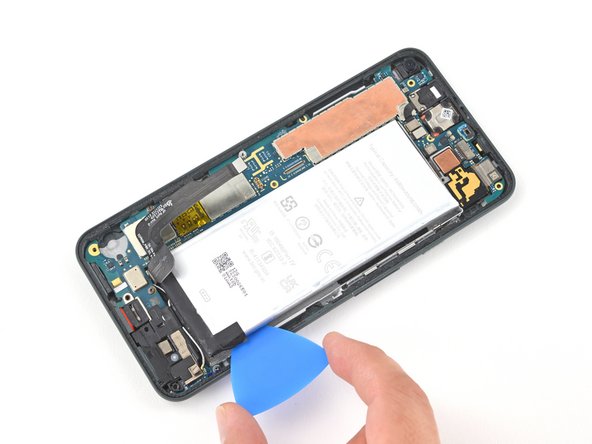
Insert a pick into the gap to the right of the battery and slide its tip underneath the battery.
-
Slide the pick along the right side of the battery to slice through the adhesive securing it to the midframe.
-
Once the right side of the battery begins to separate from the midframe, leave an opening pick in the gap to keep the battery slightly raised.
-
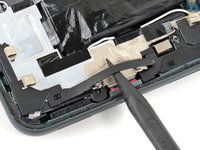
Apply a few drops of isopropyl alcohol directly to the adhesive securing the battery to the midframe. Let the isopropyl penetrate the adhesive for 2-3 minutes.
-
-
Bu adımda kullanılan alet:Tesa 61395 Tape$5.99
-
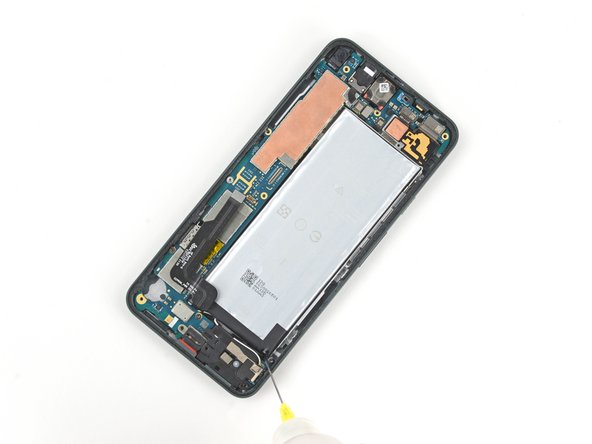
Repeat the last step with an opening card to slice through the remaining adhesive under the right side of the battery.
-
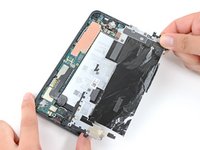
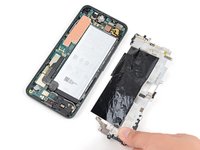
Remove the battery.
-
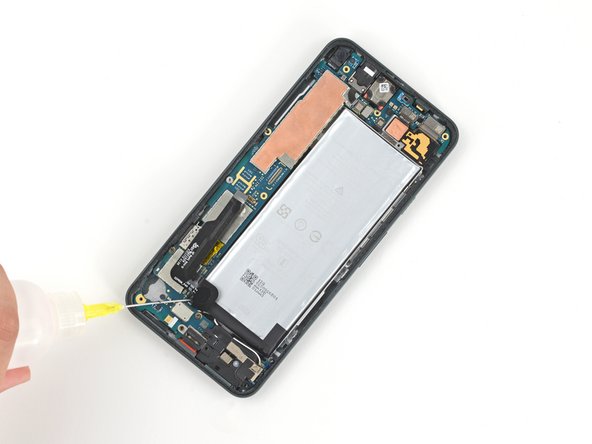
Remove any remaining adhesive from the phone, and clean the entire area under the battery with isopropyl alcohol. If there's any alcohol solution remaining in the phone, carefully wipe it off with a lint-free cloth or allow it to air dry before installing your new battery.
-
Apply a few new strips of pre-cut adhesive or Tesa tape.
-
Press the new battery firmly into place for 5-10 seconds.
-


To reassemble your device, follow these instructions in reverse order.
Take your e-waste to an R2 or e-Stewards certified recycler.
Repair didn’t go as planned? Try some basic troubleshooting, or ask our Google Pixel 5a Answers community for help.
Compare your new replacement part to the original part—you may need to transfer remaining components or remove adhesive backings from the new part before you install it.
For optimal performance, calibrate your newly installed battery after completing this guide.
İptal et: Bu kılavuzu tamamlamadım.
7 farklı kişi bu kılavuzu tamamladı.

5Kılavuz Yorumları
Yes Puv, I own the master msds sheet for the pixel 5a battery
I ended up not needing heat or the i-opener to pry up the right side of the phone because my old battery was swelling enough it had already started pushing the right side apart. Just had to slice through the adhesive.
Careful not to apply much torque with the tiny torx bit. I used my own tool set and stripped my T3 torx bit without using much pressure at all. But maybe the torx bit that comes from iFixIt will hold up better than the one from my own toolkit.
My battery replacement was successful using this guide.