
Google Pixel 6 Pro Rear Camera Replacement

Giriş
1. adıma gitThis repair guide was authored by the iFixit staff and hasn’t been endorsed by Google. Learn more about our repair guides here.
Use this guide to remove or replace the rear camera assembly in your Google Pixel 6 Pro.
For your safety, discharge the battery below 25% before disassembling your phone. This reduces the risk of a dangerous thermal event if the battery is accidentally damaged during the repair. If your battery is swollen, take appropriate precautions.
Caution: The Pixel 6 Pro contains class 1 lasers. Disassembly could result in exposure to invisible infrared laser emissions.
Retaining water resistance after the repair will depend on how well you reapply the adhesive, but your device will lose its IP (Ingress Protection) rating.
You’ll need replacement adhesive to reattach components when reassembling the device.
Neye ihtiyacın var
Tamir Seti
Bu kit, bu kılavuzu tamamlamak için gereken tüm parçaları ve araçları içerir.

Parçalar


Aletler


Daha fazlasını göster…
-
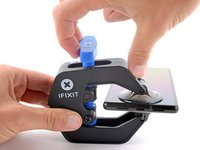
Bu adımda kullanılan alet:Clampy - Anti-Clamp$24.95
-
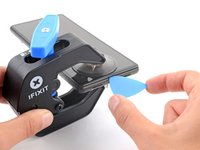
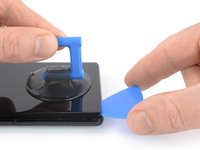
Pull the blue handle backwards to unlock the Anti-Clamp's arms.
-
Slide the arms over either the left or right edge of your phone.
-
Position the suction cups near the bottom edge of the phone—one on the front, and one on the back.
-
Squeeze the cups together to apply suction.
-
-
-
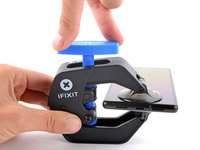
Heat an iOpener and thread it through the arms of the Anti-Clamp.
-
Fold the iOpener so it lays on the bottom edge of the phone.
-
Wait one minute to give the adhesive a chance to release and present an opening gap.
-
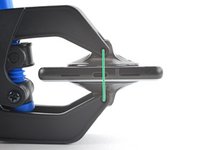
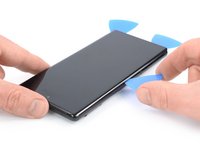
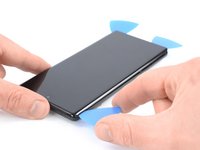
Insert an opening pick under the screen frame when the Anti-Clamp creates a large enough gap.
-
Skip the next two steps.
-
-
-
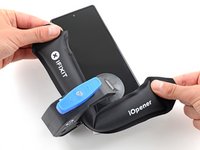
Apply a heated iOpener to the screen to loosen the adhesive underneath. Apply the iOpener for at least 3 minutes.
Do you think that removing the SIM card, also will be a wise step? I'm pretty sure that heating the SIM card is not a good idea.
The SIM is probably no more sensitive than the rest of the phone.
What does "be sure to have replacement adhesives for both the rear glass and the screen." I only had one it didn't mention another one?
I didn't have the replacement adhesive for rear glass nor the 2 sided tape they talk about when putting it back together. It's Sunday, so I don't expect an answer. I decided to go ahead and work up until that point
StlrFan -
-
-
-
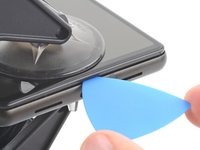
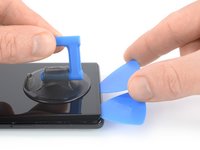
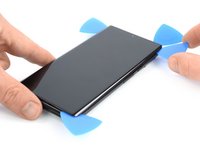
Once the screen is warm to the touch, apply a suction handle to the bottom edge of the screen.
-
Lift the screen including its safety frame with the suction handle to create a small gap between the screen and the phone assembly.
-
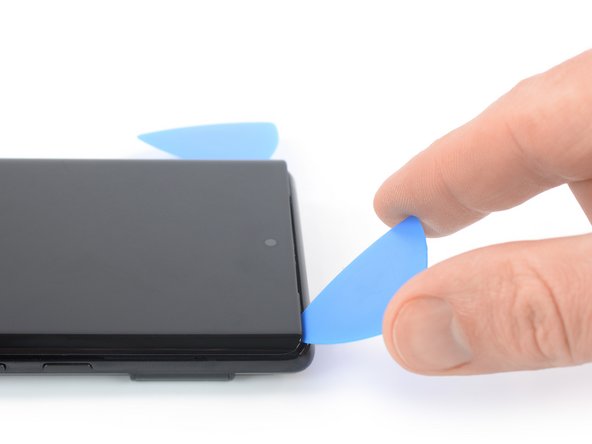
Insert an opening pick into the gap between the screen frame and the phone assembly.
-
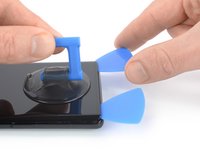
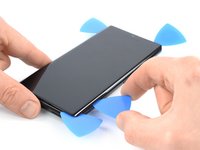
Slide the opening pick to the bottom left corner of the screen to slice its adhesive.
-
Leave the opening pick in place to prevent the adhesive from resealing.
-
-
-
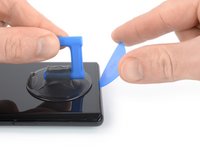
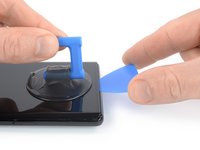
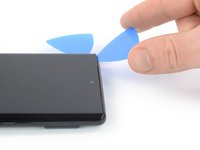
Insert a second opening pick at the bottom edge and slide it to the bottom right corner of the screen to slice the adhesive.
-
Leave the opening pick in place to prevent the adhesive from resealing.
-
-
-
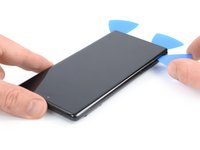
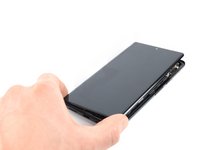
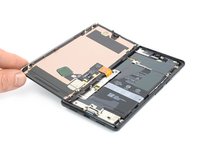
Carefully fold the screen to the left side of the phone assembly like you would open the front cover of a book.
I don't know if it's an earlier or later design, but I am combining 2 phones (1 crushed glass but operational into the casing of one that quit functioning but has good glass) and on both, the ribbon cable for the LCD is a tiny bit too short to fold out flat like this. If you are working on one like mine, extreme care must be taken while holding the LCD up while simultaneously trying to plug the cable back into that very small recessed socket. Almost like you need 3 hands or robot fingers...
I also felt that the cable was too short to fully open like a book, however it is possible that the hinge side of my screen was still pressed in to the adhesive and I did not properly open the screen or I was being overly cautious. Be careful on first approach either way.
-
-
-
Bu adımda kullanılan alet:Magnetic Project Mat$19.95
-
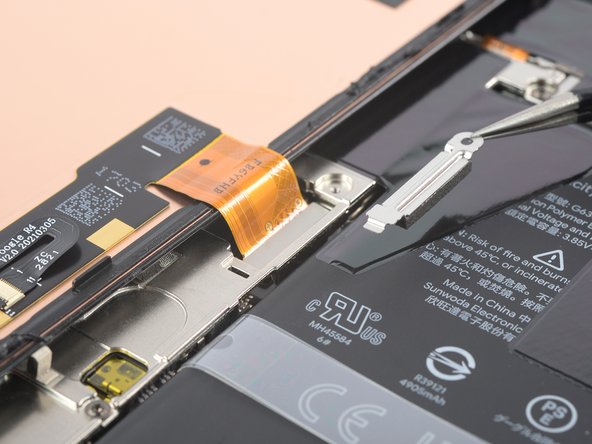
Use a Torx T3 screwdriver to remove the 2.0 mm-long 3IP Torx Plus screw securing the display cable metal bracket.
I don't know if it's an earlier or later design, but I am combining 2 phones (1 crushed glass but operational into the casing of one that quit functioning but has good glass), and on both, the metal holder plate shown here is simply spring connected and that 2mm screw is instead slightly off to the side as part of the aluminum bracket's screws.
Does anyone know the exact dimensions/specifications of this screw? I've misplaced mine and need to find a replacement.
Alternatively, what are the chances the display cable might come loose if I install the display bracket without screwing it in? I would expect there's not too much clearance between the bracket and the display, so it should still mostly hold in place once the display is installed.
I found this -> https://unlockr.ca/products/screw-set-co...
Richard -
-
-
Bu adımda kullanılan alet:Tweezers$4.99
-
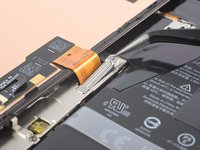
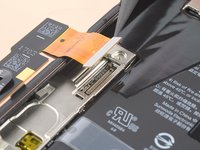
Use a pair of tweezers to remove the metal bracket sitting on top of the display cable connector.
-
-
-
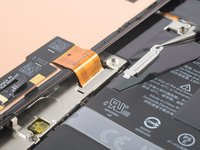
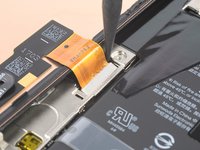
Use a spudger to disconnect the display flex cable by prying the connector straight up from its socket.
Reconnecting the display port cable was the longest part of my first repair. It helped when I carefully folded the ribbon connector at each end to get the most length out of it and bent it into the proper shape to hover just right over the small port. I lightly bent the cable back at the base and at the connector end.
This connector feels delicate, so it definitely made me take my time and be cautious. The snap is unmistakable, but be careful afterward as you're on a short leash again. I folded the new screen closed like a book and snapped it into place easily.
-
-
-
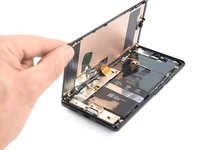
When handling your screen, grip it by its edges.
-
When placing the screen on your work area, make sure nothing is touching the bottom of the screen. Consider placing it on a soft, lint-free cloth.
-
-
-
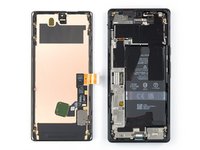
Remove the screen.
-
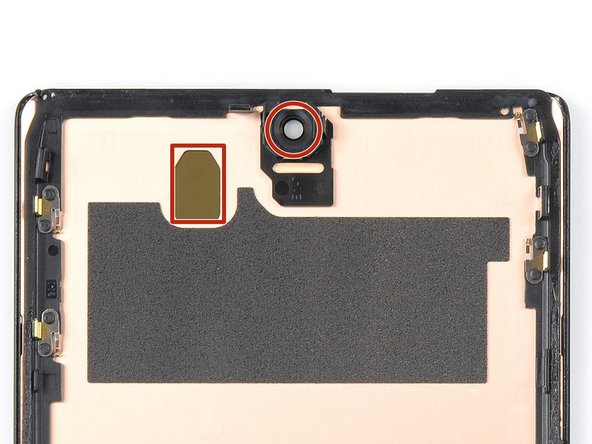
If you replaced the screen, check the screen's front-facing camera hole and sensor cutout for any protective liners. Remove these liners before you close the phone up.
-
This is a good point to test your phone before sealing it up. Temporarily connect your screen, power on your phone, and make sure it works as expected. Before continuing with reassembly, power off your phone and disconnect the screen.
-
Follow this guide if you're using custom-cut adhesives for your device.
-
Follow this guide in case you're using a pre-cut adhesive card.
-
If you're installing a new screen, follow this guide to calibrate the fingerprint sensor.
Before reassembly, clean around the edge of where the screen was, to remove any debris that may have been captured.
After reassembly, the fingerprint sensor appears to be a common issue with new screens:
* Go to https://pixelrepair.withgoogle.com/udfps on a computer.
* If using Windows, click the help link to install the USB software. After installing, restart the computer and return to https://pixelrepair.withgoogle.com/udfps.
* Follow the steps given to install the fingerprint calibration software.
* Restart the phone.
"Be sure to remove all adhesive liners from your replacement screen. Check the selfie camera recess and make sure you've removed the liner there."
A photo with blue highlight square would've been helpful here...also it's very easy to miss this instruction as you'd be on the adhesive page...
I did take the selfie camera liner this is a bad problem
This is very true. I only realized after turning on my phone the next day that the film blocking the front camera is still there. I had to re-open the screen to remove that black film, which was not obvious at all. I only opened the upper half to remove the film, hopefully the adhesive is not compromised too much...
All went well except for the adhesive. It was simply too small so when Iaid it down it was fine on one side as well as the top and bottom, but the other side required me to pull it over. As it is quite sticky, it bunched up. I cut out part of it and used my own double-sided tape to secure part of it. Otherwise, it was great. Thanks to those who made special note of the cover on the selfie camera window, and the procedure to set up the new fingerprint scanner.
They do not highlight the part that needs to be removed from the new screen, this should be added as the part looks and feels like it is a part of the new screen and removing it could break the new screen. So make sure you remove the selfie screen camera cover even if it looks and feels like there is not one there, it's there.
I ordered Google Pixel 6 pro- fix kit in IFIXIT. I followed the steps mentioned in the repair guide. During repair the finger print symbol is blinking in the screen. I thought it would get set when i do re calibration as mentioned in repair guide but it did not worked. It displays " Can´t use finger print sensor Visit a repair provider or g.co/pixel/fingerprintunlock". Does anyone have same problem??
You have to go to that link and you can re calibrate the new finger print scanner by logging into your account and approving it.
New Finger Print Reader
Boot into fast boot and connect your pixel to your pc
On your PC go to pixelrepair.withgoogle.com/udfps
Follow the PromptsReplacement process went smoothly. I reattached the screen after seating the connector. No sign its working. Just black blank screen. However text and notification sounds still coming through. Even receiving calls. etc on que. I know the phone works, just not the screen.
I figure maybe I didnt seat the connector all the way so I break the adhesive liner (figuring I'll buy another and apply again) and this time I clip in the connector for sure. Still nothing on the screen.
What can I do? Is the screen defective?
If phone is working should I see the display after the connector is seated but the phone still open? Or does the screen need to be seated all the way in the case to turn on? The screen does not display anything in either state by the way...
As an aside, your instructions are so detailed until the point where the screen needs to connect and seat. It would helpful to get more pointers for this final step...It's so frustrating that paper instructions are not included considering I'm about to pull the screen off my phone. It's also very frustrating that I have to load and read multiple sub instructions in the middle of the main instructions, just include all instructions in one booklet and include the booklet in the kit.
-
-
-
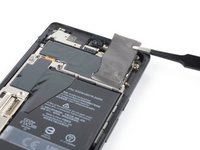
Apply a heated iOpener or a heat gun to the rear glass to loosen the adhesive underneath the graphite films on top of the battery. Apply the iOpener for at least two minutes.
This seems contradictory: the step basically says to heat the graphite film through the battery (from below) instead of heating the graphite film itself, and then says "don't heat the battery directly". Sounds like a thermometer test is needed.
-
-
Bu adımda kullanılan alet:Tweezers$4.99
-
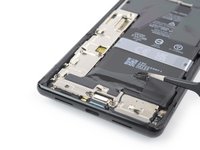
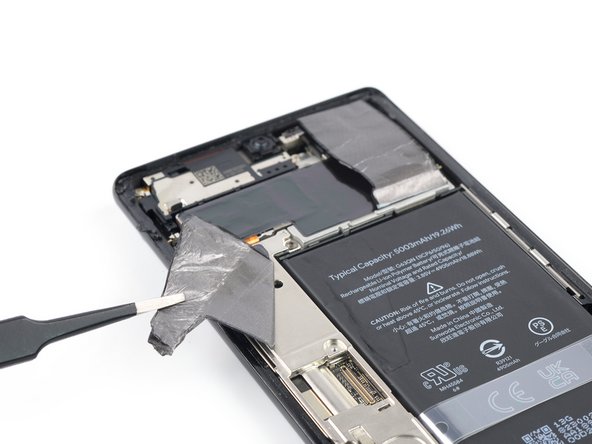
Use a pair of blunt nose tweezers or a clean fingernail to carefully peel the black graphite film off the bottom edge of the battery and the motherboard shield.
-
Remove the graphite film.
The film delaminates easily, so be careful.
If you are using an iFixit replacement battery, it comes with replacement graphite film for the bottom and left.
so do you need this film?? if it is damaged, can you use some sort of tape, or does it have to be this graphite film?
-
-
-
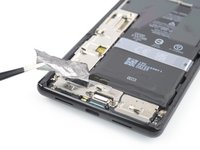
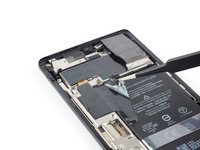
Use a pair of blunt nose tweezers or a clean fingernail to carefully peel the black graphite film off the top right corner of the battery.
-
Fold the graphite film in direction of the selfie camera to get free access to the battery.
バッテリーとカメラユニットの間に隙間があります。そこからピンセットを差し込んでグラファイトフィルムを剥がすのが最も安全ですね。
It should be highlighted that this graphite film does not have a replacement and so should only be peeled back. I know it says peel vs. remove in the title, but going through people (myself as an example) might not read the title portion.
-
-
-
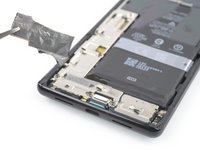
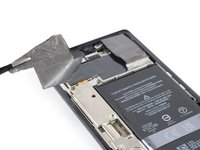
Use a pair of blunt nose tweezers or a clean fingernail to carefully peel the black graphite film off the left edge of the battery and the motherboard shield.
-
-
-
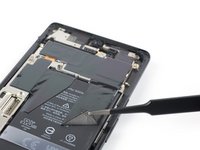
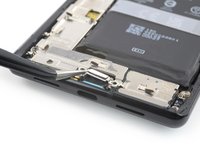
Use a Torx T3 screwdriver to remove the two 5.1 mm-long 3IP Torx Plus screws securing the charging port metal bracket.
-
-
-
Use a pair of tweezers to remove the charging port bracket.
-
-
-
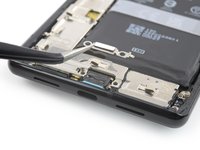
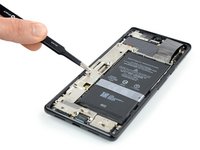
Use a Torx T3 screwdriver to remove the five 5.1 mm-long 3IP Torx Plus screws securing the motherboard cover.
-
-
-
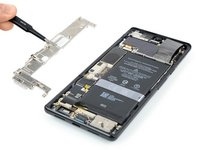
Use a pair of tweezers or your fingers to carefully remove the motherboard cover.
-
-
-
Use a spudger to disconnect the battery cable by prying the connector straight up from its socket.
On some models, there is another cable, which crosses the battery (which accounts for the odd diagonal shape of the upper-left graphite film), which also needs to be removed.
-
-
-
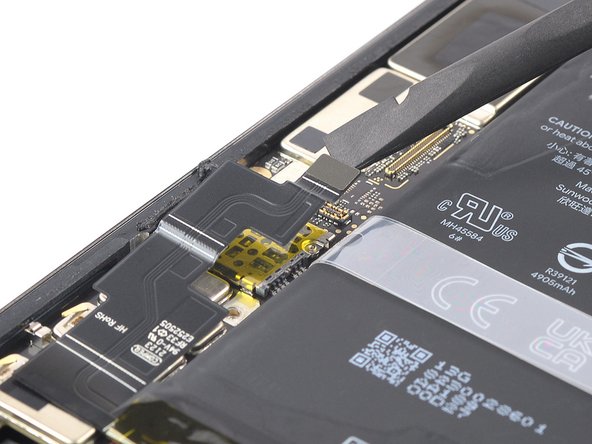
Use a Torx T3 screwdriver to remove the two 5.1 mm-long 3IP Torx Plus screws securing the camera connector cover.
-
-
Bu adımda kullanılan alet:Tweezers$4.99
-
Use a pair of tweezers to remove the camera connector cover.
-
-
-
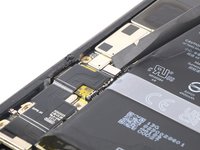
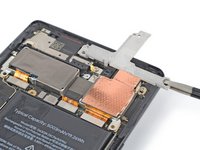
Use a Torx T3 screwdriver to remove the single 3.3 mm-long 3IP Torx Plus screw securing the camera assembly.
-
-
-
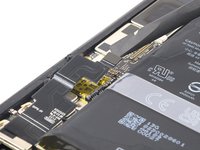
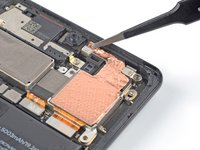
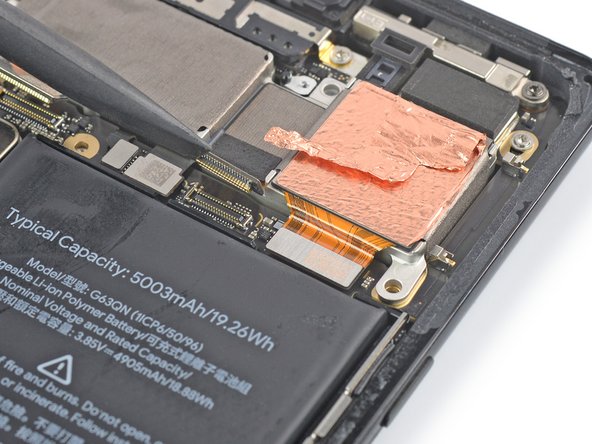
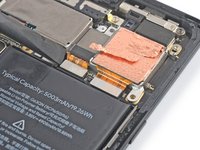
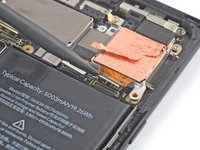
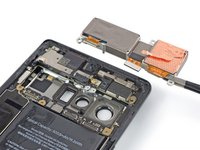
Use a pair of tweezer to carefully peel the top half of the copper foil off the metal spacer and fold it back.
-
-
-
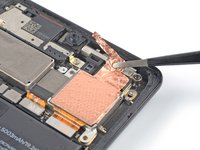
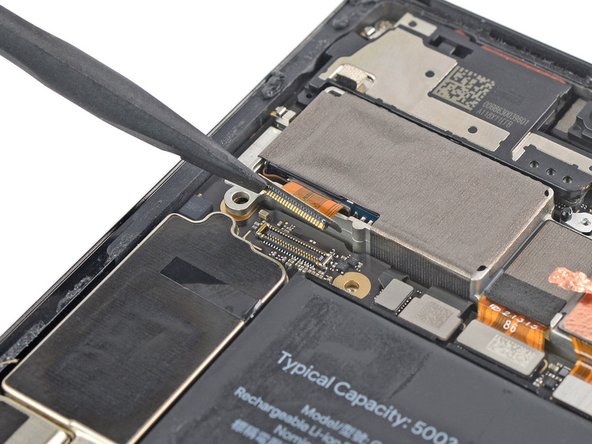
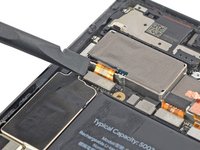
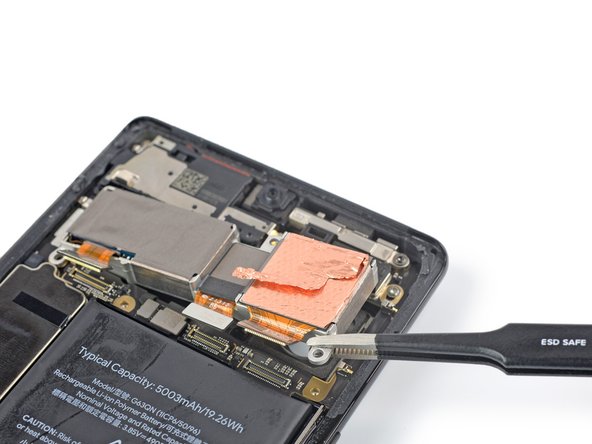
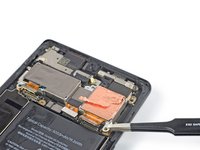
Use a spudger to disconnect the telephoto cable by prying the connector straight up from its socket.
-
-
-
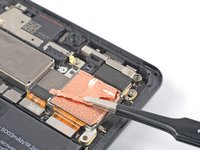
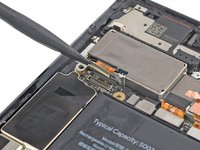
Use a spudger to disconnect the cables of the wide and ultrawide cameras by prying their connectors straight up from their sockets.
-
-
-
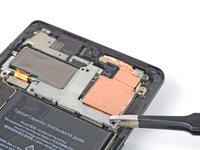
Use a pair of tweezers or your fingers to carefully lift the camera assembly out of its recess and remove it.
My back glass is broken - does this repair kit include the a replacement for the back glass cover?
Hi Adam,
the kit doesn't include a new rear glass cover but only the camera and the tools and adhesive needed for reassembly.do you need to re-apply that graphite film? What about the copper tape?
Also, new cameras do not come with the copper foil. What is done in this instance?
Yet another connundrum... Multiple outlets online say a new camera WILL NOT work without calibration software.
https://www.phonearena.com/news/google-p...
https://repair.wiki/w/Google_Pixel_6_Pro
Can someone who has done a replacement confirm if this is true or not? I don't want to buy an expensive new camera for it to not work.
-


If possible, turn on your device and test your repair before installing new adhesive and resealing.
To reassemble your device, follow these instructions in reverse order. During reassembly apply new adhesive where necessary after cleaning the relevant areas with isopropyl alcohol (>90%).
To run a diagnostics test with the built-in Pixel Diagnostic tool, click here.
Take your e-waste to an R2 or e-Stewards certified recycler.
Repair didn’t go as planned? Try some basic troubleshooting, or ask our Answers community for help.
İptal et: Bu kılavuzu tamamlamadım.
4 farklı kişi bu kılavuzu tamamladı.


8Kılavuz Yorumları
I just read that the camera has to be "paired" with the motherboard using software. It may work after a replacement and not calibrating, but will not render as-good of pictures. This came from a leaked repair manual from google. What do you say of this? Also, do you need to re-use the graphite and copper tape? https://repair.wiki/w/Google_Pixel_6_Pro...
it's actually says that swapping a camera between production models can cause issues because they are somehow paired to the mainboard but the GEO replacement ones exist specifically to get around this problem but it would seem what they have done is made it so you can't get a broken pixel 6pro take its good working camera and fix another pixel 6 pro with it because of the pairing issue from factory it's a massive d!ck move forces you to buy new camera if you want to replace a logic bord or camera instead of say using a broken phone for parts
UPDATE:
I just replaced the camera and it will not work. I get an error message, and asks to force close or continue anyway. If you continue, it just crashes. As to the gold foil, I was able to peel it off another broken camera and re-use it. Why is Ifixit selling these parts if you CANNOT use them unless you are Assurion or UbreakIfix(the only authorized centers) who have their own supply of official parts straight from Google????? This is very deceptive and disingenuous from Ifixit.
thanks for the warning @michaelcarton
good guide fairly simple hardest part really is getting the screen off/on its in my phone and works like new
the box it came in look like it got elbow dropped from the top rope was so flat I thought it was a brown envelope at fist no joke but be f*%ked it somehow survived the classic Aus post treatment and is working fine
I just replaced the camera in my Pixel 6 Pro with a camera from another company because iFixit was out of stock. The camera replacement went well and the camera works great. The hardest part is removing the graphite film. I'm very pleased with how it turned out. The camera works great and I didn't use any camera tuning to the motherboard software as mentioned above.
I replaced my rear camera on my launch day Pixel 6 pro. I had scratched the primary lense after cracking the rear glass.
With the replacement module, the telephoto lense would not focus on distant object, but it would focus on near objects.
I tried clearing the camera cache and a device reset
I thought it might have been the rear glass, but the issue persisted after trying 3 different rear glass covers, and also without the glass in place.
I bought a cheaper camera module from aliexpress and it has the same behavior. Whilst I had the phone open, I tried the original module, and the telephoto worked okay. I decided to take a risk and I've frankenstined the telephoto camera from that original came from the phone into the ifixit camera module with the working primary camera, and everything now works.
TLDR/point of this comment, I don't think all versions are compatible with all phones. This is very disappointing considering how expensive the camera module is.
Please, how can I turn it off when screen is broken?
Thubbe - Yanıt